Brayered Sky

by Michelle Zindorf

Create stunning backgrounds with your brayer.

Supplies
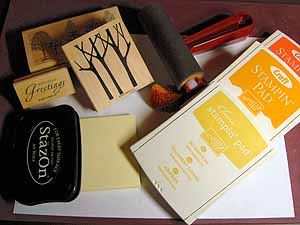
  • Whisper White Cardstock

  • Post-It™ Notes

  • Rubber Brayer

  • Sponge

  • Several Coordinating Dye Inks (here So Saffron, More Mustard and Really Rust)

  • Black Ink

  • Stamps

  • White Gel Pen

  • Additional Card Stock for layering (here Whisper White, Basic Black & Going Gray)

Step-by-Step

  1. Step 1

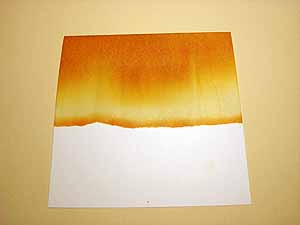
    Tear Post-It™ Notes and adhere to white cardstock to mask the snow area.

  2. Step 2

    Ink brayer with the lightest color of dye ink by rolling it across the ink pad. Using a back and forth motion, roll inked brayer across the sky area of the masked cardstock until all of the ink is off the roller. Roll some more to blend it further.
  3. Step 3

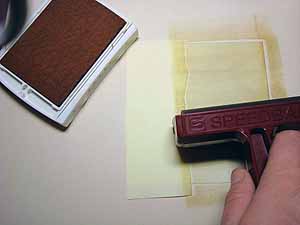
    Repeat previous step using the second lightest color of dye ink (here More Mustard) and covering only part of the previously inked (So Saffron) area.
  4. Step 4

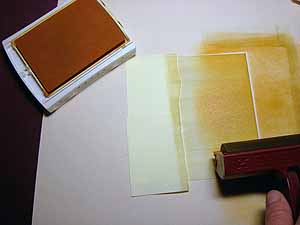
    Repeat previous step with the darkest color dye ink (here Really Rust) and covering only part of the previously inked (More Mustard) area.
  5. Step 5

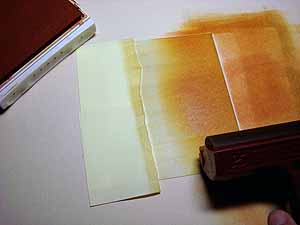
    Sponge along the Post-It™ Note horizon line with the darkest colored dye ink (Really Rust).
  6. Step 6

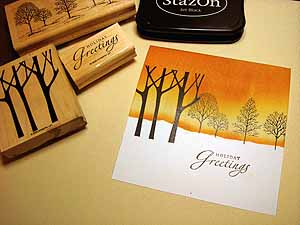
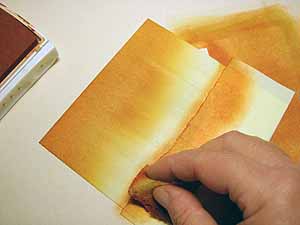
    Remove Post-It™ Notes.

  7. Step 7

    Stamp images with Black ink.

  8. Step 8

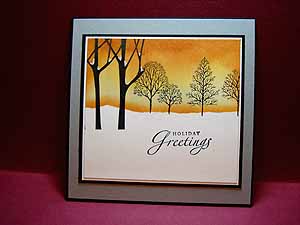
    Crop image if needed, then sponge the darkest color ink along the top and sides of sky area.
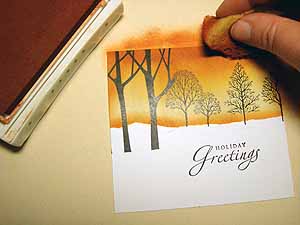
  9. Step 10

    Finish card.

Variations

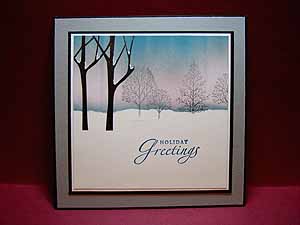
  1. Try different color combinations:
    Colors used for sky, Pretty In Pink, Going Gray & Not Quite Navy
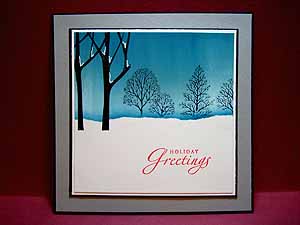
  2. Colors used for sky, Soft Sky, Blue Bayou & Not Quite Navy
Your Turn

You've seen the tutorial, now you try it! We've got a section of the gallery set aside for Brayered Sky. Try this technique, then upload your artwork to the gallery. Show us your creations!

***Please note - Internet Explorer/Edge is not a supported browser, and will not allow you to see the videos. Please use Chrome, Firefox or Safari to view our tutorial videos.

Questions and Comments

We'd love to get your feedback or questions. Leave your comment below.

This looks incredible! Thank you so much for sharing this technique. I want to try to make a beach. If it works I'll post it. grin
Michelle  |  Mon Jan 14, 2008 at 8:35 AM
This is absolutely beautiful. I am so happy to have come across this Technique. Thanks so much.
Stacey  |  Thu Jan 17, 2008 at 4:19 PM
AWESOME! Now I have another use for my brayer! Thanks! It's just beautiful and I can't wait to try it!
Kari  |  Tue Jan 22, 2008 at 8:00 PM
Thank you for this tutorial. Your work is stunning!
Athena  |  Wed Feb 6, 2008 at 10:30 PM
Gorgeous cards with your technique. I found this just in time as I have a new customer wanting to learn more techniques using the brayer. So many ways to use this technique. Thanks.
Victoria n Cincinnati  |  Mon Feb 25, 2008 at 3:25 PM
Simply gorgeous cards! What a great technique for such beautiful sky and sunsets!
Sharon  |  Thu Mar 27, 2008 at 2:19 PM
This is it! I have finally found my 2008 Christmas card!
Carol  |  Tue Jun 10, 2008 at 5:34 PM
I know this tutorial is so thorough but I still can't seem to get mine looking great. Any tips, am I missing something?
Beth  |  Sun Sep 7, 2008 at 12:13 PM
At last I found a tutorial to show me how to do those marvelous things.

I now need to find where to buy the accessories.

Thanks for sharing
fabienne  |  Thu Sep 11, 2008 at 1:00 AM
I also love your brayer tutorial and would like to know who makes the stamp for the bare trees in the foreground. Thank!
Joy  |  Fri Sep 12, 2008 at 11:35 AM
Michelle I was loking for cards using my brayerand found yours. Beautiful! I'm going to try them. I have'nt done muchbrayer work in the past. I am also A S U Demonstrator, but am still new at it. I'm hoping to use this in one of my workshops. Thanks much ! Bernice
Bernice O  |  Thu Sep 18, 2008 at 4:47 PM
I love this idea and I really want it to work for me but I can't seem to figure it out. I keep getting lines from the brayer that won't smooth out like yours. Any tips to help?
Thanks!!!
Dawn  |  Fri Sep 19, 2008 at 4:46 AM
Love this technique! Thank you for sharing it with us.
Sherry Henifin  |  Mon Dec 1, 2008 at 6:01 AM
I have some sunset pictures that would scrapbook beautifully with this as the background. Thanks.
Emilie Boyd  |  Sun Dec 28, 2008 at 10:49 AM
I just saw your cards and was blown away. I have the background tree stamp but can't seem to find the tree in the foreground in the Stampin UP catalogues I have.....can you tell me where you got it...I think it really makes the card. Thanks for sharing your great idea
Barbara Payne  |  Thu Jan 22, 2009 at 9:58 PM
I absolutely love your card. I have looked in Stampin Up Catalogues for the foreground stamp. Could you tell me where to find it. I think it is what makes the design work. Appreciate your detailed instructions and info on color choices. Many thanks
Barb Payne  |  Fri Jan 23, 2009 at 9:09 AM
Where did you get the three dead looking trees?I have looked everywhere.
Diana  |  Sat Jan 24, 2009 at 11:37 AM
Michelle, just found your blog the other day. Love your work!! I'm really glad I found this tutorial too because it explained things a little more. Thank you so much for sharing such an awesome technique!
Lavonne (tweetygirl)  |  Mon Feb 2, 2009 at 4:24 PM
I just love your work, oh my goodness, you are so amazing. I learned a few things, thank you. Adella
Adella Ortiz  |  Mon Feb 2, 2009 at 8:10 PM
BEAUTIFUL CARD USING AN OLD STAMP SET. THANKS
marcia  |  Sat Feb 7, 2009 at 11:51 AM

Page 5 of 7 pages « First  <  3 4 5 6 7 >

You need to be logged in to comment

GET OUR NEWSLETTER


Splitcoaststampers's privacy policy