Brayered Sky

by Michelle Zindorf

Create stunning backgrounds with your brayer.

Supplies
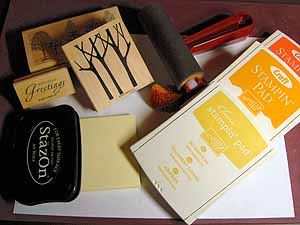
  • Whisper White Cardstock

  • Post-It™ Notes

  • Rubber Brayer

  • Sponge

  • Several Coordinating Dye Inks (here So Saffron, More Mustard and Really Rust)

  • Black Ink

  • Stamps

  • White Gel Pen

  • Additional Card Stock for layering (here Whisper White, Basic Black & Going Gray)

Step-by-Step

  1. Step 1

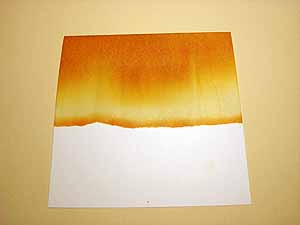
    Tear Post-It™ Notes and adhere to white cardstock to mask the snow area.

  2. Step 2

    Ink brayer with the lightest color of dye ink by rolling it across the ink pad. Using a back and forth motion, roll inked brayer across the sky area of the masked cardstock until all of the ink is off the roller. Roll some more to blend it further.
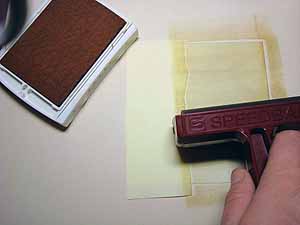
  3. Step 3

    Repeat previous step using the second lightest color of dye ink (here More Mustard) and covering only part of the previously inked (So Saffron) area.
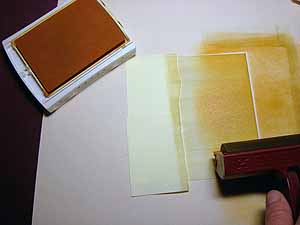
  4. Step 4

    Repeat previous step with the darkest color dye ink (here Really Rust) and covering only part of the previously inked (More Mustard) area.
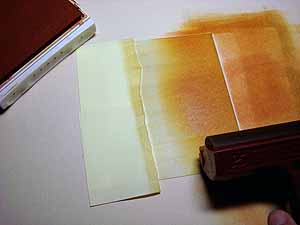
  5. Step 5

    Sponge along the Post-It™ Note horizon line with the darkest colored dye ink (Really Rust).
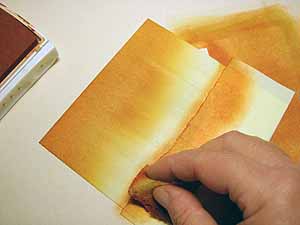
  6. Step 6

    Remove Post-It™ Notes.

  7. Step 7

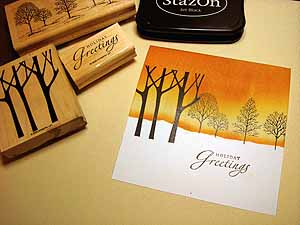
    Stamp images with Black ink.

  8. Step 8

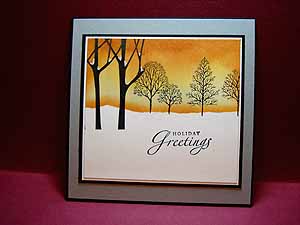
    Crop image if needed, then sponge the darkest color ink along the top and sides of sky area.
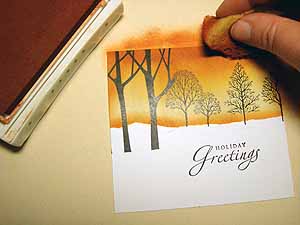
  9. Step 10

    Finish card.

Variations

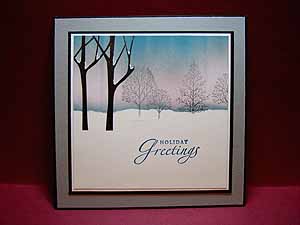
  1. Try different color combinations:
    Colors used for sky, Pretty In Pink, Going Gray & Not Quite Navy
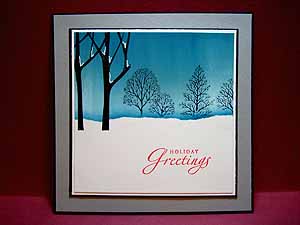
  2. Colors used for sky, Soft Sky, Blue Bayou & Not Quite Navy
Your Turn

You've seen the tutorial, now you try it! We've got a section of the gallery set aside for Brayered Sky. Try this technique, then upload your artwork to the gallery. Show us your creations!

***Please note - Internet Explorer/Edge is not a supported browser, and will not allow you to see the videos. Please use Chrome, Firefox or Safari to view our tutorial videos.

Questions and Comments

We'd love to get your feedback or questions. Leave your comment below.

Wow, my very own Zindorf tutorial!!! I'm a devoted fan of yours and feel so blessed that you shared some deets with us!!! Thank you. I hope to try this technique soon!
Christine M.  |  Mon Dec 24, 2007 at 12:25 AM
I absolutely love this technique and my daughter and I have used it many times using your beautiful art cards for inspiration.

Merry Christmas!!!
Deborah B  |  Tue Dec 25, 2007 at 11:41 PM
Beautiful! How creative. I am glad to learn a new technique with the brayer. I don't use mine nearly enough!
Suzanne  |  Wed Dec 26, 2007 at 12:23 PM
Perfectly amazing!! Michelle, thank you so much for creating this tutorial and sharing your talent with us.
Susan (rainy)  |  Thu Dec 27, 2007 at 12:22 PM
Awesome technique. I love learning new and useful ways to use the brayer!
TrishG  |  Fri Dec 28, 2007 at 9:33 AM
I have always wondered how you achieved such a layered look. Thank you for sharing your secrets & skills.
Marnie  |  Fri Dec 28, 2007 at 7:47 PM
WOW is all I can say......I can't wait to try this beautiful technique and if it works I will be doing it for a class. Love it, Thanks
Mary Lou Kemp  |  Sat Dec 29, 2007 at 7:06 AM
I have a brayer but never used it, will definately give it a try now, super gallery and thanks for the tutorial
Pat
pat  |  Sat Dec 29, 2007 at 10:57 AM
I was surfing to look for new techniques to teach my advanced stampers. Thanks so much for sharing! The girls will love it.
Tina W.  |  Mon Dec 31, 2007 at 9:06 PM
Absolutely STUNNING! Thank you so much for this tutorial - I can't wait to try it on a large scale on the canvases that I just bought!
btalem  |  Tue Jan 1, 2008 at 4:28 PM
Wow. That is such a gorgeous technique. Thanks for sharing. I look forward to trying it out.
Jennifer  |  Tue Jan 1, 2008 at 5:02 PM
Your card makes me think of winter skies, variable in shade, breathtaking against the snow. I made a few Christmas cards layering colors on my brayer. This is both easier, in a way, and more flexible. Time to try it!
Cathleen  |  Sat Jan 5, 2008 at 12:41 PM
Michelle, your cards are amazing. I have tried over and over to create your background, but can't get it to smooth out on the whisper white card stock. Did you use the glossy card stock? I'm going to give that a try next. Your cards are stunning!
Janice Trumbauer  |  Sun Jan 6, 2008 at 2:41 PM
Absoutly Beautiful! Thanks for sharing.. I will have to give it a try.
Brooke S  |  Sun Jan 6, 2008 at 5:54 PM
Your tutorial is fantastic, and your cards breathtaking. Thank you so much for sharing your skills and giving us all such inspiration.
Tilly  |  Tue Jan 8, 2008 at 1:18 PM
Thanks for sharing. I have tried so many times to brayer a background only to be dissapointed with the results. Maybe know I can get it right, thanks to you.
Evelynn S.
evelynn  |  Tue Jan 8, 2008 at 2:06 PM
Your one talented chick!! These are super "D" duper stunning!
Lainy  |  Tue Jan 8, 2008 at 5:13 PM
Thank you so much for sharing. This is gorgeous! I'm a new Stampin' UP! demonstrator, and so much wanting to learn new ideas.
Bobbie  |  Wed Jan 9, 2008 at 6:08 PM
Gorgeous...I love stuff like this. Another technique for my customers.
Jennifer  |  Wed Jan 9, 2008 at 10:10 PM
I love your brayerd sky tutorial. I tried with water colors once and the water ate through the cheap card stock (Not SU). I wondered if you would share the name of the maker of the "two silhouette trees" used in your tutorial. I have the Lovely As A Tree set but the other is not familiar to me. Any help would be much appreciated. Thanks
Martha Gunckel  |  Sat Jan 12, 2008 at 6:57 AM

Page 4 of 7 pages « First  <  2 3 4 5 6 >  Last »

You need to be logged in to comment

GET OUR NEWSLETTER


Splitcoaststampers's privacy policy