Brayered Sky

by Michelle Zindorf

Create stunning backgrounds with your brayer.

Supplies
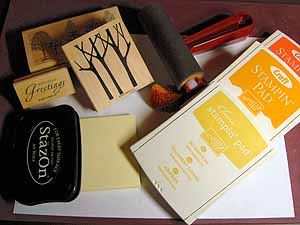
  • Whisper White Cardstock

  • Post-It™ Notes

  • Rubber Brayer

  • Sponge

  • Several Coordinating Dye Inks (here So Saffron, More Mustard and Really Rust)

  • Black Ink

  • Stamps

  • White Gel Pen

  • Additional Card Stock for layering (here Whisper White, Basic Black & Going Gray)

Step-by-Step

  1. Step 1

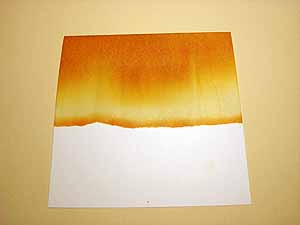
    Tear Post-It™ Notes and adhere to white cardstock to mask the snow area.

  2. Step 2

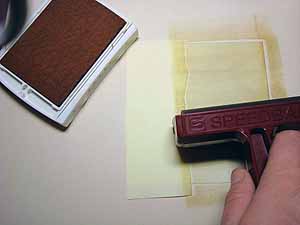
    Ink brayer with the lightest color of dye ink by rolling it across the ink pad. Using a back and forth motion, roll inked brayer across the sky area of the masked cardstock until all of the ink is off the roller. Roll some more to blend it further.
  3. Step 3

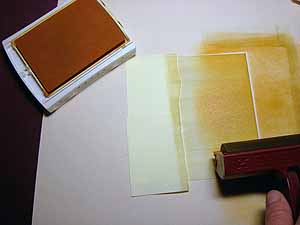
    Repeat previous step using the second lightest color of dye ink (here More Mustard) and covering only part of the previously inked (So Saffron) area.
  4. Step 4

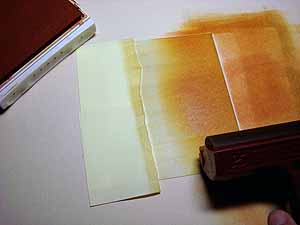
    Repeat previous step with the darkest color dye ink (here Really Rust) and covering only part of the previously inked (More Mustard) area.
  5. Step 5

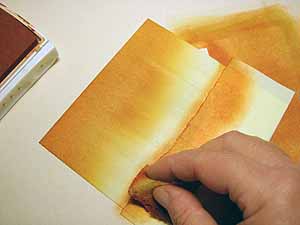
    Sponge along the Post-It™ Note horizon line with the darkest colored dye ink (Really Rust).
  6. Step 6

    Remove Post-It™ Notes.

  7. Step 7

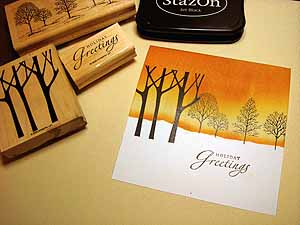
    Stamp images with Black ink.

  8. Step 8

    Crop image if needed, then sponge the darkest color ink along the top and sides of sky area.
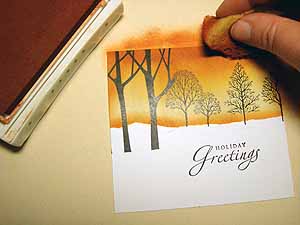
  9. Step 10

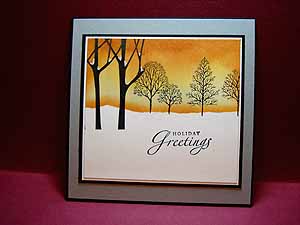
    Finish card.

Variations

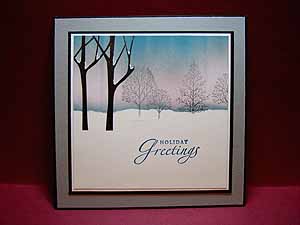
  1. Try different color combinations:
    Colors used for sky, Pretty In Pink, Going Gray & Not Quite Navy
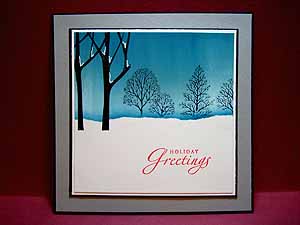
  2. Colors used for sky, Soft Sky, Blue Bayou & Not Quite Navy
Your Turn

You've seen the tutorial, now you try it! We've got a section of the gallery set aside for Brayered Sky. Try this technique, then upload your artwork to the gallery. Show us your creations!

***Please note - Internet Explorer/Edge is not a supported browser, and will not allow you to see the videos. Please use Chrome, Firefox or Safari to view our tutorial videos.

Questions and Comments

We'd love to get your feedback or questions. Leave your comment below.

Thank you so much for some great tips on my favorite stamp set. I can't wait to go home and make some of these myself.
Shelley
Shelley Esposito  |  Wed Apr 22, 2009 at 5:47 AM
WOW beautiful, I like it very much.

Thanks !
Dinhalee (Francine L.)  |  Wed Apr 22, 2009 at 10:45 AM
This card is so very peaceful! I will be making this for the holidays.
Cat  |  Thu Apr 23, 2009 at 8:27 PM
Love the brayered look but I can't seem to get it right. Mine always looks like it's got lines in it (almost like a crease) - how do you avoid getting that? Doesn't matter what colors or paper....I still get it. Thanks!

Sherry
Sherry W  |  Wed Apr 29, 2009 at 8:43 AM
I found the same problem till I used glossy white instead of whisper whie. Good luck.
Beth  |  Wed Apr 29, 2009 at 8:52 AM
Superbe !
Merci de ce partage.
nicole  |  Sat May 2, 2009 at 7:17 PM
I'm looking for a process where a breyer is used to paint onto glossy cardstock and then stamping is done, or maybe it is done in reverse.I know I saw it somewhere but can't seem to locate it again.Any help would be great.Thank you. Angela
angela  |  Fri Sep 11, 2009 at 6:45 PM
I just found this site and must say you have some amazing stuff here. This one just blows my mind. I can�t wait to get started with this years christmas cards.

Thank you!!
Ulrika  |  Sat Sep 26, 2009 at 8:57 AM
Love,Love, this! Beautiful work. Thanks Angela
angela  |  Sun Sep 27, 2009 at 1:37 PM
This technique is beautiful. I have tried it and it doesn't turn out the same. I end up with a solid line of each color and not a smooth transition between colors. What am I doing wrong? I would really like to make a card with this type sky, but it just doesn't look the same. Please advise what I may be doing wrong. Thanks a bunch.
Sharyl S  |  Wed Oct 21, 2009 at 9:25 PM
Sharyl, try using the Glossy White cardstock - the ink doesn't dry as fast and you have time to "blend" it in better. The Glossy worked for me, and Stampin' Up's is the BEST!!!
Sue  |  Wed Oct 21, 2009 at 9:30 PM
I did this in a class and made a lovely card. Havn't been able to duplicate it yet.
Emilie Boyd  |  Thu Oct 22, 2009 at 6:34 AM
Sue...thanks for the tip. I'll give that a try as I really want to make some cards with my brayer. I'll let you know how it goes.
Sharyl S.  |  Thu Oct 22, 2009 at 7:49 PM
Came across this totally by accident! Am I ever glad I did!!! Thank you for showing the way!
Vivienne  |  Wed Nov 18, 2009 at 11:46 AM
michelle ,tryed so hard to get that last seat in nashville indiana with you .Rats .but your an amazing artist ,and im trying, just havent mastered it maybe pressing to hard .i dont know . love love love your tutorials . maybe i ll join you in the future .hopeful. anne marie
anne marie  |  Wed Nov 18, 2009 at 12:24 PM
I used the glossy white paper and it worked beautifully. What I found is that you must keep rolling over the area until it blends. Over lap the area where the lines are and blend them in. Just keep rolling until you get the look you like. Also, it looks better when it dries. Made 2 cards which turned out really nice. Thanks for the tip, Sue.
Sharyl S  |  Wed Nov 18, 2009 at 12:38 PM
It can be done on Whisper White cardstock - I've seen it work! But you have to use a lot of ink, and move down the page very slowly. See Michelle's FAQs for more: http://zindorf.blogs.splitcoaststampers.com/frequently-asked-questions/
Charly  |  Wed Nov 18, 2009 at 3:58 PM
Glad it worked for you , Sharyl! Keep up the good work - maybe you will be our next expert!! Why don't you post your cards???
Sue  |  Wed Nov 18, 2009 at 9:34 PM
Michelle, Since taking your workshop on January 16 th I don't want to put my brayer down! It is truly my best friend. I need to get computer savvy so I can send you some pictures. I am having fun and learning alot. Your tutorials are so great. Have you ever considered putting it in book form? I would buy it in a heartbeat!
Pam Atkinson  |  Fri Jan 29, 2010 at 7:40 AM
I love this technique and need much more experience with it. Have the new inkpad need to get organized and try it.
Emilie Boyd  |  Fri Jan 29, 2010 at 8:12 AM

Page 6 of 7 pages « First  <  4 5 6 7 >

You need to be logged in to comment

GET OUR NEWSLETTER


Splitcoaststampers's privacy policy