Brayered Sky

by Michelle Zindorf

Create stunning backgrounds with your brayer.

Supplies
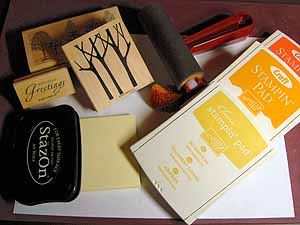
  • Whisper White Cardstock

  • Post-It™ Notes

  • Rubber Brayer

  • Sponge

  • Several Coordinating Dye Inks (here So Saffron, More Mustard and Really Rust)

  • Black Ink

  • Stamps

  • White Gel Pen

  • Additional Card Stock for layering (here Whisper White, Basic Black & Going Gray)

Step-by-Step

  1. Step 1

    Tear Post-It™ Notes and adhere to white cardstock to mask the snow area.

  2. Step 2

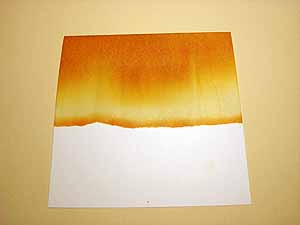
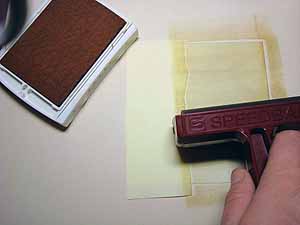
    Ink brayer with the lightest color of dye ink by rolling it across the ink pad. Using a back and forth motion, roll inked brayer across the sky area of the masked cardstock until all of the ink is off the roller. Roll some more to blend it further.
  3. Step 3

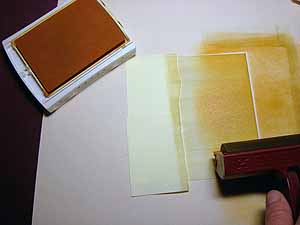
    Repeat previous step using the second lightest color of dye ink (here More Mustard) and covering only part of the previously inked (So Saffron) area.
  4. Step 4

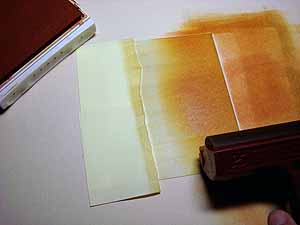
    Repeat previous step with the darkest color dye ink (here Really Rust) and covering only part of the previously inked (More Mustard) area.
  5. Step 5

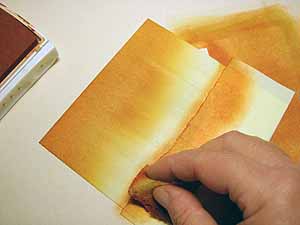
    Sponge along the Post-It™ Note horizon line with the darkest colored dye ink (Really Rust).
  6. Step 6

    Remove Post-It™ Notes.

  7. Step 7

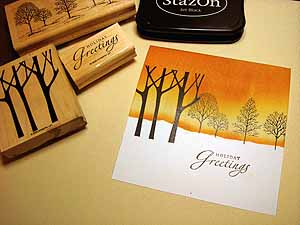
    Stamp images with Black ink.

  8. Step 8

    Crop image if needed, then sponge the darkest color ink along the top and sides of sky area.
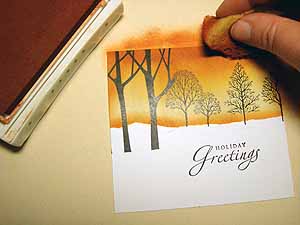
  9. Step 10

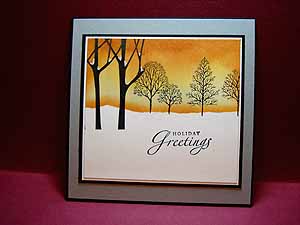
    Finish card.

Variations

  1. Try different color combinations:
    Colors used for sky, Pretty In Pink, Going Gray & Not Quite Navy
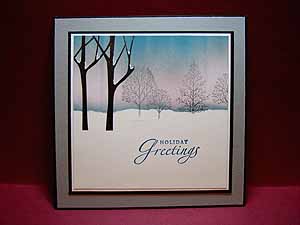
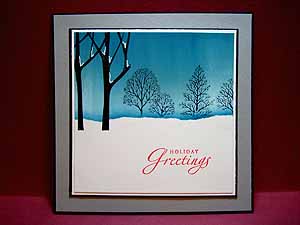
  2. Colors used for sky, Soft Sky, Blue Bayou & Not Quite Navy
Your Turn

You've seen the tutorial, now you try it! We've got a section of the gallery set aside for Brayered Sky. Try this technique, then upload your artwork to the gallery. Show us your creations!

***Please note - Internet Explorer/Edge is not a supported browser, and will not allow you to see the videos. Please use Chrome, Firefox or Safari to view our tutorial videos.

Questions and Comments

We'd love to get your feedback or questions. Leave your comment below.

Gorgeous and breathtaking
Jeanette  |  Wed Dec 19, 2007 at 4:35 PM
Oh, I am so glad you shared your method of brayering. I have always been a huge fan of your work!
sophia landry  |  Wed Dec 19, 2007 at 5:05 PM
Hey, thanks a bunch! I have the stamp set, and now I have the know how. Looks like it would be pretty quick too. Happy Holidays!
Ginny  |  Wed Dec 19, 2007 at 6:22 PM
Yippeeee skippeee cannot wait to try this! thanks michelle for sharing your talent!!!
Carolyn King  |  Wed Dec 19, 2007 at 7:21 PM
You have made this technique look so easy! I can never this result. ... I must try again!!
Cynthia  |  Wed Dec 19, 2007 at 7:28 PM
Fantastic directions - you make it look so easy - the outcome is manificent! Simply beautiful and how nice of you to take the time to share your technique with us. A million thanks!
LindaB  |  Wed Dec 19, 2007 at 11:24 PM
WOW WE!!! that iz a very pretty card thanxs for sharing how to do this i can hardly wait to try this
Merri Bergerson  |  Thu Dec 20, 2007 at 1:59 AM
Thanks so much for this tutorial and tips! Life gets so busy this time of year. I haven't stamped at all in a couple of weeks, but I made time to try THIS technique! I can't wait to show it to my mom when I see her this weekend.
Becky  |  Thu Dec 20, 2007 at 4:50 AM
Thanks, so much, Michelle, for sharing your technique with the brayer. Bought on, but was scared to death to try USING it---until now!!! TFS all your beautiful ideas and cards with all of us less gifted!!!
Sue Worthington  |  Thu Dec 20, 2007 at 9:27 AM
Wow, what awesome cards!!! Thank you for sharing this wonderful tutorial.
Juanita (Toni173)  |  Thu Dec 20, 2007 at 1:12 PM
Woo hoo, what an awesome tutorial! I can't wait to give it a go...
MrsNemo  |  Thu Dec 20, 2007 at 4:42 PM
Hey.......not only are you a dirty girl with fabulous cards, but you are so kind to share your talents with us in such wonderful detail.....you rock, Michelle.........and Merry Christmas to you......
jojot  |  Thu Dec 20, 2007 at 6:40 PM
Holy cow! That is breathtaking! Thanks so much for sharing. You might have breathed some new life into those tree stamps I haven't touched in months if not years!
Julie Koerber  |  Thu Dec 20, 2007 at 9:38 PM
I don't know what has happened to my brayered sky card. It was in the gallery and also in my own gallery. it is still there - but it vanished from here. Why?
nessie  |  Fri Dec 21, 2007 at 6:39 AM
OMG! Thanks for sharing!! I'm such a big fan of your gallery!!!! THIS will be my card for next year!!!

smile
Adriene  |  Fri Dec 21, 2007 at 9:21 AM
Wow!!!! I always love this look, but I thought it was going to be a very complicated technique. Plus, I always thought this look could only be achieved with the glossy white. To find out this is regular whisper white is amazing. This looks very doable for me. Thanks for sharing!!!!
Betty Wright  |  Fri Dec 21, 2007 at 2:24 PM
WOW!!! Amazing, that is all that I can say.
Connie Flowers  |  Fri Dec 21, 2007 at 4:07 PM
Thanks Michelle for showing this cool technique. I will have to try this to make winter birthday cards coming up in January.
Alma  |  Sat Dec 22, 2007 at 9:26 PM
This is so great. Thanks for the tutorial. I will definitely use this after the holidays.
phan1240  |  Sun Dec 23, 2007 at 4:00 AM
This is wonderful!! Thanks for the awesome tutorial, Michelle!! Your samples are gorgeous!!
Rose Ann  |  Sun Dec 23, 2007 at 7:33 AM

Page 3 of 7 pages  <  1 2 3 4 5 >  Last »

You need to be logged in to comment

GET OUR NEWSLETTER


Splitcoaststampers's privacy policy