Altered Pop Top Can

by Julie Buhler

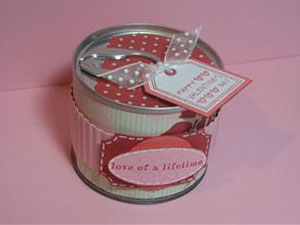
Alter a pop top can container and fill it with goodies. It makes a great gift container for small gifts or candy.

Supplies
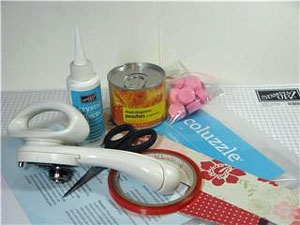
  • Pop Top Can
  • Safety Can Opener
  • Coluzzle™
  • Patterned Paper
  • Scissors
  • Sticky Strip™
  • Candy or other filling
  • Crystal Effects or other STRONG glue

Step-by-Step

  1. Step 1

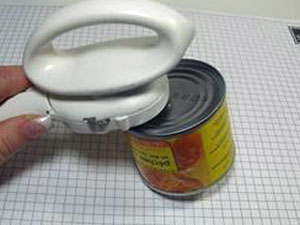
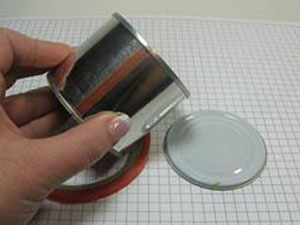
    Open the can AT THE BOTTOM with a safety can opener. Drain contents and wash container.
  2. Step 2

    Apply Sticky Strip™ at the seam of the can.
  3. Step 3

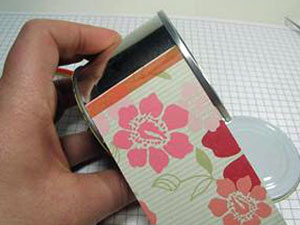
    Cut patterned paper tall enough to cover the area between the top and bottom of the tin, and long enough to wrap around the can, leaving a slight overlap.

    Adhere over the Sticky Strip™ and add more Sticky Strip™ to the end of the paper. Remove the red liner, then wrap the paper around the and adhere.
  4. Step 4

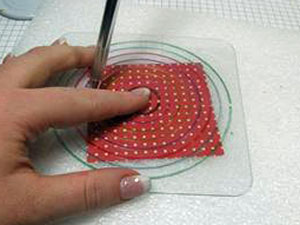
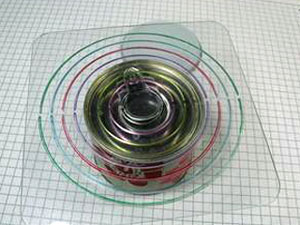
    Measure the top of the can with a Coluzzle™ template. Only measure the metal area that is going to pop out when the can is opened.
  5. Step 5

    Cut circle to fit.

  6. Step 6

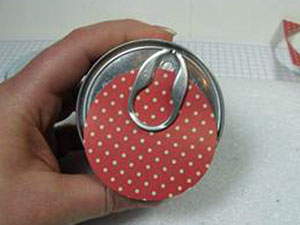
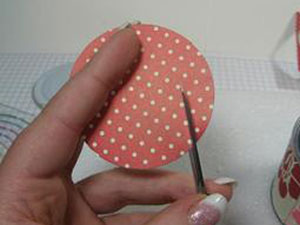
    Slide paper under the tab to get an idea of how much will need to be cut off.
  7. Step 7

    Use your scissor to cut off a side of the circle. There is no set amount, but start with a little and keep trimming until it fits.
  8. Step 8

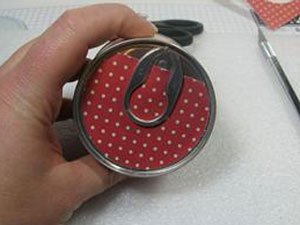
    Using Sticky Strip™, adhere paper circle to the lid of the can.
  9. Step 9

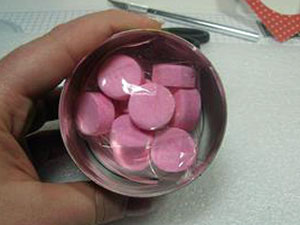
    Now, fill the can. Turn it upside down and add desired contents. If adding food items, put them in a baggie. This way, the glue used to close the container will not touch the food.
  10. Step 10

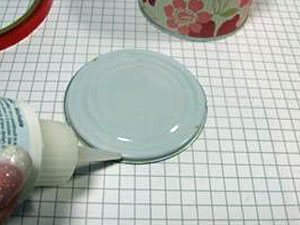
    Apply a thin strip of Crystal Effects™ (or other STONG glue) all the way around the outer rim of the cut out bottom.
  11. Step 11

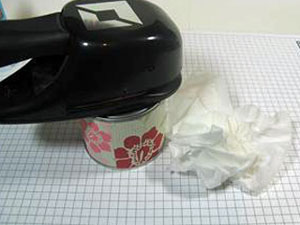
    Press the bottom back on, wiping away excess glue with a tissue.

    Leave can upside down and weigh down a heavy object on top until the glue has dried for a few hours or overnight.

    When dry, embellish as desired!!
  12. Step 12

    Finish decorating your can.

Variations

    Use a can without the pop top.

Your Turn

You've seen the tutorial, now you try it! We've got a section of the gallery set aside for Altered Pop Top Can. Try this technique, then upload your artwork to the gallery. Show us your creations!

***Please note - Internet Explorer/Edge is not a supported browser, and will not allow you to see the videos. Please use Chrome, Firefox or Safari to view our tutorial videos.

Questions and Comments

We'd love to get your feedback or questions. Leave your comment below.

How cute! Thanks so much for sharing this! I can't wait to give it a try!
Jennifer Buck  |  Fri Jan 4, 2008 at 7:15 PM
Received one of these as a gift this last summer and right away I new what I was doing to do for my nieces Christmas gift cards, added some chocolates and some nail polish.
Awesome idea and they were so much fun to do with all the wonderful papers, ribbons, tags etc. They were a great hit and got many great comments.
inney M.  |  Sat Jan 5, 2008 at 2:26 PM
I've used super glue before instead of Crystal Effects. It dries a lot faster!! smile It is a very fun project!!
Laura  |  Sat Jan 5, 2008 at 8:00 PM
This is just AWESOME! So clever and unique! I am going to show THAT in my workshops!

Thanks a lot for sharing!
French_Caroline  |  Sun Jan 6, 2008 at 7:45 AM
How funny. I saw some of these on someones blog and tried them myself. I threw out the lids! (LOL) now I know to keep them,
Maria Guimaraes  |  Sun Jan 6, 2008 at 12:53 PM
Way to go Julie! Awesome tutorial..i am gonna have to try it...you made it seem simple with these excellent instructions!
Carolyn King  |  Mon Jan 7, 2008 at 1:41 PM
Thanks for showing these - it's a great idea!
swimmermama  |  Mon Jan 7, 2008 at 3:07 PM
Del Monte has the perfect sized cans with fruit in them. They are lined too so no metallic taste in the fruit and looks awesome.
June R.  |  Tue Jan 8, 2008 at 11:35 AM
All your ideas are neat, but loved the possibilities with this one -- limitless.
Linda Hayaes  |  Wed Jan 9, 2008 at 7:29 AM
I have made these many, many times and never get tired of them. One thing that I do a bit differently on the top---I use the Scallop punch instead of the Coluzzle. It is nearly the right size and saves a bit of time. I also then take the 3/4 circle punch and set it half on/half off the edge of the punched out scallop circle and then punch it. This gives a small divet that makes it easy to slip right under where the pull-ring attaches to the top of the can. It just makes the top look a little more finished. Nice job on the tutorial
Becky  |  Mon Jan 14, 2008 at 4:49 PM
Honestly how hard is it to use a regular can opener?
fd  |  Fri Jan 18, 2008 at 10:15 AM
A regular can opener will not work because it leaves a sharp edge and the reasoning behind the safety openers is that you need the rim so that you can reattach the "lid" to the can after it is filled with your "surprise" or "gift"
Linda  |  Fri Jan 18, 2008 at 10:28 AM
This is a GREAT idea! I can think of soooo many suprises to put in the cans!! Wonder if anyone knows where to find some of those pop-out snakes! Yep, I don't plan on all my suprises being sweet! wink
Kathy  |  Fri Jan 18, 2008 at 11:00 AM
Oh, I absolutely love that . . . does anyone know where we can find the spring snakes? grin
Linda  |  Fri Jan 18, 2008 at 11:14 AM
Thank you so much for this tutorial. It is really really clear and I have already made one of these as a trial for my assistant. She was thrilled with it and so was I. This is a very clever idea and because you can personalise the inside gift as well as the outside and this is what really creates a pressie that impresses. People are fascinated with how these are made. It's a good thing my 2 Siamese cats like tinned peas and corn as I predict we will be eating quite a bit of canned veg so that we can stockpile a supply of cans. cheers
Peaceful Pursuits  |  Fri Jan 25, 2008 at 11:00 PM
Very cute. But if you can edit this at all I would recommend that you advise people to use a can of which it's contents have already been used. Don't just open the can and throw out the contents. It's such a waste!
Sarah  |  Tue Jan 29, 2008 at 1:08 AM
Made these for my golf group & put tees and a golf ball inside. They loved them and now want to make more!
mellen  |  Sat Feb 2, 2008 at 8:05 AM
That looks cute. Your tutorial is very easy to follow. Thanks!
SewDelish  |  Mon Feb 4, 2008 at 4:30 PM
i thought this was a great idea,cant wait to try it out.thankyou
jackie  |  Mon Feb 4, 2008 at 4:30 PM
Always looking for a way to give a gift card. This is definitely a keeper. Thanks for a great idea.
Wendy Moore  |  Tue Feb 12, 2008 at 2:43 AM

Page 3 of 5 pages  <  1 2 3 4 5 >

You need to be logged in to comment

GET OUR NEWSLETTER


Splitcoaststampers's privacy policy