Alcohol Marker Marbling

by Audrie Magno-Gordon

Use alcohol markers to create a marbled background on glossy cardstock.

Supplies
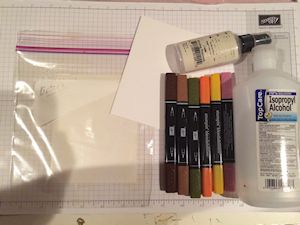
  • Alcohol markers (Blendabilities Markers by Stampin' Up! used here)

  • Rubbing alcohol or colorless blending ink intended for alcohol markers in a spray bottle (safety note: Ranger Blending Solution and alcohol inks contain resins and should not be sprayed)

  • Glossy cardstock cut to 4 1/4" x 5 1/2"

  • Quarter sheet of text weight paper for a template

  • Ziploc-type plastic bag (empty and sealed closed) or other non-porous surface, such as a craft sheet or ceramic tile

Step-by-Step

  1. Step 1

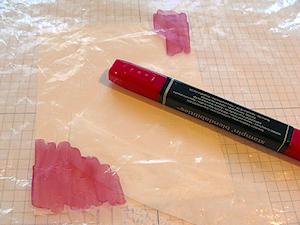
    Using a tiny bit of removable tape, secure a quarter sheet of paper to your work surface. This will serve as a template. Cover the template with a Ziploc bag. Use removable tape to secure the bag so it doesn't move.

    Begin coloring with alcohol markers directly onto the bag, covering a space equal to the size of the template.
  2. Step 2

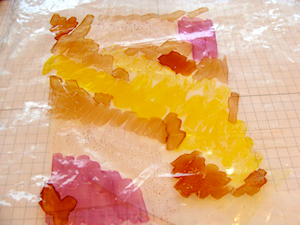
    Use a variety of markers randomly on the bag. No need to blend them, just scribble them on side-by-side very randomly.
  3. Step 3

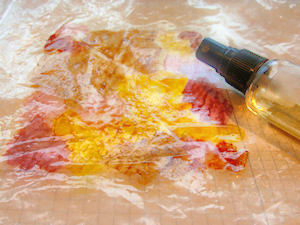
    Spritz the bag with rubbing alcohol until the inks appears to be wet, and droplets of the liquid are visible on top. You will notice that the edges of the colors will start to blend.
  4. Step 4

    Place glossy cardstock glossy side down onto the wet ink. Press the cardstock onto the ink for a few seconds then lift it up to reveal your background.
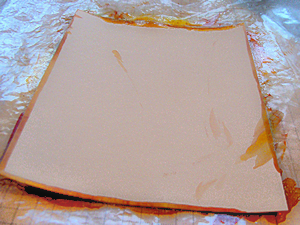
  5. Use the print as is or repeat this step to add layers of color or fill in missed areas. Mist the inked work surface as needed to revive colors with alcohol.
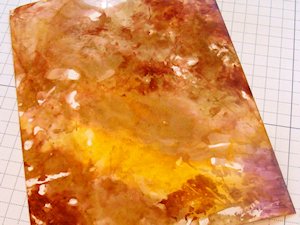
  6. Step 5

    Use the background to complete a card front or scrapbook page.
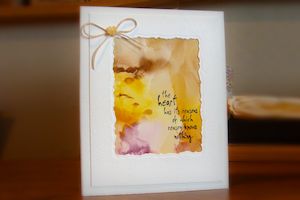
Video!

Variations

  1. Plan your coloring to complete a scene. For an impressionistic look to any favorite landscape or nature image, stamp the image onto your work surface underneath the plastic, use that image as a guide for color placement.
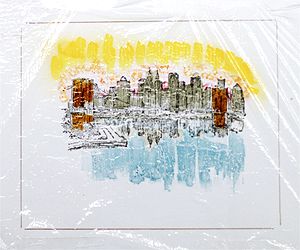
  2. Spritz a large stamp with rubbing alcohol and lay a completed background panel onto the stamp. An impression of the stamp will appear in your marbled background. Wash the stamp promptly to remove alcohol residue.

    A similar look can be achieved by spritzing alcohol through a stencil over a completed background.
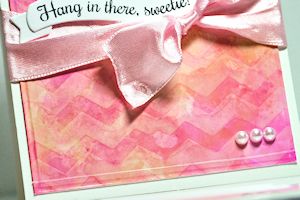
Your Turn

You've seen the tutorial, now you try it! We've got a section of the gallery set aside for Alcohol Marker Marbling. Try this technique, then upload your artwork to the gallery. Show us your creations!

***Please note - Internet Explorer/Edge is not a supported browser, and will not allow you to see the videos. Please use Chrome, Firefox or Safari to view our tutorial videos.

Questions and Comments

We'd love to get your feedback or questions. Leave your comment below.

Another source for the Spellbinder dies is: www.scrapbookpal.com Her prices are VERY reasonable and she ships things out FAST!
marie0112  |  Thu Sep 25, 2014 at 7:21 AM
Great video. Will have to get out my glossy cardstock and play.
Carol V  |  Thu Sep 25, 2014 at 2:18 PM
What a great technique. I read above that you can not use glossy photo paper. What glossy paper do you suggest and where can it be purchased?
Kim Green  |  Thu Sep 25, 2014 at 3:13 PM
Hi Kim! You should be able to find glossy cardstock with other papercrafting products. Another alternative is clay-coated cardstock - that's what I use, and it seems to hold the color and details of the alcohol inks better. The brand I have is called Mohawk Ultra Gloss or you may find it as Kromekote Cover online. I know Marco Paper carries it.
dina  |  Thu Sep 25, 2014 at 3:26 PM
Thank you so much. I will start looking.
Kim Green  |  Fri Sep 26, 2014 at 4:07 AM
Love this BUT what kind of stamping ink do you use for the comments, etc. I'm afraid some of it smudges and don't want to experiment (at this time) after putting in all my "hard" work! Thanks
Barb Canfield  |  Fri Sep 26, 2014 at 10:36 AM
Barb, I've had good results with Stazon and Memento inks.
dina  |  Fri Sep 26, 2014 at 12:52 PM
What an interesting technique Thank you for the TT....Lis
Lis  |  Fri Sep 26, 2014 at 4:26 PM
Love, love, LOVE this technique! Thanks for sharing Audrie. Wonderful way to get a lot of backgrounds made for clean and simple cards. Add a stamp, a little bling or ribbon, and call it done! Inkssentials (Ranger) makes Glossy cardstock.
Karen Atkinson  |  Fri Sep 26, 2014 at 9:40 PM
I really enjoyed your tutorial Audrie. You explaied everything so well so that there would not be any questions. Super job - this is one of your gifts.
Kim Hahn  |  Thu Oct 2, 2014 at 7:27 AM
Amazing -- loved this video. Have seen several cards today on blogs using this beautiful technique. Thanks for a very informative video.
Mary Haverland  |  Fri Oct 3, 2014 at 3:04 PM
Audrie thanks for a great video. I even tried it tonight and uploaded my card. Thanks for inspiring me to just do it.
Carol V  |  Sat Oct 4, 2014 at 9:59 PM
Pretty technique! I have Stampin' Up! glossy paper and have been waiting to use it. Thank you for shring.
Melanie R  |  Mon Oct 6, 2014 at 4:03 PM
Audrie,

I tried the technique with old olive and bronze blendabilities. I was using 50% rubbing alcool and it didn't work! The reds and pinks did but not those two colours. Should I be using a higher percentage volume of alcool to spray?
Michelle Lotan  |  Wed Oct 8, 2014 at 7:57 PM
I had the problem with the colors. I used pumpkin pie, old olive, rich razzleberry, crumb cake and mine ended up very light colors. I am doing something wrong.
Kimberly Green  |  Thu Oct 9, 2014 at 10:16 AM
Gorgeous technique that looks totally doable for me. Will definitely try this technique.
mzteaze  |  Wed Oct 15, 2014 at 8:59 AM
Audrie, Thank you soo much for this tut. I love the backgrounds that you created.
Joyce Bodo  |  Wed Oct 22, 2014 at 10:47 AM
Really loved the alcohol ink markers on plastic results. Wow. When we have lots of cards to make this seems to be a perfect choice to get them done. I loved the tutorial!
Dottie  |  Wed Oct 22, 2014 at 2:22 PM
LOVED your technique. I used my Blendabilities and worked great. TFS Audrie.
nancy littrell  |  Fri Oct 24, 2014 at 12:21 PM
You are right, it is so easy, and fun. Thanks for this tutorial, I think this will make beautiful DSP.
Pamela McIntyre-Albaro  |  Wed Apr 15, 2015 at 9:51 PM

Page 3 of 4 pages  <  1 2 3 4 >

You need to be logged in to comment

GET OUR NEWSLETTER


Splitcoaststampers's privacy policy