3” x 3” Notecard Box

by Laurie Schmidlin

Create this beautiful box to hold your 3" x 3" notecards.

Supplies
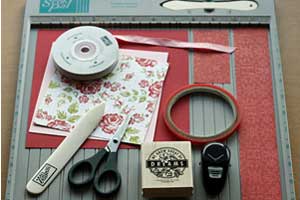
  • Scor-Pal™ (or paper cutter with scoring blade)

  • One 7 1/2" square piece of cardstock (for base of box)

  • One 5 5/8" square piece of cardstock (for box top)

  • One 5 1/8" square piece of patterned paper A

  • One 1 3/4" x 12" strip of patterned paper B

  • One 1 3/4" x 3 1/2" strip of patterned paper B

  • Corner Rounder punch

  • Bone Folder

  • Sticky Strip™

  • Scissors

  • Stamps, Ink, Ribbon (or other embellishments) to decorate box

Step-by-Step

  1. Step 1

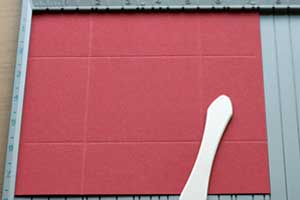
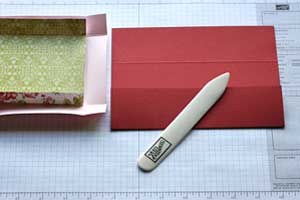
    Score 7 1/2" square cardstock at 2" on all four sides.
  2. Step 2

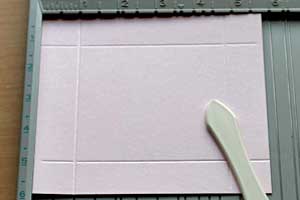
    Score 5 5/8" square cardstock at 1" on all four sides
  3. Step 3

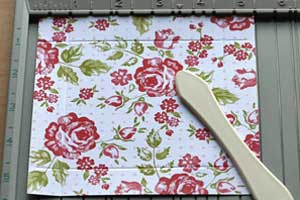
    Score 5 1/8" piece of patterned paper at 3/4" on all four sides
  4. Step 4

    Prefold all scores with Bone Folder.
  5. Step 5

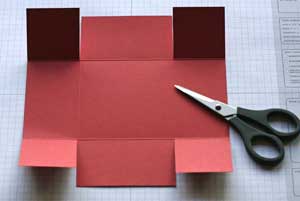
    Using scissors, make vertical cuts (following the scored line) on all four sides to create a flap in each corner of the 7 1/2" square cardstock piece.

    Repeat this step on the 5 5/8" square piece of cardstock and the 5 1/8" piece of patterned paper
  6. Step 6

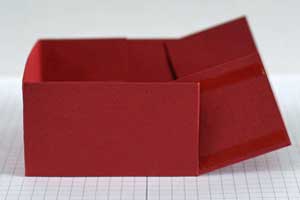
    Add Sticky Strip™ to each corner flap on the 7 1/2" square cardstock and fold into a box.
  7. Step 7

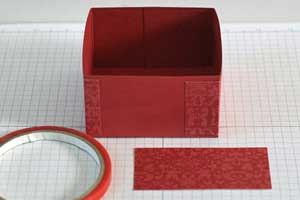
    Adhere 1 3/4" x 12" strip of patterned paper around box so that both ends start and end on same side.

    Adhere 1 3/4" x 3 1/2" strip of patterned paper to the side with the gap.
  8. Step 8

    Using scissors, cut each flap of the 5 5/8" cardstock in half at an angle.

    Create a scalloped edge around the 5 5/8" piece of cardstock using the Corner Rounder punch. Click here to find a tutorial on scalloping edges with the corner rounder punch.
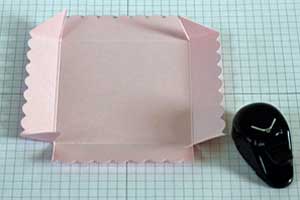
  9. Step 9

    Add Sticky Strip™ to each corner flap of the 5 1/2" cardstock and fold to create box lid.

    Adhere the 5 1/8" square piece of patterned paper to the box lid.
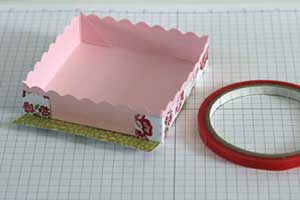
  10. Step 10

    Stamp and embellish your box as desired.
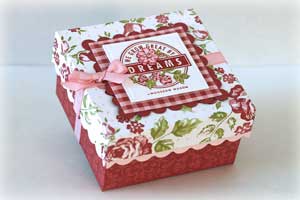
  11. Your finished box is perfect to hold a set of coordinating 3 x 3 Mini Note Cards and envelopes!
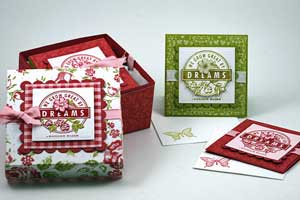
Video!

Your Turn

You've seen the tutorial, now you try it! We've got a section of the gallery set aside for 3” x 3” Notecard Box. Try this technique, then upload your artwork to the gallery. Show us your creations!

***Please note - Internet Explorer/Edge is not a supported browser, and will not allow you to see the videos. Please use Chrome, Firefox or Safari to view our tutorial videos.

Questions and Comments

We'd love to get your feedback or questions. Leave your comment below.

gorgeous box! thanks so much for sharing the instructions
Rachel  |  Wed Aug 13, 2008 at 12:39 PM
This is absolutely adorable! I know what I'll be making this afternoon!! Fantastic tutorial!! Thanks Laurie
Becca Feeken  |  Wed Aug 13, 2008 at 1:00 PM
I love these. Can anyone tell me where to find envelopes for the 3 x 3 size? I do not like the ones I make.
Karen  |  Wed Aug 13, 2008 at 1:12 PM
What a darling design Laurie. Love the box, the dp, and that adorable image on top!! Fabulous tutorial too!! It's so easy to follow!! AWESOME!! I'm going to have to try this one for sure!!
Tosh  |  Wed Aug 13, 2008 at 2:06 PM
Amazing...what a wonderful idea. I can't wait to try it!
rainythurdsay  |  Wed Aug 13, 2008 at 2:50 PM
This is ADORABLE!! I am loving the Bella Rose paper and have that stamp set on my wishlist. Well, off to give this box a go!! Thanks for putting this together Laurie:)
Marcee  |  Wed Aug 13, 2008 at 3:39 PM
Great Tutorial Laurie!!! I'll be making one tonight!
Hannah Kost  |  Wed Aug 13, 2008 at 4:19 PM
Love the box. Can't wait to try it. Where do I order the paper? Does anyone know where I can purchase a Scor-Pal?
Mama D  |  Wed Aug 13, 2008 at 4:55 PM
Thanks for sharing this adorable card box!!
This is so cute! I can't wait to make this.
Barb in SC  |  Wed Aug 13, 2008 at 5:08 PM
I love love love these little boxes..you are the best!
Pam  |  Wed Aug 13, 2008 at 5:41 PM
I LOVE THIS! It is just darling and my customers will absolutely love it as well! Thank you so much for showing it and making it easy to follow!
zuzu  |  Wed Aug 13, 2008 at 5:43 PM
CAN'T WAIT TO MAKE THIS! GREAT CHRISTMAS IDEA!
PALOMA  |  Wed Aug 13, 2008 at 8:36 PM
This is so very pretty!!! The tutorial is great too. Thanks much!
Jamie  |  Wed Aug 13, 2008 at 8:58 PM
Wow I can't wait to try this out...
Jackielou  |  Wed Aug 13, 2008 at 9:46 PM
Fabulous and beautiful! The timing is perfect as I'm thinking about little 3x3 card sets for Christmas gifts for friends & coworkers. TFS!!
Susan (PSU_Mom)  |  Thu Aug 14, 2008 at 2:36 AM
LOVE IT! I am definitely going to be trying this one!
Crystal  |  Thu Aug 14, 2008 at 7:26 AM
This is a great box! I can't wait to try this at home!
Lisa  |  Thu Aug 14, 2008 at 10:12 AM
What a gorgeous box Laurie! Thanks so much for the wonderful tutorial.

Hugs, Jennifer smile
Jennifer Meyer  |  Thu Aug 14, 2008 at 12:32 PM
Awesome tutorial, Laurie....the box is GORGEOUS!!!
Denise (peanutbee)  |  Thu Aug 14, 2008 at 6:08 PM
LOVE this!
Michelle
heart  |  Thu Aug 14, 2008 at 7:12 PM

Page 2 of 5 pages  <  1 2 3 4 >  Last »

You need to be logged in to comment

GET OUR NEWSLETTER


Splitcoaststampers's privacy policy