3” x 3” Notecard Box
by Laurie Schmidlin
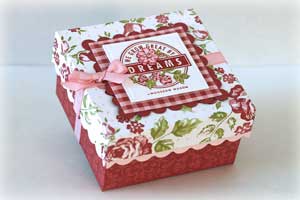
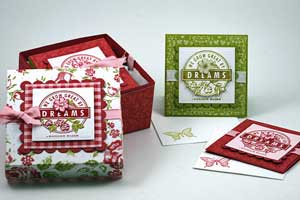
Create this beautiful box to hold your 3" x 3" notecards.
Supplies
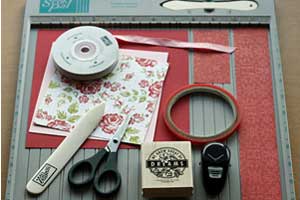
- Scor-Pal™ (or paper cutter with scoring blade)
- One 7 1/2" square piece of cardstock (for base of box)
- One 5 5/8" square piece of cardstock (for box top)
- One 5 1/8" square piece of patterned paper A
- One 1 3/4" x 12" strip of patterned paper B
- One 1 3/4" x 3 1/2" strip of patterned paper B
- Corner Rounder punch
- Bone Folder
- Sticky Strip™
- Scissors
- Stamps, Ink, Ribbon (or other embellishments) to decorate box
Step-by-Step
-
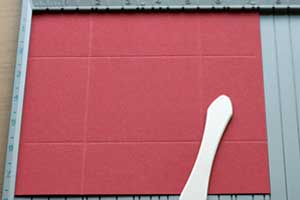
Step 1
Score 7 1/2" square cardstock at 2" on all four sides.
-
Step 2
Score 5 5/8" square cardstock at 1" on all four sides
-
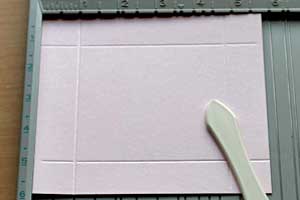
Step 3
Score 5 1/8" piece of patterned paper at 3/4" on all four sides

-
Step 4
Prefold all scores with Bone Folder.
-
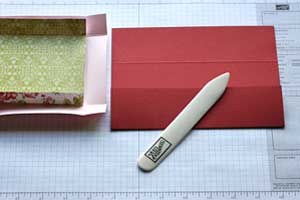
Step 5
Using scissors, make vertical cuts (following the scored line) on all four sides to create a flap in each corner of the 7 1/2" square cardstock piece.
Repeat this step on the 5 5/8" square piece of cardstock and the 5 1/8" piece of patterned paper
-
Step 6
Add Sticky Strip™ to each corner flap on the 7 1/2" square cardstock and fold into a box.
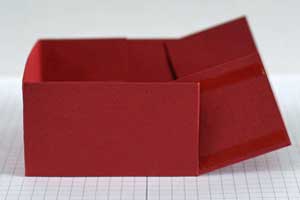
-
Step 7
Adhere 1 3/4" x 12" strip of patterned paper around box so that both ends start and end on same side.
Adhere 1 3/4" x 3 1/2" strip of patterned paper to the side with the gap.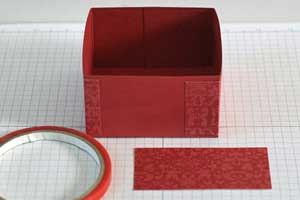
-
Step 8
Using scissors, cut each flap of the 5 5/8" cardstock in half at an angle.
Create a scalloped edge around the 5 5/8" piece of cardstock using the Corner Rounder punch. Click here to find a tutorial on scalloping edges with the corner rounder punch.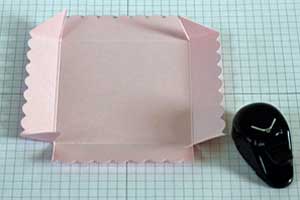
-
Step 9
Add Sticky Strip™ to each corner flap of the 5 1/2" cardstock and fold to create box lid.
Adhere the 5 1/8" square piece of patterned paper to the box lid.
-
Step 10
Stamp and embellish your box as desired.
-
Your finished box is perfect to hold a set of coordinating 3 x 3 Mini Note Cards and envelopes!
Video!
Your Turn
You've seen the tutorial, now you try it! We've got a section of the gallery set aside for 3” x 3” Notecard Box. Try this technique, then upload your artwork to the gallery. Show us your creations!
***Please note - Internet Explorer/Edge is not a supported browser, and will not allow you to see the videos. Please use Chrome, Firefox or Safari to view our tutorial videos.

 *
*
Questions and Comments
We'd love to get your feedback or questions. Leave your comment below.
I don't have a score pal but i do have the crafters companion pro
Thanks
Cathy
Page 5 of 6 pages « First < 3 4 5 6 >