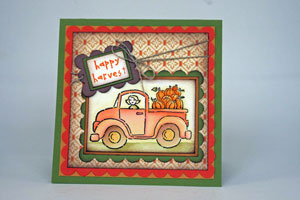
Scallop Squares with Scallop Edge Punch

by Mary Jo Albright

Create Scallop Rectangles and Squares with the Scallop Edge Punch.

Supplies
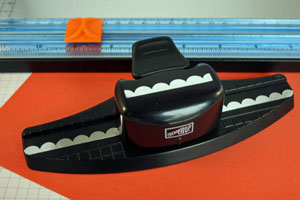
  • Scallop Edge Punch
  • Cardstock
  • Paper Cutter

Step-by-Step

  1. Step 1

    Hold the Scallop Edge Punch upside-down.

    Place your cardstock piece all the way into the punch until it stops and is in between two scallops. Punch.
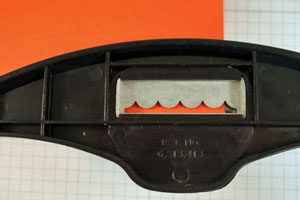
  2. Step 2

    Continue this process of punching until you have reached your desired length.
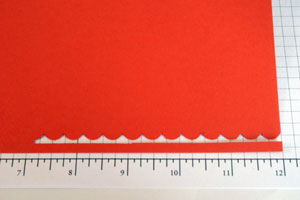
  3. Step 3

    Once you have determined your length, cut between two scallops using your paper cutter.
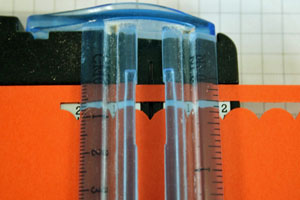
  4. Picture of one finished punched side after cut in paper cutter
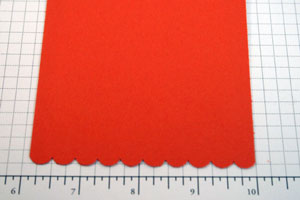
  5. Step 4

    Place your cardstock piece back into the Scallop Edge Punch but NOT the whole way in.

    Just line it up with the bottom of the metal scallops. You want the end scallop to line up perfectly with one whole scallop.
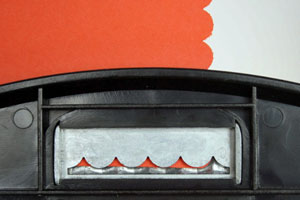
  6. Close up of a perfectly punched corner.
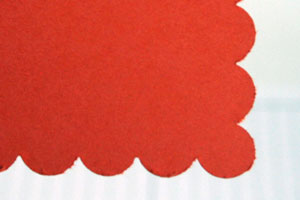
  7. Step 5

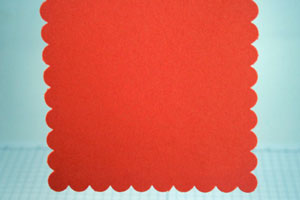
    Continue this process till you have three sides done. At this point, you need to determine the width of your cardstock piece (how many scallops).

    Sample shown is going to be a square scallop with 10 scallops to each side.
  8. Step 6

    Place your cardstock piece back into your paper cutter. Line up and cut between scallops.

    Here, it was cut between the 10th scallop of each side.
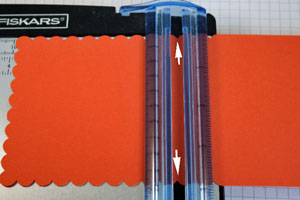
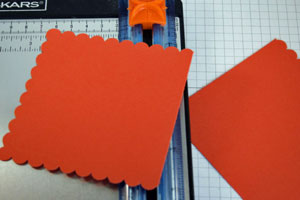
  9. You have to make sure you cut the cardstock between the correct scallops or you will not have a straight line and your corners will not match up.
  10. Step 7

    Place the last side of your cardstock square back into your punch, lining up again with the cardstock along the base of the metal punch (not the whole way into the punch till the cardstock stops).

    Make sure your corner scallop is lined up with a metal scallop punch.
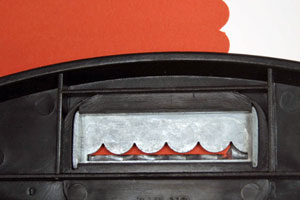
  11. You now have a punched shape with perfectly rounded, matching up corners.
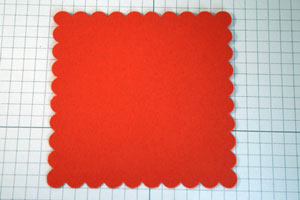
  12. Step 8

    Finish your project.

Video!

Variations

    Different sizes:
    With this tutorial, you can create any size square or rectangle you need for your project. Just change the number of scallops in your first row.

    Clean it up:
    You may need to use your paper snips to some punched scallops as I did have some areas that needed some cleaning up where it was punched (small paper fibers after cutting that hung from side of cardstock).

Questions and Comments

We'd love to get your feedback or questions. Leave your comment below.

So cool!!! Thanks for showing us this. Will try it right away. Now I don't need to buy all those square scallop punches! smile
Heike  |  Wed Nov 12, 2008 at 12:34 PM
I am so excited to see this. I JUST got the scallop punch yesterday and will be playing with my new toy on the weekend. Now I have a new project to try. YAY!
JoyAnne  |  Wed Nov 12, 2008 at 12:41 PM
Oh - nice. I've been looking for a way to do this. THanks.
Metalcharm  |  Wed Nov 12, 2008 at 12:43 PM
THANKS for figuring that out for us!! I've been wondering how to do it, but haven't had time to play with it.

You're fantastic!
Karrie  |  Wed Nov 12, 2008 at 12:48 PM
Thank you- I was shown another way and the corners were ugly. Can't wait to try this technique.
thanks again.
Kim  |  Wed Nov 12, 2008 at 12:51 PM
Wow this worked wonderfully! Thank you so much for this tutorial!
Jacquie/momofour26  |  Wed Nov 12, 2008 at 1:07 PM
OMG!! Thank you! I tried this and could not make it right!! Thanks for the picture! Off to try it out!
Katie Skiff  |  Wed Nov 12, 2008 at 1:09 PM
WOO HOO Have a class this weekend wait till I share this one!

Mary Jo you so rock! Thanks dear
Melissa Lenhardt  |  Wed Nov 12, 2008 at 1:17 PM
I have wanted to know how to do this for a LONG time!! Thanks soooooooooo much!! You're the best!! :O)
Linda  |  Wed Nov 12, 2008 at 1:51 PM
Thanks so much for the great tutorial. I've just got my punch & am dying to try this out.
Di  |  Wed Nov 12, 2008 at 1:57 PM
i was just wondering last night how i can do this... too cool!
catherine  |  Wed Nov 12, 2008 at 2:08 PM
I had such a hard time getting the corners to turn out right. Thanks for the help!
Crystal B.  |  Wed Nov 12, 2008 at 2:53 PM
I SHOULD HAVE been able to figure that out, but I never thought of it. Thanks!
Gail  |  Wed Nov 12, 2008 at 3:13 PM
I can't wait to try this! Thanks for sharing.
Cynthia  |  Wed Nov 12, 2008 at 3:55 PM
what brand of scalloped edge punch is used?I really think it's so CUTE...thank you!
Lea Fox  |  Wed Nov 12, 2008 at 4:02 PM
I also am very happy to get this tutorial.
I tried on my own to do squares and was frustrated with the way the corners turned out like others I read said. This is just the trick I needed to use my scallop edger again.
Thank you very much
Stampin' Nancy
Nancy Cahill  |  Wed Nov 12, 2008 at 4:27 PM
Thank you for this very wise and helpful way to use another punch.Thank you for sharing this with all of us.
Di
Dianne Henry  |  Wed Nov 12, 2008 at 5:24 PM
So, could you please do a tutorial on how to do the inner rectangle, like the one around the truck? It looks awesome and I can't figure it out.
chicagogirl  |  Wed Nov 12, 2008 at 7:57 PM
Fabulous tutorial...I need to try this later this evening! Thank you so much!
Smiles.
Sheri  |  Wed Nov 12, 2008 at 9:32 PM
thanks so much for this tutorial I was wondering how to get rounded corners
Mary Ellen Cope  |  Thu Nov 13, 2008 at 12:01 AM

Page 1 of 4 pages  1 2 3 >  Last »

You need to be logged in to comment

GET OUR NEWSLETTER


Splitcoaststampers's privacy policy