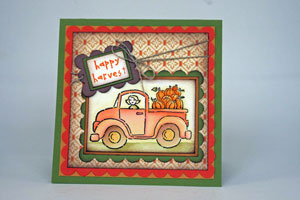
Scallop Squares with Scallop Edge Punch

by Mary Jo Albright

Create Scallop Rectangles and Squares with the Scallop Edge Punch.

Supplies
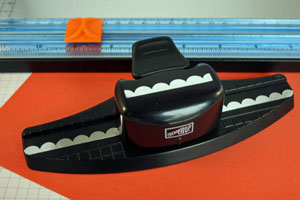
  • Scallop Edge Punch
  • Cardstock
  • Paper Cutter

Step-by-Step

  1. Step 1

    Hold the Scallop Edge Punch upside-down.

    Place your cardstock piece all the way into the punch until it stops and is in between two scallops. Punch.
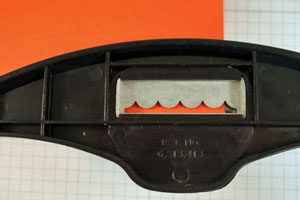
  2. Step 2

    Continue this process of punching until you have reached your desired length.
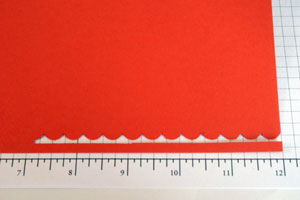
  3. Step 3

    Once you have determined your length, cut between two scallops using your paper cutter.
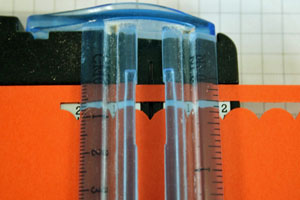
  4. Picture of one finished punched side after cut in paper cutter
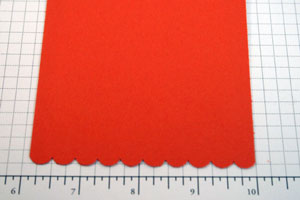
  5. Step 4

    Place your cardstock piece back into the Scallop Edge Punch but NOT the whole way in.

    Just line it up with the bottom of the metal scallops. You want the end scallop to line up perfectly with one whole scallop.
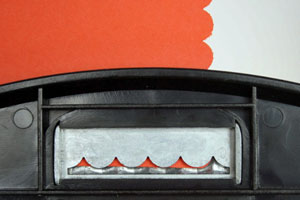
  6. Close up of a perfectly punched corner.
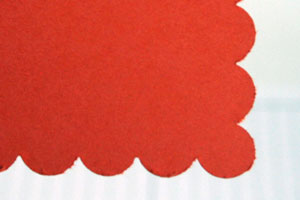
  7. Step 5

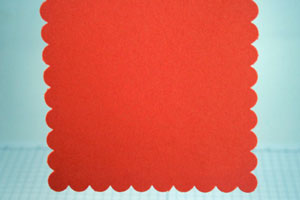
    Continue this process till you have three sides done. At this point, you need to determine the width of your cardstock piece (how many scallops).

    Sample shown is going to be a square scallop with 10 scallops to each side.
  8. Step 6

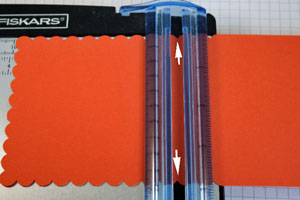
    Place your cardstock piece back into your paper cutter. Line up and cut between scallops.

    Here, it was cut between the 10th scallop of each side.
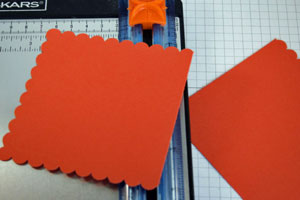
  9. You have to make sure you cut the cardstock between the correct scallops or you will not have a straight line and your corners will not match up.
  10. Step 7

    Place the last side of your cardstock square back into your punch, lining up again with the cardstock along the base of the metal punch (not the whole way into the punch till the cardstock stops).

    Make sure your corner scallop is lined up with a metal scallop punch.
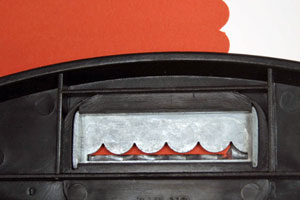
  11. You now have a punched shape with perfectly rounded, matching up corners.
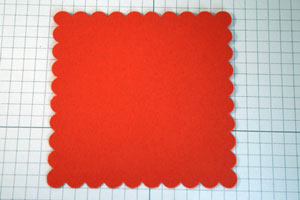
  12. Step 8

    Finish your project.

Video!

Variations

    Different sizes:
    With this tutorial, you can create any size square or rectangle you need for your project. Just change the number of scallops in your first row.

    Clean it up:
    You may need to use your paper snips to some punched scallops as I did have some areas that needed some cleaning up where it was punched (small paper fibers after cutting that hung from side of cardstock).

Questions and Comments

We'd love to get your feedback or questions. Leave your comment below.

Thanks so much looks brilliant. Can you tell me which scallop punch you used and is it available in the UK - I only seem to be able to find them from the USA.
Thanks, Avril xx
Avril Langley  |  Thu Nov 13, 2008 at 3:22 AM
Lea,
The punch is called Scallop Edge Punch and is sold by Stampin' Up!
Avril, I don't know of a different punch of this kind that is sold in the UK. Sorry!
Chicagogirl,
You can create rectangles like the one on the center of this card just like the square shown here. Just decide how many scallops you want, cut and add your last edge.
beate  |  Thu Nov 13, 2008 at 4:50 AM
Oops! When I looked at it the first time I thought the designer paper had scallops ounched out of it. I guess the green layer had the scallops huh.
chicagogirl  |  Thu Nov 13, 2008 at 4:58 AM
Tahnks so much. This is awesome. I now can expand beyond the sizes of my nesties.
Donielle  |  Thu Nov 13, 2008 at 5:45 AM
Great!!!!! Thank you I've tried to do that before and the corners never turned out. Now how do you do the inside scallop? for the truck?
Kellie  |  Thu Nov 13, 2008 at 5:57 AM
Dear Lea Fox, It's a Stampin Up! punch, but I got a Fiskars one from Michaels, except that it has little holes under each scallop, which I like even better!
stamps4funGin  |  Thu Nov 13, 2008 at 7:35 AM
I have another brand of punch for the scallops and have wondered why I get the ugly corners. This is great and can't wait to try it!!!
eiamarie  |  Thu Nov 13, 2008 at 12:38 PM
Was so happy to see this idea and the instructions here. I do plan to go and buy one of those punches. I saw the one with the small holes in it but didn't think that would work. After reading your answer to Lea I will get that one if I don't find the other. Thanks so much.
Nana  |  Thu Nov 13, 2008 at 1:09 PM
What can I say that hasn't already been said?

I just bought this punch and although I haven't tried to make a square, I already knew that I wasn't even going to try! I just KNEW that it would be a problem, it wouldn't come out even, and I was going to lose my mind trying and would end up throwing the punch out of the window! Thanks to you, my mind (and my punch!) are still intact and in good working order!

Thank you SO, SO much! The time you've spent putting this tutorial together will save SO many people from a very frustrating situation ... AND keeping them from going out and buying OTHER companies' stuff! SU! should give you some sort of medal!

All the best,
Gay
Gay Engelberger  |  Fri Nov 14, 2008 at 7:59 AM
Great! I have been playing with this and now have the answer.
Micki Antinone  |  Fri Nov 14, 2008 at 9:05 AM
thank you very much for this tutorial. I tried this with an corner rounder, it works as well.
Franziska  |  Sat Nov 15, 2008 at 3:24 AM
Thanks so much for sharing Mary Jo! I've been wondering how to round those corners perfectly.
lindsey2Ca  |  Sat Nov 15, 2008 at 8:02 AM
Thanks so much for this tutorial - I was trying to figure this out myself with no luck! I should have known some clever SCS person would have the answer. smile
elizabeth  |  Sat Nov 15, 2008 at 10:40 AM
thank you thank you thank you! I already loved that scallop punch, and now I have reason to love it even more!!!!!!!
zuzu  |  Sat Nov 15, 2008 at 2:49 PM
Is there a gallery set-aside to upload our projects?
Rae  |  Sun Nov 16, 2008 at 9:32 AM
I just tried this, takes a little practice to get it just perfect, but it works, and ty so very much, I have been trying to get rectanglar punches, and have not been able to get any yet, now...I won't need them, thanks to your wonderful tutorial, again THANK YOU. hugsss Jan
Jan Keen  |  Sun Nov 16, 2008 at 4:07 PM
I tried it on my own without success. Thank you very much for the demo. It made a very nice border. Obviously, I will try it as soon as I get to my cards.
Dona Roelke  |  Mon Nov 17, 2008 at 4:01 PM
This is WONDERFUL!!! Thank you!
Christyne  |  Tue Nov 18, 2008 at 6:06 AM
Very interesting post.The way you have explained is really good.Thanks for posting!
< href="http://www.purdie.co.uk/">cold forming</a>
cold forming  |  Tue Nov 18, 2008 at 11:33 PM
Great post!

cold forming
cold forming  |  Tue Nov 18, 2008 at 11:34 PM

Page 2 of 4 pages  <  1 2 3 4 >

You need to be logged in to comment

GET OUR NEWSLETTER


Splitcoaststampers's privacy policy