Delft Tile
by Julie Warner
Score lines into your cardstock before stamping patterns over it for a tile look.
Supplies
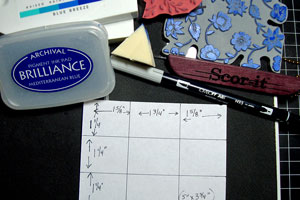
- Scor-It!™ or other scoring tool
- Cardstock
- Ink
- Stamps (Sparkle N Sprinkle used here)
- Sponge
- Light grey marker (Tombow used here)
- Scrap paper for masking
Step-by-Step
-
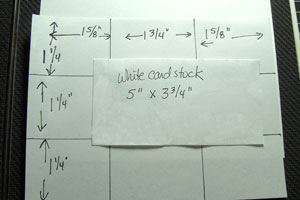
Step 1
Cut card stock to 5" x 3 3/4". Using your scoring board, score the 5" side 1 5/8" in from each side (this will leave 1 3/4" for the center column). Turn 90 degrees and score the 3 3/4" side 1 1/4" in from each side.
-
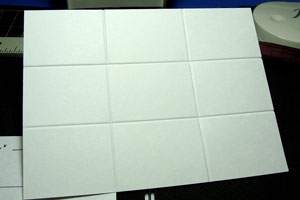
Step 2
Turn your scored card stock so that the backside, or side with indented score lines, is face up.
-
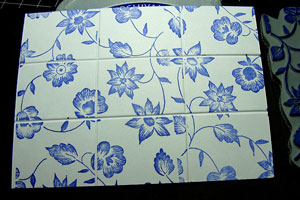
Step 3
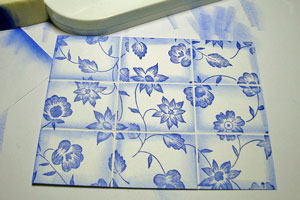
Stamp your image. Large background images work best. Smaller images will also work, but care must be taken not to press too hard into the scored indentations.
-
Step 4
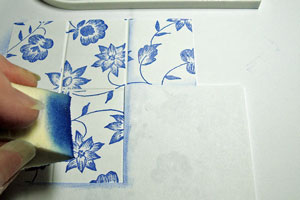
Cut an inside corner out of the scrap paper. Place the mask over the scored lines. Ink the sponge with the same or slightly lighter ink. Lightly sponge just inside the scored line covered by the mask. Move the mask as you go, sponging all sides of the “tiles”. The out side edges may be sponged, if desired.
-
-
Step 5
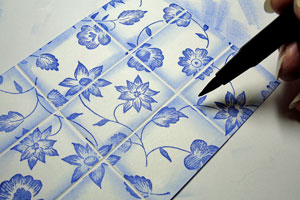
To further enhance the tiles, use the light grey marker to outline the scored indentations or faux grout lines.
-
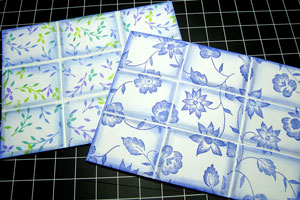
Two different background shown here.
-
Step 6
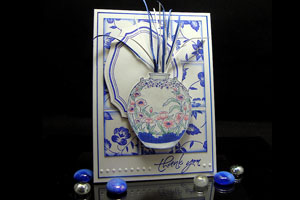
Use the tiles as a focal image.

-
Alternately, use the tiles as a background on a card.
Video!
Variations
Other Sizes
Try making the tiles smaller for a different look.
Your Turn
You've seen the tutorial, now you try it! We've got a section of the gallery set aside for Delft Tile. Try this technique, then upload your artwork to the gallery. Show us your creations!
***Please note - Internet Explorer/Edge is not a supported browser, and will not allow you to see the videos. Please use Chrome, Firefox or Safari to view our tutorial videos.

 *
*
Questions and Comments
We'd love to get your feedback or questions. Leave your comment below.
Thanks
TFS
The floral background stamp is called: Brocade Background #3125-398R. I hope this helps and thanks for asking!
Thank you. Patti
You don't have to remember all the steps. The tutorial will stay like all our tutorials in our resource section Just come back and type in what you are looking for in the search bar on the left hand side and you will find the tutorial again.
On the actual sample, I used the 2 darkest blues of the Kaleidacolor Blue Breeze pad. It also worked well using the Brilliance Mediterranean Blue, but it had to be well inked.
Hope this helps!
Page 1 of 4 pages 1 2 3 > Last »