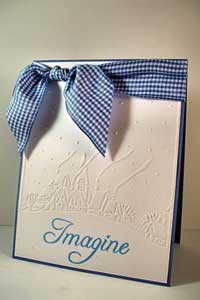
Conditioning JustRite™  Stamps

by Sharon Johnson

With a little cleaning and sanding before stamping, the JustRite™ images will stamp much better.

Supplies
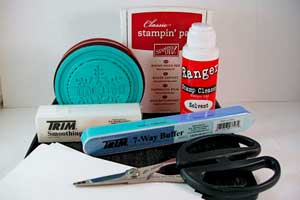
  • Solid Image Stamp

  • Sentiment Stamp/Center

  • Dark Ink

  • Solvent Cleaner

  • Sanding or Smoothing Block

  • 7 Way Nail Buffer

  • White Paper

  • Rubber Scissors

Step-by-Step

  1. Step 1: Reverse Image Conditioning

    Stamp an image and set aside for later comparison.

  2. Step 2

    Clean rubber well with a solvent based cleaner.
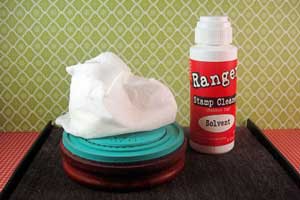
  3. Step 3

    Using the sanding/smoothing block, sand the rubber firmly, but gently, in both directions.
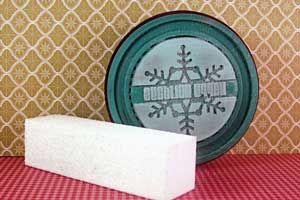
  4. Step 4

    Clean grit off stamp and stamp image again, comparing results to original stamped image. You should see a marked improvement from the previously stamped image.

  5. Step 5

    Clean stamp, sand with side #1 on the file, stamp image again, comparing results. You will again see a marked improvement.

  6. Step 6

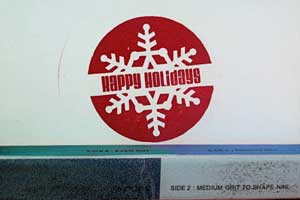
    Repeat step 5, but using side #2 on the file. You will again see a marked improvement.
  7. Step 7

    Repeat again, using side #3 on the file. Results will vary with different images – keep sanding and checking until you get the desired result.

    Note:
    Different papers will give different results. Try smoother papers for clearer stamped images.

  8. Step 8: Cutting your JustRite™ centers

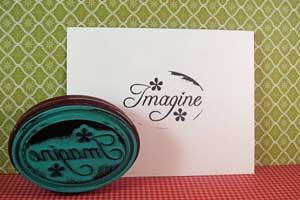
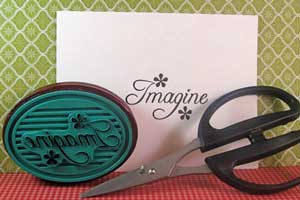
    JustRite™ centers can be used with or without the accompanying borders. When using them without the borders, ink has a tendency to build up on the rubber, creating unsightly markings on the stamped image. Cut away the unnecessary excess rubber to resolve this issue.

    Here's the stamped center image stamped without the border.
  9. Step 9

    Using scissors, cut off the excess rubber as shown in photo, resulting in a perfectly stamped image.

    Note:
    Even though the JustRite™ centers are made to snap into a circular or oval rubber stamper, many of them work equally as well when used in either rectangular or square shapes or when stamped directly to your card. By omitting the border from the stamper and using only the center, your options are greatly increased for many of your JustRite™ centers.
  10. Step 10

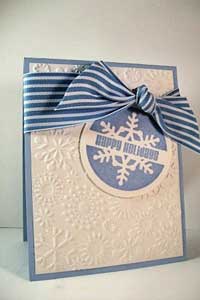
    Now your JustRite™ stamps are ready to create perfect images.
Questions and Comments

We'd love to get your feedback or questions. Leave your comment below.

Thanks Sharon for this! I'll be out looking for a file today! Want to play with my stamps!
Dawn Easton  |  Thu Oct 30, 2008 at 5:08 AM
Thank you!!!!!!!!! I have been very frustrated with the stamped images of the justrite stamps and now I will be playing away with them. This is such a nice tutorial.
Donna
Donna  |  Fri Oct 31, 2008 at 4:35 AM
Sharon, thank you so much for sharing this information! I'm excited to start stamping with my JustRite products! smile
Christina Fischer (cmf1216)  |  Fri Oct 31, 2008 at 9:31 AM
Sharon, this tutorial is fabulous, thank you so much for sharing with us, I know it takes quite a while to make a tutorial and we're all so thankful to you for your time and efforts. Fabulous cards by the way, you always make gorgeous cards that look so effortless and yet I know there's a creative genius at work behind each design!
Jerri Kay  |  Thu Nov 6, 2008 at 5:30 AM
Printing this out now Sharon! Have to get my new JustRite's ready for use! Thanks so much for the indepth and informative tutorial-- looks great!
Deb Saaranen (DeborahLynneS)  |  Sat Nov 22, 2008 at 8:06 AM
SHARON, THANKS, THANKS, THANKS. I WAS SO DISCOURAGED WTH MY JUSTRITE STAMPS----THEY ARE SO PRETTY, GREAT IMGAGES, AND PRICED SO REASONABLY.
YOU HAVE MADE THEM USEABLE.
WISH JUSTRITE WOUD GIVE US INSTRUCTIONS LIKE YOU DID.
BY THE WAY, WHERE DO YOU GET THE 7 WAY NAIL BUFFER ?
THANKS AGAIN, TOMI JO
Tomi Jo  |  Mon Dec 22, 2008 at 9:52 AM
Ditto to Tomi Jo on Dec 22. Where do you find the 7 way nail buffer? Thanks for the great info.
Nancy B  |  Sun Dec 28, 2008 at 9:18 AM
Thank you!!!!!!!!
Ciacchina  |  Tue Dec 30, 2008 at 1:42 AM
Sharon:

This tutorial is great. I was just trying to figure out how to use my justrite set I received for Christmas.
Tai  |  Wed Dec 31, 2008 at 3:25 PM
I sure don't mean to sound rude---but why ask a question, if you can't get an answer.
I am referring to: Where you you get this 7 way nail buffer?
Someone out there should know----HELP.
Thanks, Tomi Jo
Tomi Jo  |  Wed Dec 31, 2008 at 4:33 PM
Hi Tomi,
I am sorry that we didn't answer this question right away. You can find that buffer everywhere. Pharmacy stores, Walmart....you name it, I saw it there. Just check the nail section.
Happy New Year
Beate  |  Wed Dec 31, 2008 at 4:52 PM
Oh I'm glad I found this while blog hopping and reading up on my new (on the way) purchase smile... I'm wondering what brand and name this file goes by so I can look for it. Thanks Sharon, you are full of such wonderful tips and help.
bluemoon  |  Thu Jan 1, 2009 at 12:32 AM
I have a buffer similar to this but MINE ISNT NUMBERED. Is side one the light blue or the darkest pink???

Please advise.
Thanks!
JenC  |  Wed Feb 4, 2009 at 11:54 AM
All these tutorials are so great! This one especially. I thought we would be stuck with the image we get with the stamps. Never thought to buff the rubber! This is great!

Can this process be used on stamps other than "JustRite"? I have some Stampin' Up stamps that I'd like to try that on - especially 2-step stamps.

I'd also like to know the answer to what JenC asked. Is side one the light blue or the darkest pink?

SCS and all of you are so wonderful! It's my favorite site!

Please advise.
Thanks
NuSu  |  Wed Mar 4, 2009 at 7:53 AM
I do a simplified version of this- I sand the stamps with Stampin"UP! sanding blocks and then clean with Stazon cleaner. That's it! I do this for all my stamps, solid and line image- it makes a much better impression.
Chris  |  Wed Mar 4, 2009 at 9:48 AM
Chris

Thanks so much. I really appreciate it!

Sue
NuSu  |  Wed Mar 4, 2009 at 10:26 AM
I just bought both the 7-way ($2.99) and the white sanding block at Walgreens ($.99).

I'm gonna try them tonight!.
NuSu  |  Wed Mar 4, 2009 at 3:07 PM
I stumbled across this post and boy, am I glad I did. After finally buying the Justrite Monogram stamp set and using your technique, I am fully satisified with the results.
Deb  |  Wed Mar 18, 2009 at 12:48 PM
Thank you for your info Chris... Can you help me? Do you start with the more COARSE buffer and move to the more FINE or go in reverse???
Jen  |  Thu Mar 19, 2009 at 12:26 PM
Jen, in response to your question above, Yes, I started with the more coarse sander, which was my white buffing block (from the fingernail section of Wal-Mart or any similar store or the sanding block made by SU, same thing) and I then moved to a finer grit file. And if you don't have the file like I did with all the different grit papers (also from Wal-Mart), that's OK. Just use what you have - the point is to first clean the rubber and then sand it until you get a good impression, and you CAN do that with whatever sanding blocks or files you have. Just sand a bit, test, and continue until you are happy with the resuts. Depending on the stamp, you may get a good impression after your first sanding!
Sharon (notimetostamp)  |  Sat Mar 21, 2009 at 2:53 AM

Page 1 of 3 pages  1 2 3 >

You need to be logged in to comment

GET OUR NEWSLETTER


Splitcoaststampers's privacy policy