Conditioning JustRite™ Stamps
by Sharon Johnson
With a little cleaning and sanding before stamping, the JustRite™ images will stamp much better.
Supplies
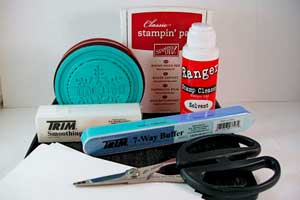
- Solid Image Stamp
- Sentiment Stamp/Center
- Dark Ink
- Solvent Cleaner
- Sanding or Smoothing Block
- 7 Way Nail Buffer
- White Paper
- Rubber Scissors
Step-by-Step
-
Step 1: Reverse Image Conditioning
Stamp an image and set aside for later comparison.

-
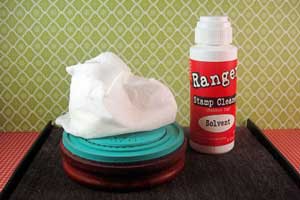
Step 2
Clean rubber well with a solvent based cleaner.
-
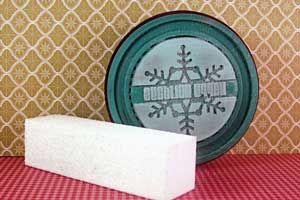
Step 3
Using the sanding/smoothing block, sand the rubber firmly, but gently, in both directions.
-
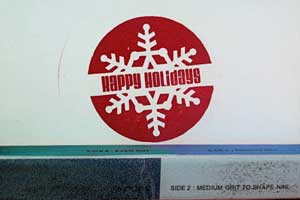
Step 4
Clean grit off stamp and stamp image again, comparing results to original stamped image. You should see a marked improvement from the previously stamped image.

-
Step 5
Clean stamp, sand with side #1 on the file, stamp image again, comparing results. You will again see a marked improvement.

-
Step 6
Repeat step 5, but using side #2 on the file. You will again see a marked improvement.
-
Step 7
Repeat again, using side #3 on the file. Results will vary with different images – keep sanding and checking until you get the desired result.
Note:
Different papers will give different results. Try smoother papers for clearer stamped images.
-
Step 8: Cutting your JustRite™ centers
JustRite™ centers can be used with or without the accompanying borders. When using them without the borders, ink has a tendency to build up on the rubber, creating unsightly markings on the stamped image. Cut away the unnecessary excess rubber to resolve this issue.
Here's the stamped center image stamped without the border.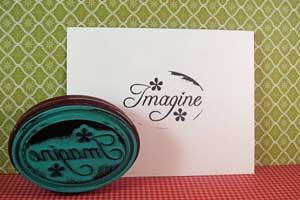
-
Step 9
Using scissors, cut off the excess rubber as shown in photo, resulting in a perfectly stamped image.
Note:
Even though the JustRite™ centers are made to snap into a circular or oval rubber stamper, many of them work equally as well when used in either rectangular or square shapes or when stamped directly to your card. By omitting the border from the stamper and using only the center, your options are greatly increased for many of your JustRite™ centers.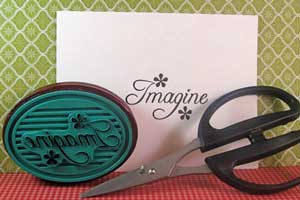
-
Step 10
Now your JustRite™ stamps are ready to create perfect images.
-

 *
*
Questions and Comments
We'd love to get your feedback or questions. Leave your comment below.
Thanks for the information will try with my stamps. My question is on the holiday card with embossed image. Where did you find it and who produces it?
thanks
Thanks.
Linda D.
You rock!
I was so frustrated with the set that I have I was ready to sell them. Maybe now they can stay with my other children (stamp sets). LOL
All the new sets from JustRite don't have to be conditioned before the first use. They stamp perfectly right from the beginning.
You sand the rubber of your stamp before you ink it up for the first time. It will give you a better stamped image.
This is only neccessary for the old JustRite stamps. The new release stamps don't have to be conditioned before stamping with them.
Thanks!!!!
Page 2 of 3 pages < 1 2 3 >