Wrinkle-Free Distress

by Sherry Cheever

Create gorgeous backgrounds in just a few minutes.

Supplies
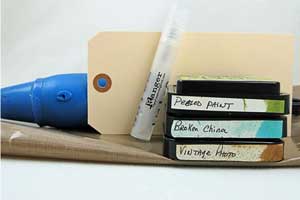
  • Non-Stick Craft Sheet or alternative

  • Three Different Colors Ranger™ Distress Inks

  • Water Mister

  • Heat/Embossing Tool

  • Shipping tag or cardstock


Step-by-Step

  1. Step 1

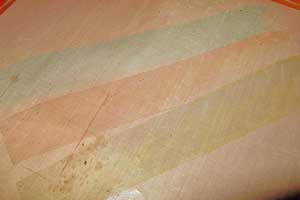
    Swipe the inks across the non-stick surface, by lying felt to surface and wipe across. Try not to overlay the inks, as this will contaminate the colors.
  2. Step 2

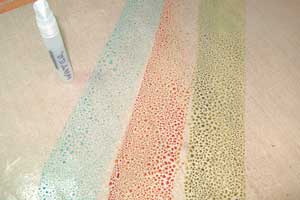
    Mist the inks with water until small beads form.
  3. Step 3

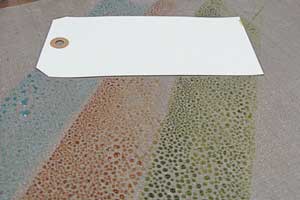
    Lay the paper into the watered ink to pick up color. It is not necessary to twist or turn the paper. Take paper out of ink.
  4. Step 4

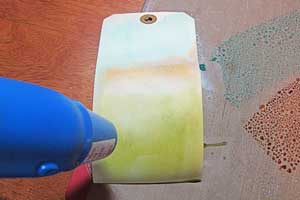
    Use heat/embossing tool to dry the paper. The paper may curl, but when dry will flatten out.
  5. Step 5

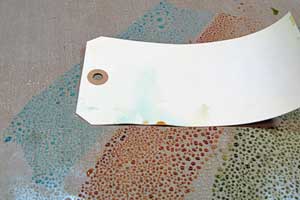
    Add more color to the paper by placing in ink again.
  6. Step 6

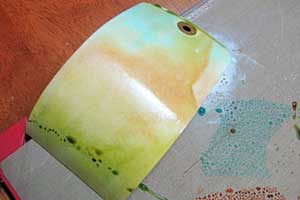
    Dry paper once again with heat tool.
  7. Step 7

    Repeat steps 3 and 4 until you have the desired level of color and layers. Remember to dry each layer before repeating.
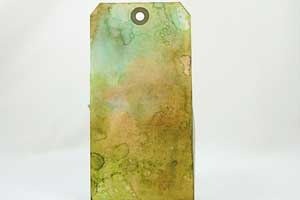
  8. Step 8

    Using the paper just made, complete card.

    Special thanks to Tim Holtz for allowing me to create this tutorial based on his technique.
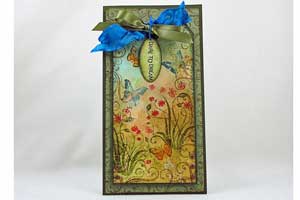
Your Turn

You've seen the tutorial, now you try it! We've got a section of the gallery set aside for Wrinkle-Free Distress. Try this technique, then upload your artwork to the gallery. Show us your creations!

***Please note - Internet Explorer/Edge is not a supported browser, and will not allow you to see the videos. Please use Chrome, Firefox or Safari to view our tutorial videos.

Questions and Comments

We'd love to get your feedback or questions. Leave your comment below.

Fantastic ...thanks
Roz Willoughby  |  Wed May 20, 2009 at 10:55 PM
Thanks for bringing wrinkle free to SCS, Sherry!

I use heavy-weight non-stick foil for my non-stick surface. You can wipe it down and reuse it but once it starts to get a bit tatty you can junk it and tear a new piece off the roll. The non-stick craft mats are a bit pricey and I find the foil does the job just great - just check out the aisle with the Saran wrap, wax paper etc.
Angelnorth  |  Thu May 21, 2009 at 3:03 AM
The tutorial mentions felt in step 1, but not mentioned in materials needed. What kind of felt and how used?
Clozelle Harris  |  Thu May 21, 2009 at 5:38 AM
Have you tried this using perfect pearls in your mister water? It sounds pretty, but do you think it would work?
ragdoll  |  Thu May 21, 2009 at 5:39 AM
Sounds like a great idea! I just started carding and scrapping and I find I don't know much. What is a non-stick craft sheet? and can I get it at Wal-Mart, my main place to get supplies.
Judi Beran  |  Thu May 21, 2009 at 7:01 AM
Betty you are welcome to try, but my experience with alcohol inks tell me that they might muddy in color and you won't get the layers that you do with this technique. The best part of this technique, is that you can achieve many different looks with water.
Sherry Cheever  |  Thu May 21, 2009 at 7:02 AM
Clozene, what the felt means is the felt of the stamp pad. Sorry about the confusion.
Sherry Cheever  |  Thu May 21, 2009 at 7:03 AM
Ragdoll I'm sure the perfect pearls would be beautiful. I typically mist the perfect pearls on my finished piece for a light touch of shimmer.
Sherry Cheever  |  Thu May 21, 2009 at 7:04 AM
Judi I don't know about Walmart. You can substitute heavy weight aluminum foil instead.
Sherry Cheever  |  Thu May 21, 2009 at 7:05 AM
Is the beautiful bird and folliage stamp from Tim Holz? I love this image!!


Thanks!
Patricia  |  Thu May 21, 2009 at 7:33 AM
Stunning card and technique! I'm anxious to try it! Thanks for sharing this terrific tutorial!
Vina  |  Thu May 21, 2009 at 7:46 AM
Patricia the stamps are from Rubbernecker.
Sherry Cheever  |  Thu May 21, 2009 at 8:33 AM
Judi, Ranger carries a craft sheet and there is one that you can google called Splat Mat. I forget who makes that one. These are really neat, all of your ink messes, etc. can be wiped off with no problem.
Patricia  |  Thu May 21, 2009 at 8:56 AM
I absolutely LOVE this card. The non-stick craft sheet is a heat resistant sheet treated with teflon. I don't know the brand....I got one years ago but allows you to use your heat gun without scorching or burning what is underneath.... like your table top : )
Peggy  |  Thu May 21, 2009 at 9:13 AM
I love your tag! It's realy gorgeous! I have looked around before for the craft sheet. Does anyone know who sells it-online? Also, what did you use for your image? I'd Love to know!
Ai Keller  |  Thu May 21, 2009 at 9:31 AM
Ai, the images are from Rubbernecker Stamps and you can get the craft sheet there too.
Sherry Cheever  |  Thu May 21, 2009 at 9:37 AM
Sherry! This is stunning and such a thrill to see. I think I'm going to try it tonight along with the WT challenge. Gorgeosu work, girlie! Just the perfect Sherry piece of art.
Kittie  |  Thu May 21, 2009 at 12:36 PM
I use the celophane or plastic that my craft products come wrapped in. You know like your stickers and paper and the like. It is a great way to use what you have and then just pitch it in the trash when you are done.
Pam  |  Thu May 21, 2009 at 6:10 PM
***so simple and yet such a great effect on the tag. You gotta LOVE it! Now I need to try it! Thanks!
Debbie  |  Thu May 21, 2009 at 6:51 PM
. I have taught this techniques as a class, and it worked beautifully with acetate or off-cuts from laminating sheets to swipe my ink onto.
loobylou  |  Fri May 22, 2009 at 2:29 AM

Page 2 of 4 pages  <  1 2 3 4 >

You need to be logged in to comment

GET OUR NEWSLETTER


Splitcoaststampers's privacy policy