Wrinkle-Free Distress
by Sherry Cheever
Create gorgeous backgrounds in just a few minutes.
Supplies
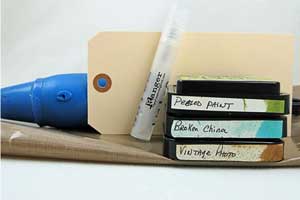
- Non-Stick Craft Sheet or alternative
- Three Different Colors Ranger™ Distress Inks
- Water Mister
- Heat/Embossing Tool
- Shipping tag or cardstock
Step-by-Step
-
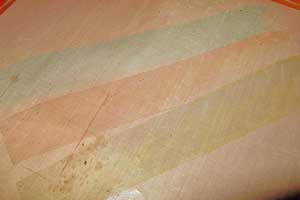
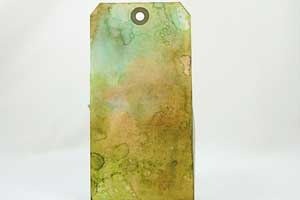
Step 1
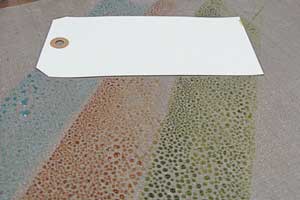
Swipe the inks across the non-stick surface, by lying felt to surface and wipe across. Try not to overlay the inks, as this will contaminate the colors.
-
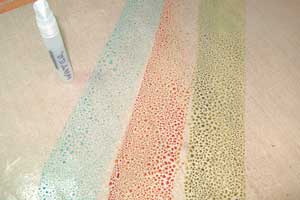
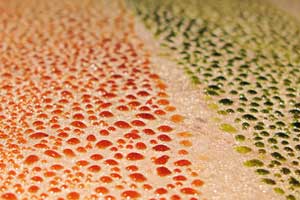
Step 2
Mist the inks with water until small beads form.
-
-
Step 3
Lay the paper into the watered ink to pick up color. It is not necessary to twist or turn the paper. Take paper out of ink.
-
Step 4
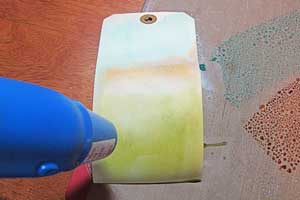
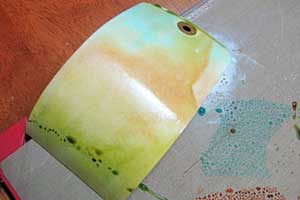
Use heat/embossing tool to dry the paper. The paper may curl, but when dry will flatten out.
-
Step 5
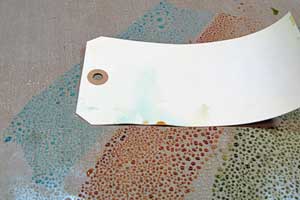
Add more color to the paper by placing in ink again.
-
Step 6
Dry paper once again with heat tool.
-
Step 7
Repeat steps 3 and 4 until you have the desired level of color and layers. Remember to dry each layer before repeating.
-
Step 8
Using the paper just made, complete card.
Special thanks to Tim Holtz for allowing me to create this tutorial based on his technique.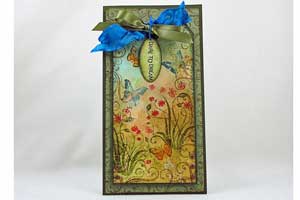
Your Turn
You've seen the tutorial, now you try it! We've got a section of the gallery set aside for Wrinkle-Free Distress. Try this technique, then upload your artwork to the gallery. Show us your creations!
***Please note - Internet Explorer/Edge is not a supported browser, and will not allow you to see the videos. Please use Chrome, Firefox or Safari to view our tutorial videos.

Questions and Comments
We'd love to get your feedback or questions. Leave your comment below.
Thanks
Gorgeous card! Another technique on my list and in my card making "arsenal" (LOL) I can't wait to get some misters so I can experiment.
Peg
What a great technique! Thanks for linking this tutorial to your Spellbinders posting today!
Eveline.
I am currently trying to "play" with my Perfect Pearls. Did I read correctly to add some Perfect Pearls to a mister?
Hugs!
Page 3 of 4 pages < 1 2 3 4 >