Watering Can
by Helen Orr
Fashion a watering can from patterned paper and fill with goodies.
Supplies

- Patterned Paper, at least 8 1/2" x 11"
- Cutting Mat
- Craft Knife and Scissors
- Steel Ruler for cutting edge
- Scoring Tool
- Glue or Double-sided Adhesive
- Embellishments
Step-by-Step
-
Step 1
Print the template on patterned paper and cut out the four pieces: watering can body, spout, curved handle and back handle.
Watering Can Template (Updated template without text. Thanks, Helen!)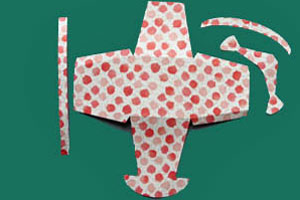
-
Step 2
Working on the "wrong" side of the paper, score and valley fold the dashed red lines on the main watering can body.
-
Step 3
Apply adhesive (glue or double-sided sticky tape) to the folds on the "right" side of the paper.
-
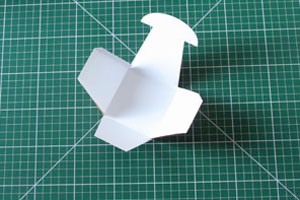
Step 4
Bring sides together to form the can body.

-
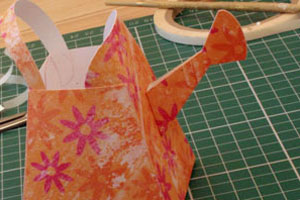
Step 5
Curve the front flaps and tuck into the sides of the watering can using a dab of glue or other fixative to keep in place.
-
Step 6
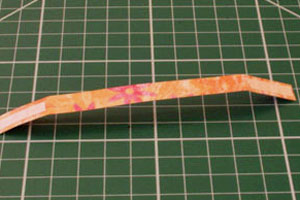
Take the spout and fold with "wrong" sides turned to the inside as indicated by the red dashed lines in the template.
-
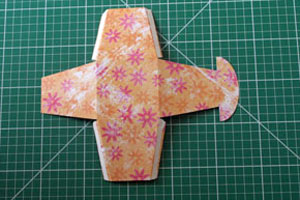
Step 7
Apply a dab of glue to the end of the spout's inner sides to fix them together.
Apply a strip of double-sided sticky tape to the base of the spout and affix to the front of the watering can body.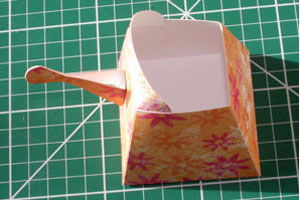
-
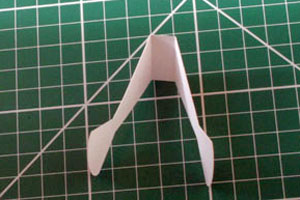
Step 8
Attach the curved top handle by placing a dab of glue on each end (right side up) and tucking inside the top of the can, ensuring that the handle curves to the back.
-
Step 9
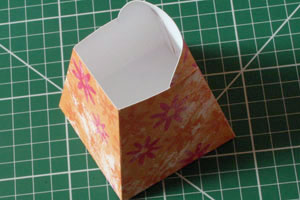
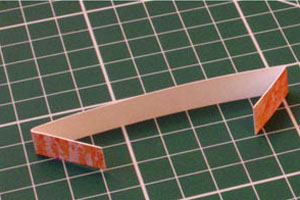
Fold the handle for the back on the dashed red lines as indicated in the template.
-
Step 10
Apply glue or sticky tape to the right side of the folded ends.
-
Step 11
Glue to the back of the can to form a ‘D’ shape.
-
Step 12
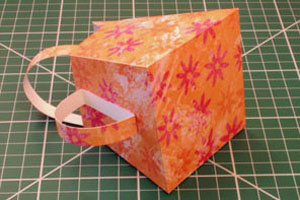
Your watering can is now complete and ready to be decorated as you wish!

-
Decorated watering can.

Video!
Your Turn
You've seen the tutorial, now you try it! We've got a section of the gallery set aside for Watering Can. Try this technique, then upload your artwork to the gallery. Show us your creations!
***Please note - Internet Explorer/Edge is not a supported browser, and will not allow you to see the videos. Please use Chrome, Firefox or Safari to view our tutorial videos.

 *
*
Questions and Comments
We'd love to get your feedback or questions. Leave your comment below.
Thank you so much.
http://www.stampo.com/miracle.html
The link has ideas for other projects using this tape.
Thank you (=
~Ceceilia
Thank you, this is a great activity!
~Ceceilia
Thanks, Have a nice day.
I just want to thank you for a beautiful idea and a great tutorial. I got inspired to make a kettle for my daughter for Halloween. I used your tutorial (changed it a little bit to make it look more lika a kettle) and the fake metal technique.
You'll find a few pictures at http://elsalster.blogspot.com/2011/11/bus-eller-godis.html
Thanks
Kari
We had too many complaints about the lines and writing on the original file. Helli was kind enough to create a template without all that. Unfortunately I can't find the template with the score lines anymore.
Figuring out where to score is pretty easy though. You score between the glue tab notches that you can see on the main watering can and then parallel to them to create the glue tabs and sides.
approximately how big is the watering can when its done? how thick should the cardstock be? i am not sure on the thickness.
I am quite relieved about my sons' school project.
Page 3 of 4 pages < 1 2 3 4 >