Watering Can
by Helen Orr
Fashion a watering can from patterned paper and fill with goodies.
Supplies

- Patterned Paper, at least 8 1/2" x 11"
- Cutting Mat
- Craft Knife and Scissors
- Steel Ruler for cutting edge
- Scoring Tool
- Glue or Double-sided Adhesive
- Embellishments
Step-by-Step
-
Step 1
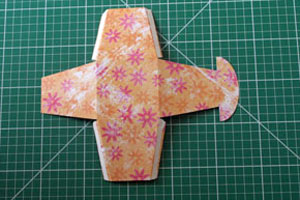
Print the template on patterned paper and cut out the four pieces: watering can body, spout, curved handle and back handle.
Watering Can Template (Updated template without text. Thanks, Helen!)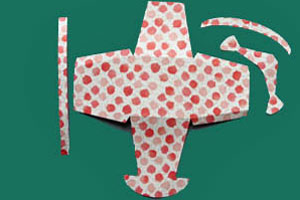
-
Step 2
Working on the "wrong" side of the paper, score and valley fold the dashed red lines on the main watering can body.
-
Step 3
Apply adhesive (glue or double-sided sticky tape) to the folds on the "right" side of the paper.
-
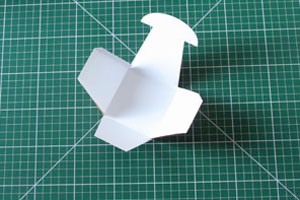
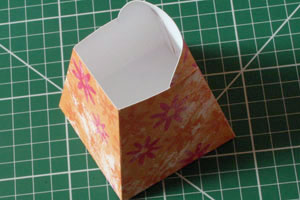
Step 4
Bring sides together to form the can body.

-
Step 5
Curve the front flaps and tuck into the sides of the watering can using a dab of glue or other fixative to keep in place.
-
Step 6
Take the spout and fold with "wrong" sides turned to the inside as indicated by the red dashed lines in the template.
-
Step 7
Apply a dab of glue to the end of the spout's inner sides to fix them together.
Apply a strip of double-sided sticky tape to the base of the spout and affix to the front of the watering can body.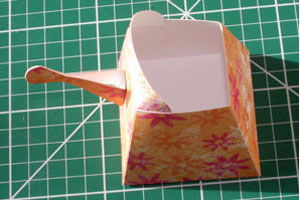
-
Step 8
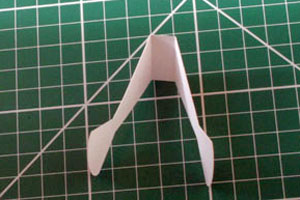
Attach the curved top handle by placing a dab of glue on each end (right side up) and tucking inside the top of the can, ensuring that the handle curves to the back.
-
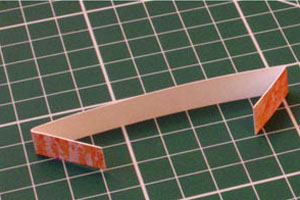
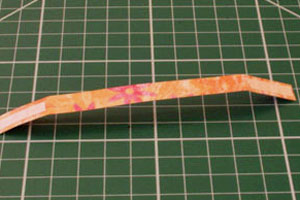
Step 9
Fold the handle for the back on the dashed red lines as indicated in the template.
-
Step 10
Apply glue or sticky tape to the right side of the folded ends.
-
Step 11
Glue to the back of the can to form a ‘D’ shape.
-
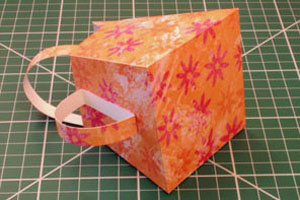
Step 12
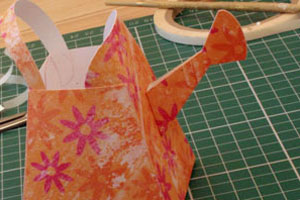
Your watering can is now complete and ready to be decorated as you wish!

-
Decorated watering can.

Video!
Your Turn
You've seen the tutorial, now you try it! We've got a section of the gallery set aside for Watering Can. Try this technique, then upload your artwork to the gallery. Show us your creations!
***Please note - Internet Explorer/Edge is not a supported browser, and will not allow you to see the videos. Please use Chrome, Firefox or Safari to view our tutorial videos.

 *
*
Questions and Comments
We'd love to get your feedback or questions. Leave your comment below.
Thx so much. I love your weekly emalis...
Thanks so much!!
This is my can
http://tesapysslar.blogg.se/2009/july/blomma-vattenkanna.html#comment
When you print up the template it has the handle attachment written on the actual handle that you will cut out.
How can i remove the words as they show on the first one i made? Melissa
When you don't want the wording to show, print out one template and use it as a template. Cut your template out and then place it over the patterned paper/cardstock you want to use. Trace around your template and cut out. This way your patterned paper/cardstock won't have any printing on it.
Hugs and smiles
Kris
Page 2 of 4 pages < 1 2 3 4 >