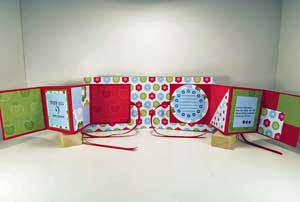
Pull-Out Scrapbook

by Corinne Somerville

Make this cute little book to show off your photos.

Supplies
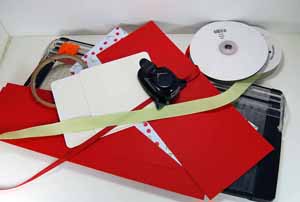
  • Two 4” x 4” chipboard coasters

  • One 4” x 10” piece of card stock for the front book cover

  • One 4” x 10” piece of coordinating patterned paper for the inside of the book cover

  • Two 3” x 12” pieces of cardstock

  • Three pieces of ribbon – 18” each piece

  • Extra sticky adhesive

  • Paper cutter

  • Scoring tool

  • Grid paper (optional but helpful)

  • 3/16” corner rounder

Step-by-Step

  1. Step 1

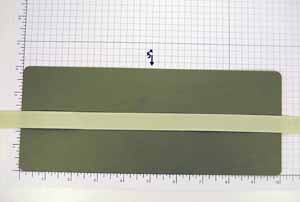
    Use the 3/16” corner rounder to round all four corners of two pieces of 4” x 10” pieces of paper.

    Run a strip of tape lengthwise through the center of the plain 4” x 10” piece of card stock and adhere one of the lengths of ribbon to the tape.
  2. Step 2

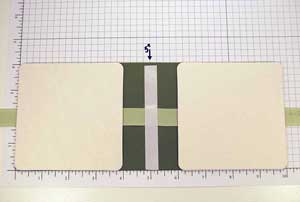
    Adhere two chipboard coasters onto the outer edges of the prepared piece from Step 1.
    Apply adhesive between the two coasters so that the patterned paper will be adhered along the spine of the book.
  3. Step 3

    To create the inside cover of the book, adhere second piece of 4” x 10” piece of patterned paper on top of the coasters.
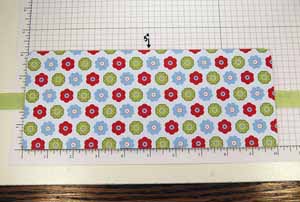
  4. Step 4

    Score both pieces of 3” x 12” card stock at 3”, 6” & 9”.

    Adhere the two remaining pieces of ribbon in center of the farthest right hand panel of the 3” x 12” card stock.
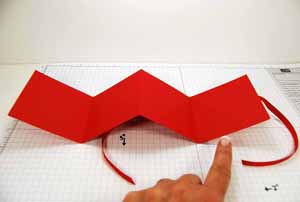
  5. Step 5

    Adhere one of the 3” x 12” pieces of card stock to each side of the inside cover to create the “pull out” sleeves of the project.
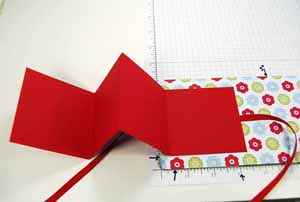
  6. Step 6

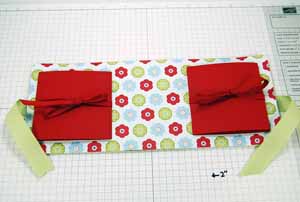
    When both pull out sleeves are taped down, it will look like this.
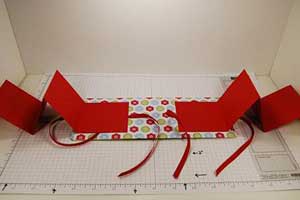
  7. Step 7

    This is what the inside of the book will look like when the ribbons have been tied.
  8. Step 8

    Decorate the inside pages.

  9. Step 9

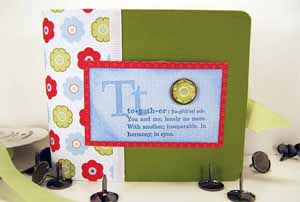
    Decorate the front of your scrapbook.
Your Turn

You've seen the tutorial, now you try it! We've got a section of the gallery set aside for Pull-Out Scrapbook. Try this technique, then upload your artwork to the gallery. Show us your creations!

***Please note - Internet Explorer/Edge is not a supported browser, and will not allow you to see the videos. Please use Chrome, Firefox or Safari to view our tutorial videos.

Questions and Comments

We'd love to get your feedback or questions. Leave your comment below.

Verdaderamente precioso, intentaré hacerlo a ver si me sale, gracias por compartir.
Monika  |  Thu Jun 19, 2008 at 1:03 PM
Corrine,
What a great album, this will make a great gift for people at Christmas with some pics and journalling about what our family has been doing through the year. Thanks. Great work.

God Bless you and your family
Kimberly  |  Thu Jun 19, 2008 at 3:35 PM
Woohooo. I love this tutorial. Great job. TFS. You are an awesome stamper. I love all that you create. TFS
Dawn B  |  Fri Jun 20, 2008 at 5:52 AM
I just wanted to thank everyone for their wonderful and kind words about this tutorial (I wish I could come through the monitor and hug you all !!!)....also a huge thank you to the Splitcoast Family (especially Beate) for giving me the priviledge of sharing what I love. Have a fantastic weekend !!!!
Corinne (aka Roxy)  |  Fri Jun 20, 2008 at 5:56 AM
THIS IS SOOOO COOOOL!
Salima  |  Fri Jun 20, 2008 at 11:54 AM
Great little gift, I found the coasters in Targets $1.00 bins!
Cindy D  |  Fri Jun 20, 2008 at 2:15 PM
So cute! I will have to try this.
Tamera  |  Sat Jun 21, 2008 at 5:26 AM
Wonderful idea! I am wanting to make one of these little cuties right away. Thanks so much for the inspiration. smile
julie kos  |  Sun Jun 22, 2008 at 3:56 AM
I absolutley love this tutorial!! My daughter and I are going to do it as a craft for her birthday party.
Loey H.  |  Mon Jun 23, 2008 at 4:19 PM
This looks wonderful - I think I'm gonna have to take some time out of my busy day to make one of these awesome little scrapbooks!!!
It looks actually pretty easy to do - TFS!!!
Silke Ledlow  |  Mon Jun 23, 2008 at 5:25 PM
You can also use squares of heavy chipboard or two thinner ones glued together if you don't have the coasters. Think of the chipboard on the back of a legal pad, or that some papers come packaged in. Or ask your LSS for some of those cardboard 12x12s that they often give away for free. Just round the corners or leave them square.
stampylisa  |  Wed Jun 25, 2008 at 7:18 AM
Fabulous project and tutorial!! Thanks for sharing!
joyk  |  Sun Jun 29, 2008 at 4:04 AM
I found 3 1/2 in coasters in the $1 section at Target. There are 20 coasters for 25 cents since they are 75% off! I picked up the last 3 packages at my Target yesterday after i ordered 40 off Ebay! LOL Oh well! Now I have TONS! Gonna make some great Christmas presents!
Julz  |  Fri Jul 4, 2008 at 6:04 AM
Patty,
Thanks so much for all you do and the tutorials you provide.
I'm very excited to do the Double Pull-out book.
You are great!
Peg Smith  |  Sat Jul 5, 2008 at 10:04 AM
Thank you for your kind words, Peg !!! You're so sweet !!!
Corinne (aka Roxy)  |  Sat Jul 5, 2008 at 4:23 PM
Corinne,
(My Turn)
I made my version of your Pull-Out Scrapbook. I tried to put it on the Gallery, but I couldn't get it to come up.
Michelle  |  Sat Jul 5, 2008 at 6:24 PM
I tried to post my "Your Turn" attempt, but I couldn't get it to work.
Michelle  |  Wed Jul 9, 2008 at 6:41 AM
Hi Michelle smile You can try and upload the usual way and when you select where it should go just go through the selections and there's an option called "pull out scrapbooks". Hope that's helpful.
Corinne (aka Roxy)  |  Thu Jul 10, 2008 at 3:37 AM
I just finished making one of these. The only problem I found is the ribbon that ties the book together should be a little bit longer, unless I did something wrong. Love it.

linda
Linda Duensing  |  Mon Jul 28, 2008 at 2:09 PM
I tried using my corner rounder to round the corners of chipboard, but it doesn't work. Can anyone tell me what they use to round the corners.

Thanks.

Linda
Linda Duensing  |  Mon Jul 28, 2008 at 2:12 PM

Page 3 of 4 pages  <  1 2 3 4 >

Commenting is not available in this weblog entry.

GET OUR NEWSLETTER


Splitcoaststampers's privacy policy