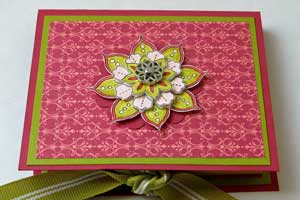
Paper Post-It™ Note Holder

by Makeesha Byl

Create an adorable little cover for your Post-It™ Note holders in no time at all.

Supplies
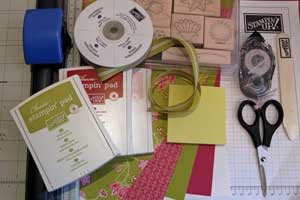
  • Paper trimmer
  • One 4" x 7" piece of cardstock
  • Three 3 ¾" x 3" pieces of cardstock
  • Three 2 ¾ " x 3 ½" pieces of patterned paper
  • One ¼" x 1" piece of cardstock
  • Two 5" lengths of ribbon
  • One small pencil
  • Post-It™ notes
  • Sticky Strip™ or other strong adhesive
  • Bone folder
  • Scissors
  • Stamps, ink, embellishment for decorating

Step-by-Step

  1. Step 1

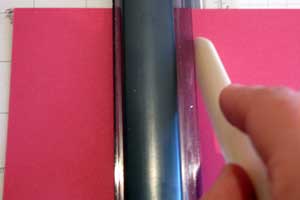
    Score the 4" x 7" cardstock across the wide side, 3 ¼" from either end.
  2. Step 2

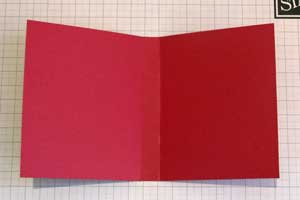
    Fold cardstock along the score lines to create a ½" spine in the center.
  3. Step 3

    Mat all 2 ¾" x 3 ½" pieces of patterned paper by adhering to the 3" x 3 3/4" cardstock pieces.

  4. Step 4

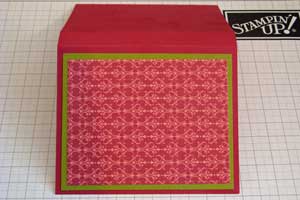
    Adhere one of the matted pieces onto the outside front of the holder.
  5. Step 5

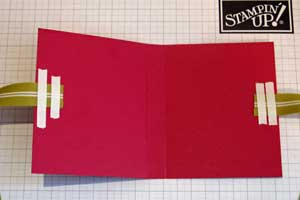
    Center two pieces of ribbon inside the holder as shown and adhere with Sticky Strip™.
  6. Step 6

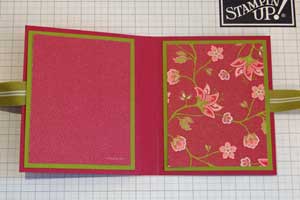
    Adhere the other two pieces of layered cardstock over the center panels to cover ribbon ends.
  7. Step 7

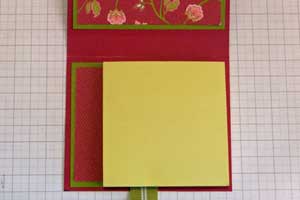
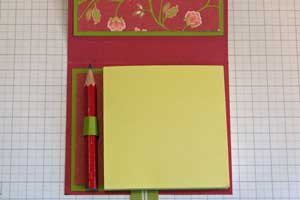
    Remove backing from Post-It™ note stack and adhere to the bottom right side of the holder.
  8. Step 8

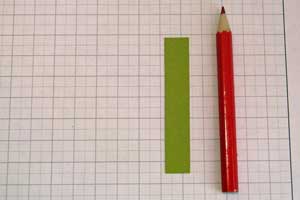
    Take the ¼" x 1" piece of cardstock and wrap it around your small pencil to create a loop.

    Adhere ends together.
  9. Adhere the cardstock loop at the base of your holder as shown.
  10. Step 9

    Close the top, and tie off with the ribbon

  11. Step 10

    Decorate the top.

Your Turn

You've seen the tutorial, now you try it! We've got a section of the gallery set aside for Paper Post-It™ Note Holder. Try this technique, then upload your artwork to the gallery. Show us your creations!

***Please note - Internet Explorer/Edge is not a supported browser, and will not allow you to see the videos. Please use Chrome, Firefox or Safari to view our tutorial videos.

Questions and Comments

We'd love to get your feedback or questions. Leave your comment below.

OH Beate! This was a fab tut! I put one together this afternoon and I am sooo pleased with it! You can see it on my blog here:
A Little Note
Thanks Ever So Much! I love what you do!
Betty aka ZacksNana  |  Mon Apr 13, 2009 at 1:06 PM
Sorry I gave credit to the wrong person. Keesha!! Thanks for a fab tut!!!
Betty aka ZacksNana  |  Mon Apr 13, 2009 at 1:08 PM
Cute note holder. Like the idea of having a pencil with it. I will make one of these!
Diane  |  Mon Apr 13, 2009 at 4:20 PM
Hey Keesh
it's beautiful, good work, I'm off to do one tonight! smile
I'm so glad you were asked to do the tutorial - Go Aussie Go!!
x Julia
Julia Lim  |  Wed Apr 15, 2009 at 4:24 PM
Makeesha, brilliant as usual. That's why I love your Monday It Monday blogs, in addition to all your other beautiful creations!
Stephanie P.  |  Wed Apr 15, 2009 at 10:09 PM
Love this post it holder! How did you do the flower? It's beautiful. Thanks for sharing
Sue N  |  Sat Apr 18, 2009 at 6:59 AM
Hi,
I would like to thank you for this easy to follow tutorial. I have made already 2 and more are to follow.
Hugs,
Jogry
jogry  |  Mon Apr 20, 2009 at 7:42 PM
Thanks so much for this wonderful, easy to follow tutorial. I have made already 3 booklets and more to follow.
jogry  |  Mon Apr 20, 2009 at 7:43 PM
You go Keesh! Congrats on the post. Now the "world" will know how fabo you are!
Megan Hayes  |  Mon Jun 1, 2009 at 4:18 PM
I love this tutorial but would like to know how you made the flower decoration on top. That really made it.
Lura Wadman  |  Wed Jul 8, 2009 at 8:01 AM
This will be a perfect gift for interpreters who volunteer to intepret at church.

Christine
Christine  |  Sat Oct 17, 2009 at 3:48 PM
Beautiful project - any ideas to make this for men
Carol W  |  Sun Nov 8, 2009 at 11:01 AM
Thank you so much for sharing, this is the first one i've made but there will definitely be morew. luv gina xx
georgina  |  Wed May 12, 2010 at 3:55 AM
Thank you for the great tutorial and the brilliant idea. That make a perfect present for my son's nursery teachers, as he is going to P1 in august, and i wanted to give them something small.
Nana  |  Thu Jun 10, 2010 at 8:09 PM
Fabulous tutorial thank you for sharing,i have made one but adjusted to fit my post its. thanks again luv gina xx
georgina  |  Wed Jan 19, 2011 at 4:35 PM
Thanks so much for this fabulous tutorial:) I had so much fun creating this Post-It-Note Holder for Mother's Day pressies!! I'm just a newbie to uploading to Splitcoaststampers and will try to upload my creation to the gallery soon:)
Sandy Beaches  |  Tue May 8, 2012 at 7:57 AM

Page 3 of 3 pages  <  1 2 3

You need to be logged in to comment

GET OUR NEWSLETTER


Splitcoaststampers's privacy policy