Paper Post-It™ Note Holder
by Makeesha Byl
Create an adorable little cover for your Post-It™ Note holders in no time at all.
Supplies
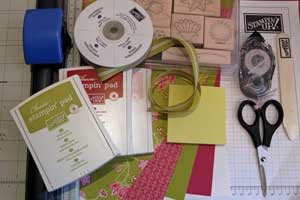
- Paper trimmer
- One 4" x 7" piece of cardstock
- Three 3 ¾" x 3" pieces of cardstock
- Three 2 ¾ " x 3 ½" pieces of patterned paper
- One ¼" x 1" piece of cardstock
- Two 5" lengths of ribbon
- One small pencil
- Post-It™ notes
- Sticky Strip™ or other strong adhesive
- Bone folder
- Scissors
- Stamps, ink, embellishment for decorating
Step-by-Step
-
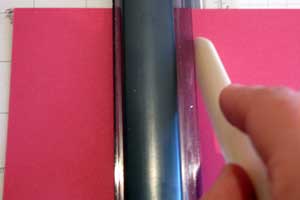
Step 1
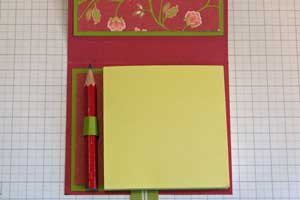
Score the 4" x 7" cardstock across the wide side, 3 ¼" from either end.
-
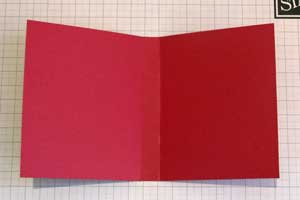
Step 2
Fold cardstock along the score lines to create a ½" spine in the center.
-
Step 3
Mat all 2 ¾" x 3 ½" pieces of patterned paper by adhering to the 3" x 3 3/4" cardstock pieces.

-
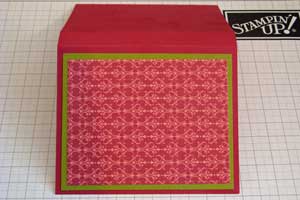
Step 4
Adhere one of the matted pieces onto the outside front of the holder.
-
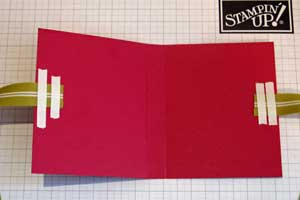
Step 5
Center two pieces of ribbon inside the holder as shown and adhere with Sticky Strip™.
-
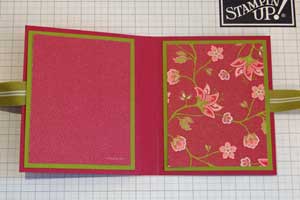
Step 6
Adhere the other two pieces of layered cardstock over the center panels to cover ribbon ends.
-
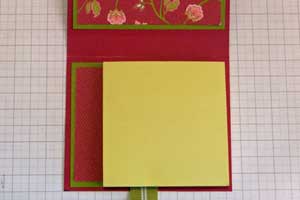
Step 7
Remove backing from Post-It™ note stack and adhere to the bottom right side of the holder.
-
Step 8
Take the ¼" x 1" piece of cardstock and wrap it around your small pencil to create a loop.
Adhere ends together.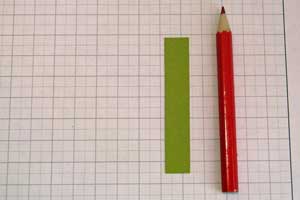
-
Adhere the cardstock loop at the base of your holder as shown.
-
Step 9
Close the top, and tie off with the ribbon

-
Step 10
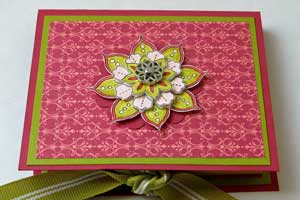
Decorate the top.
Your Turn
You've seen the tutorial, now you try it! We've got a section of the gallery set aside for Paper Post-It™ Note Holder. Try this technique, then upload your artwork to the gallery. Show us your creations!
***Please note - Internet Explorer/Edge is not a supported browser, and will not allow you to see the videos. Please use Chrome, Firefox or Safari to view our tutorial videos.

Questions and Comments
We'd love to get your feedback or questions. Leave your comment below.
Now for the products used on this projects, I have used the Playful petals stamp set from Stampin'Up, which I have stamped the flower three times, and cut out three different layers, with each of them coloured differently.
The embellishment is the Filligree, designer brads from Stampin'Up!
The DSP is the Raspberry Tart DSP, also from Stampin'Up, which I have mounted onto Rose red, and Kiwi kiss cardstock, finishing it of with some Kiwi kiss striped ribbon.
Lastly the pencils are ordinary pencils that I bought a large box, then have but them in half through a ban saw.....thanks to hubby!
Please feel free to ask further questions if you need to.
Keesh x
Love splitcoaststampers even more.
instructions. i have been wanting to make these cute holders for a while now and never knew how. love the colors and your work!
Thanks so much Hugs =)
SCS is the BOMB !! over a year ago i first tried it. my SU demo who offered classes in our mobile park told me to ck it out.......now, i
just signed up as a demo last month.
STAMPIN UP is the DOUBLE BOMB !!!!
Now with this tutorial I've really got to give this project a try.
Page 2 of 3 pages < 1 2 3 >