Paper Beads

by Patty Bombyk

Create decorative beads out of paper and clear glaze.

Supplies
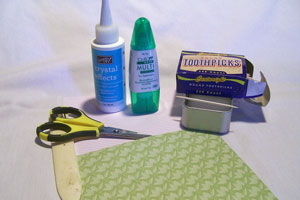
  • Patterned paper
  • Toothpick
  • Scissors or paper trimmer
  • Bone folder
  • Glue
  • Diamond Glaze, Glossy Accents or Crystal Effects

Step-by-Step

  1. Step 1

    Cut your patterned paper into 1/2" x 4" strips.
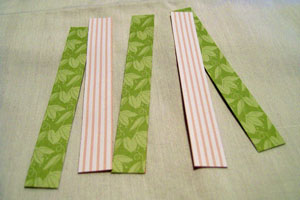
  2. Step 2

    Burnish the paper strips using your bone folder. This will help as you begin to wrap your beads.

  3. Step 3

    Apply a thin strip of glue on one end of the paper strip.

    Hint:

    You don’t need a lot of glue, but don’t skimp either, a thin line of glue on the last two inches should do.
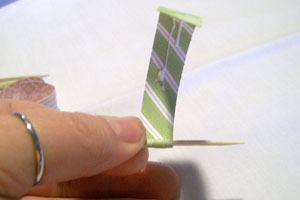
  4. Step 4

    Beginning with the end with no glue, start wrapping the patterned paper tightly around the toothpick. The glue will ooze out as you get to that end, just wipe off excess glue.

    Hint:

    You may want to keep wet wipe next to you to wipe any excess glue off your fingers.
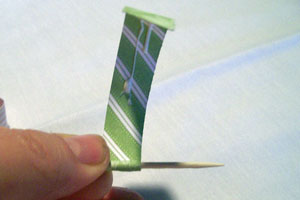
  5. Step 5

    Place toothpick across a narrow container or poke the toothpick into a piece of Styrofoam.

  6. Continue rolling beads until you have the number you want.

  7. Step 6

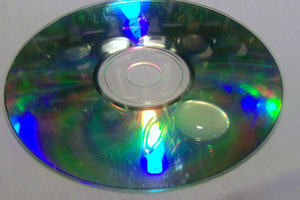
    Place a quarter size dollop of Diamond Glaze onto a disposal plastic palette (an old CD or plastic lid works great).
  8. Step 7

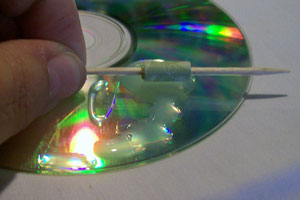
    Carefully roll the bead into the diamond glaze to coat, being careful not to get any onto your toothpick.

    Hint:
    You can get really creative now, try wrapping metallic string/embroidery floss, sprinkling glitter, mini confetti, etc, on while the diamond glaze is still wet to give the beads some texture or added dimension.
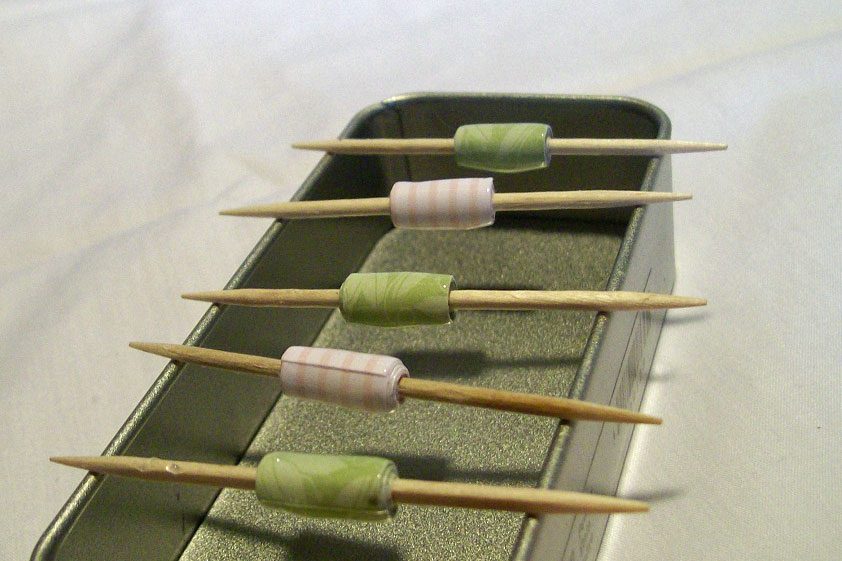
  9. Once you have all your beads rolled allow them to dry. Do not attempt to heat the glaze - heat can cloud the glaze.
  10. Step 8

    Once the beads are completely dry, carefully slide them off the toothpicks.

  11. Step 9

    String your beads as you wish.

  12. Step 10

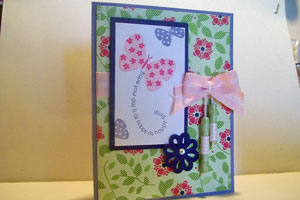
    Use beads as a decorative element on your project.
Video!

Variations

  1. Different look
    Cut patterned paper into triangles 4" long by 1" across at the widest edge.

  2. Roll as stated in steps 2 – 10 above starting with the one inch edge. This will create long tapered beads.

Your Turn

You've seen the tutorial, now you try it! We've got a section of the gallery set aside for Paper Beads. Try this technique, then upload your artwork to the gallery. Show us your creations!

***Please note - Internet Explorer/Edge is not a supported browser, and will not allow you to see the videos. Please use Chrome, Firefox or Safari to view our tutorial videos.

Questions and Comments

We'd love to get your feedback or questions. Leave your comment below.

I love these beads, they look like real beads.
Thank You
Diana
Diana laabs  |  Wed Jul 27, 2011 at 5:02 AM
What a wonderful tutorial! Now I know why I have been saving all those scraps!
Judy Rozema  |  Wed Jul 27, 2011 at 5:44 AM
Gotta practice making paper beads so that when my granddaughter is a little older, we can make them together! Love your use of old old cds for palettes. Fantastic recycle/reuse!
PmintPat  |  Wed Jul 27, 2011 at 6:15 AM
That is crazy fun! Must try that out this week!
Kim  |  Wed Jul 27, 2011 at 7:01 AM
Great tutorial! One other option is to cut drinking straws and wrap beads around them. You don't have to remove the straw, making threading the beads very easy. Thanks for sharing! <3
Marci  |  Wed Jul 27, 2011 at 7:14 AM
LOL...For some reason when I saw "paper beads" wadded up paper spitballs coated with Crystal Effects came to mind. SO glad I read your tutorial Patty. What a neat concept. Now we can have beads to match ANY project!
jacqueline  |  Wed Jul 27, 2011 at 7:32 AM
You can also do the same thing by using melted Utee and putting the rolled up paper in there, remove and let dry. No need for the tooth pick.

Patti
Patti  |  Wed Jul 27, 2011 at 7:44 AM
In the 1930's, my mother made a doorway hanging out of rose-patterned wallpaper beads (triangle shape) and real round beads. It hung in the doorway between our kitchen and living room. She had it tied back at one side. I always loved it.
Vira
Vira  |  Wed Jul 27, 2011 at 7:53 AM
I love this project! Who makes the Diamond Glaze?
Rebecca Ruediger  |  Wed Jul 27, 2011 at 8:02 AM
These look like lots of fun to make, like the idea of using a straw in the middle too. Will be a great project to do with the grandkids. TFS
craftydscreations  |  Wed Jul 27, 2011 at 8:42 AM
When I work with children making paper beads, I think it is easiest to have the kids glue the paper directly on a straw - several beads can be made on one starw. I leave the straw as support and cut the beads apart.

Using thin paper is easiest to work with - magazine, wrapping paper, newspaper ads.

My 4 year old granddaughter makes paper beads, anyone can do it with a little practice.
Charlene  |  Wed Jul 27, 2011 at 8:51 AM
what a great turorial. I too will try this with my grandchildren this week end Just so happens they are staying with me thur fri sat ans sun so this will give us some thing to do for one day any way. Thanks again
Darlene Kinnear  |  Wed Jul 27, 2011 at 8:54 AM
I make these with my quilling tool...easy as pie! Great card....paper beads can be so elegant especially covered in paper glaze...people don't believe me when I tell them....that's "paper"! smile

Great tutorial...
Susanne  |  Wed Jul 27, 2011 at 9:02 AM
These beads are so fun to make. I sometimes just cut copy paper and stamp and color the last 2 inches (that's all that's going to show anyway). The clear glaze really helps to encourage the bead-look. What really gets a second look/feel though, is when someone picks up the paper bead and it's light as air.
KellyRae  |  Wed Jul 27, 2011 at 9:13 AM
Can use colorful magazine paper too. Start with the page with the straight edge on the left; measure & mark across the top in 1" increments. Then at bottom, measure & mark 1/2", then begin marking 1" increments the rest of the bottom of page. Draw diagonal lines from top to bottom marks;forming the triangles. Cut out the long triangles. Starting with the wide end, roll paper on toothpicks; almost 2-3" from the point end brush on glue & finish rolling. Let dry & paint with a glaze or can use clear fingernail polish or some with glitter added.
loomatic  |  Wed Jul 27, 2011 at 9:27 AM
Oh my goodness...this sure takes me back to my Girl Scout day camp days! We used to make these using wallpaper triangles. I made these with kids at a preschool summer art class too, but never thought about using straws to make them easier to thread. This definitely justifies saving scraps of DSP smile
JJ Rubberduck  |  Wed Jul 27, 2011 at 9:48 AM
Patty, these are so pretty! Thanks for the tutorial...and the reminder not to glue them to the toothpick, LOL! Can't wait to try some... I want to add some gold on the edges and try a faux cloisonne look!
Plain Jane  |  Wed Jul 27, 2011 at 11:41 AM
If you taper the strip of paper like an elongated triangle and start rolling at the wide end to the point you'll get a really neat bead smile
Diana E  |  Wed Jul 27, 2011 at 12:02 PM
I have 2 necklaces made like this out of church bulletins. Have had them for 20-25 years. This could be used as a Sunday School or Bible School project.
Brenda Heizman  |  Wed Jul 27, 2011 at 12:02 PM
I love these I made them as a little girl with my grandma
sherrie  |  Wed Jul 27, 2011 at 2:16 PM

Page 1 of 2 pages  1 2 >

Commenting is not available in this weblog entry.

GET OUR NEWSLETTER


Splitcoaststampers's privacy policy