Paper Beads
by Patty Bombyk
Create decorative beads out of paper and clear glaze.
Supplies
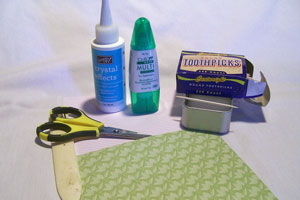
- Patterned paper
- Toothpick
- Scissors or paper trimmer
- Bone folder
- Glue
- Diamond Glaze, Glossy Accents or Crystal Effects
Step-by-Step
-
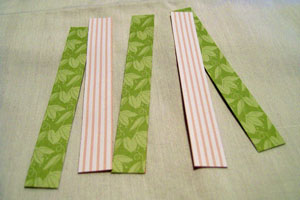
Step 1
Cut your patterned paper into 1/2" x 4" strips.
-
Step 2
Burnish the paper strips using your bone folder. This will help as you begin to wrap your beads.

-
Step 3
Apply a thin strip of glue on one end of the paper strip.
Hint:
You don’t need a lot of glue, but don’t skimp either, a thin line of glue on the last two inches should do.
-
Step 4
Beginning with the end with no glue, start wrapping the patterned paper tightly around the toothpick. The glue will ooze out as you get to that end, just wipe off excess glue.
Hint:
You may want to keep wet wipe next to you to wipe any excess glue off your fingers.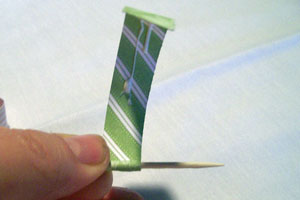
-
Step 5
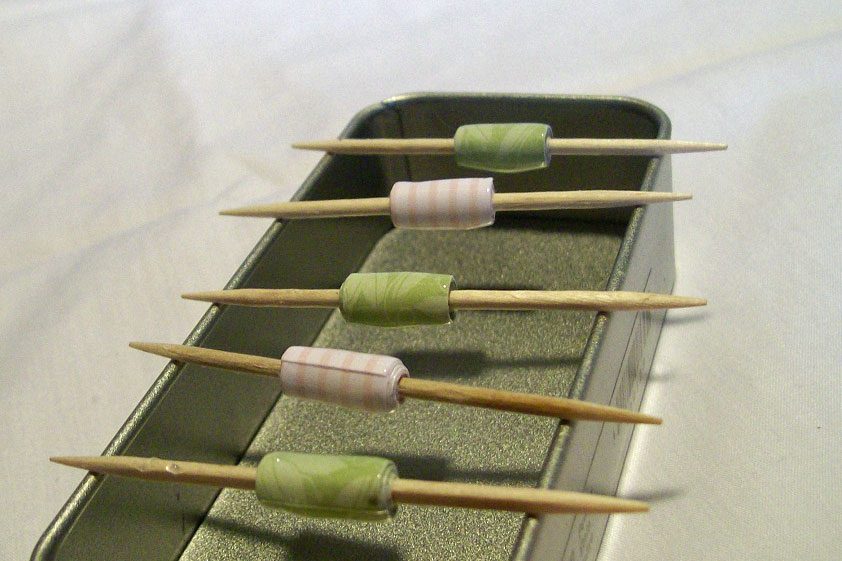
Place toothpick across a narrow container or poke the toothpick into a piece of Styrofoam.

-
Continue rolling beads until you have the number you want.

-
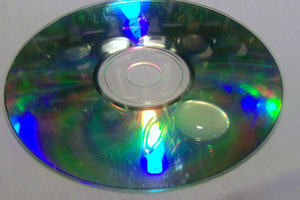
Step 6
Place a quarter size dollop of Diamond Glaze onto a disposal plastic palette (an old CD or plastic lid works great).
-
Step 7
Carefully roll the bead into the diamond glaze to coat, being careful not to get any onto your toothpick.
Hint:
You can get really creative now, try wrapping metallic string/embroidery floss, sprinkling glitter, mini confetti, etc, on while the diamond glaze is still wet to give the beads some texture or added dimension.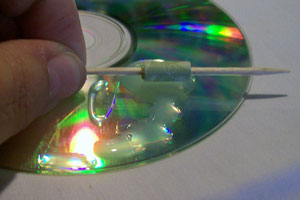
-
Once you have all your beads rolled allow them to dry. Do not attempt to heat the glaze - heat can cloud the glaze.
-
Step 8
Once the beads are completely dry, carefully slide them off the toothpicks.

-
Step 9
String your beads as you wish.

-
Step 10
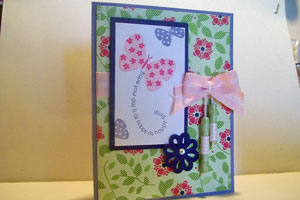
Use beads as a decorative element on your project.

Video!
Variations
-
Different look
Cut patterned paper into triangles 4" long by 1" across at the widest edge.
-
Roll as stated in steps 2 – 10 above starting with the one inch edge. This will create long tapered beads.

Your Turn
You've seen the tutorial, now you try it! We've got a section of the gallery set aside for Paper Beads. Try this technique, then upload your artwork to the gallery. Show us your creations!
***Please note - Internet Explorer/Edge is not a supported browser, and will not allow you to see the videos. Please use Chrome, Firefox or Safari to view our tutorial videos.

Questions and Comments
We'd love to get your feedback or questions. Leave your comment below.
I love this. Can not wait to get my girls to make them. Thanks for the great tut.
Anne
Thank you for sending out all of the great ideas on splitcoaststampers.
Thank you so much for sharing this today!
He IS Able!
Traci S.
Great tutorial Beate!
Page 2 of 2 pages < 1 2