Free Standing Pop-Up Card
by Mary Jo Albright
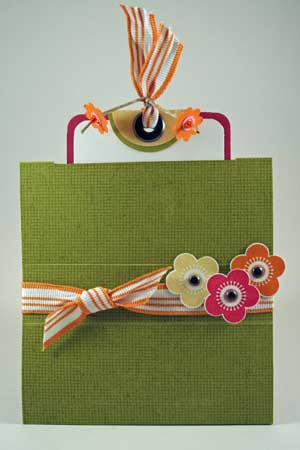
Create a free standing card that folds down flat.
Supplies
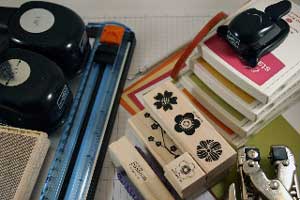
- Paper cutter with scoring & cutting blade
- 4-1/4" x 11" piece of cardstock for base
- 2-1/2" x 5" piece of cardstock for tag
- 2-3/4" x 5-1/4" piece of cardstock for tag matting
- Stamps
- Inks
- Sticky Strip™
- Hobby Blade
- Ruler
- Mat Pack
- 1-1/4" & 1-3/8" Circle Punches
- Crop-a-Dile™ tool
- 3/16" corner rounder punch
- Accessories (ribbon, hemp twine, jumbo eyelet, brads, beads, boho blossoms punch, additional cardstock for embellishing)
Step-by-Step
-
Step 1
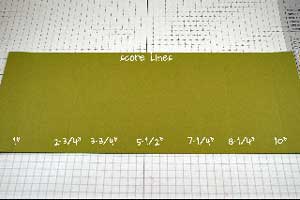
Score the 4 1/4" x 11" piece of cardstock at at 1", 2-3/4", 3-3/4", 5-1/2", 7-1/4", 8-1/4", and 10".
-
Step 2
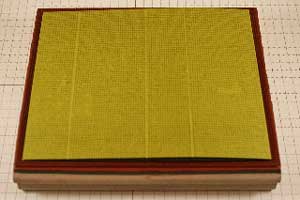
Stamp as desired. If using a background stamp, fold in half on the 5-1/2" line to achieve full-coverage without having to line up the image.
-
Step 3
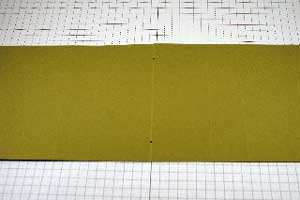
Turn cardstock base over to the non-stamped side. On the middle 5-1/2" score line, make a mark 5/8" in from both sides.
-
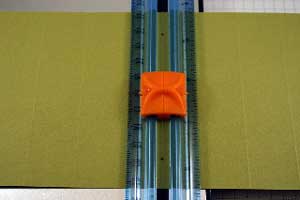
Step 4
Cut between marked lines to make a slit for your tag.
-
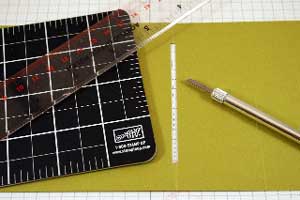
Step 5
You can make this slit larger if your tag has dimension and bulky accessories. Use a hobby blade, ruler, and setting mat to create your desired opening.
-
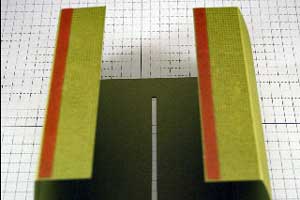
Step 6
Apply Sticky Strip™ to the stamped side on the end 1" scored sections. You will want to place one strip next to the score line on one, and one strip at the edge on the other side (this becomes important when closing the piece together and for holding the tag in place).
-
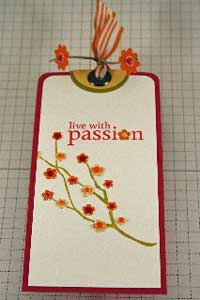
Step 7
Create your tag with the 2-1/2" x 5" piece of cardstock and adhere to the mat measuring 2-3/4" x 5-1/4". Adhere punched circles to the top. Attach a Jumbo Eyelet. Add ribbon so tag can be pulled up.
-
Step 8
Slide tag into cut slit.
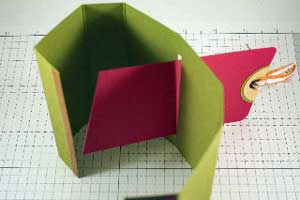
-
Attach tag to one of your Sticky Strips™. Make sure it is centered in the slit and lines up with the bottom.
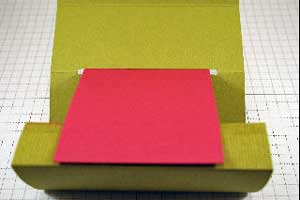
-
Step 9
Fold up the other side with the Sticky Strip™ and attach to the tag.
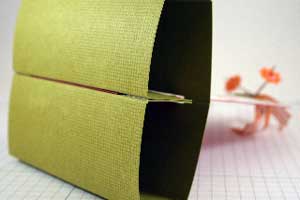
-
Step 10
Embellish the 1" cardstock base section to finish of your card.
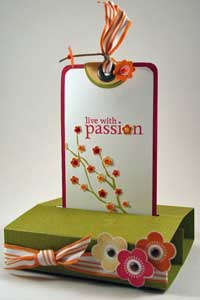
-
Your card will fold flat.
Video!
Your Turn
You've seen the tutorial, now you try it! We've got a section of the gallery set aside for Free Standing Pop-Up Card. Try this technique, then upload your artwork to the gallery. Show us your creations!
***Please note - Internet Explorer/Edge is not a supported browser, and will not allow you to see the videos. Please use Chrome, Firefox or Safari to view our tutorial videos.

Questions and Comments
We'd love to get your feedback or questions. Leave your comment below.
Thanks and awesome card!
thanks for the tutorial, will play with this more.
I posted pictures on my blog! here's the post if anyone would like to see these examples: http://www.krismom.com/2010/06/pop-up-birthday-cards-with-stand-and-tag/
Thanks for the tutorial, love the colours.
Christine x
AND MAKE SOME AS I THINK THEY ARE REALLY
DIFFERENT. BUT AS YOU KNOW, I ALWAYS THINK
YOURS ARE THE BEST.
CYNTHIA BEYNON
bise de france
cathy
Your tutorial is great easy to follow.
Thank you
Page 3 of 3 pages < 1 2 3