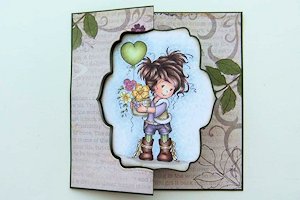
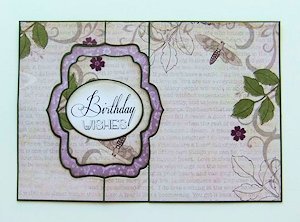
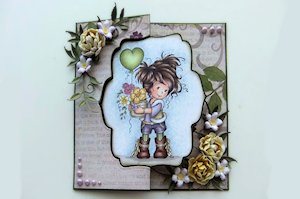
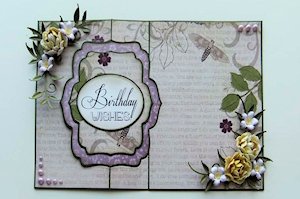
Die Cut Swing Card

by Norma Lee

Create a swing card using a shape or label die.

Supplies
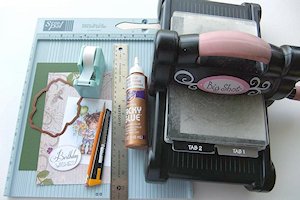
  • Cardstock cut to 8 1/4" x 5 1/2"
  • Designer paper cut to 8 1/4" x 5 1/2"
  • A shape die template (Spellbinders Labels Five used here)
  • Die cutting machine
  • Scoring board
  • Removable or low-tack tape (3M Scotch used here)
  • Pencil, ruler and craft knife (or paper trimmer)
  • Adhesive (craft glue used here)
  • Other supplies as needed to finish the card

Step-by-Step

  1. Step 1

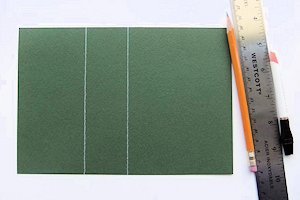
    On the 8 1/4" x 5 1/2" cardstock, lightly pencil 2 vertical lines at 2 5/8" and 4 1/4" (white pencil used here for better viewing). Set cardstock aside.

  2. Step 2

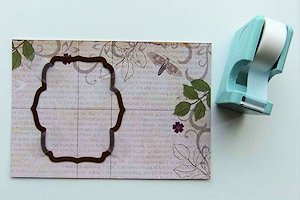
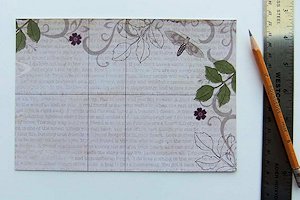
    On the 8 1/4" x 5 1/2" designer paper, lightly pencil 2 vertical lines at 2 3/4" and 4 1/8" and a horizontal line midway at 2 3/4".

  3. Step 3

    Center the die around the cross formed by the horizontal line and the first vertical line as shown. Secure in place with 3 or 4 pieces of removable tape.

  4. Step 4

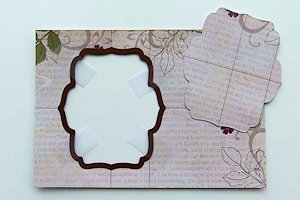
    Die cut the paper. DO NOT remove the tape pieces or the die itself, but remove the die cut piece from the center leaving a window on the designer paper.

  5. Step 5

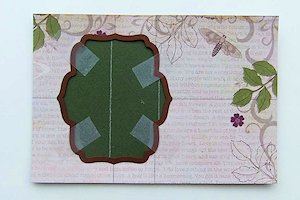
    Place the designer paper exactly on top of the cardstock, lining up the paper edges. Secure in place with the removable tape pieces that are already there.

  6. Step 6

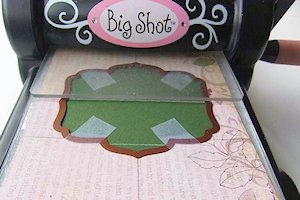
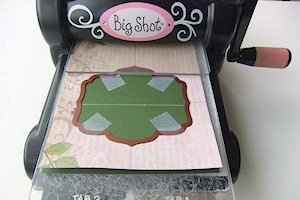
    With the die blade-side down, place the papers between the two cutting plates. Ensuring that edge of the top cutting plate is lined up along the 2 5/8" vertical line (drawn in Step 1 above) as shown, run the sandwich through the die cutting machine.

  7. Step 7

    Now turn the papers around 180 degrees and repeat Step 6, this time with the edge of the top cutting pad up lined up along the 4 1/4" vertical line.

  8. Step 8

    Remove the die and tape pieces from the papers.

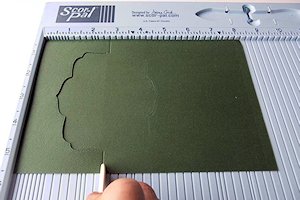
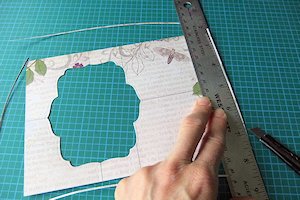
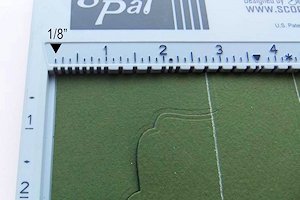
    Place the cardstock upside down on the scoring board and score at 2 3/4" as shown, from the paper edges to the die-cut lines only. DO NOT score in the middle part.

  9. Step 9

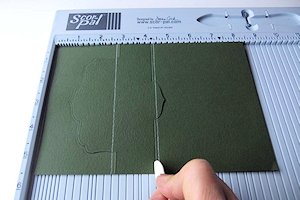
    Turn the cardstock right-side up and score at 4 1/8", from the paper edges to the die-cut lines only. DO NOT score in the middle part.

  10. Note:
    If using the Scor-Pal, place the left edge of the paper at the 1/8" mark and score at 4 1/4" as shown.
  11. Step 10

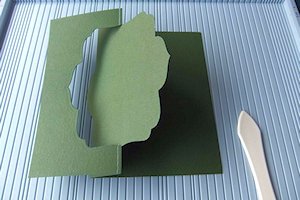
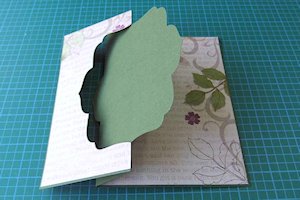
    Valley-fold and mountain-fold the cardstock as shown.

  12. Step 11

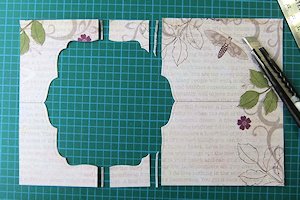
    To create a narrow border around the outside of the designer paper, trim off about 1/16" from each of the four sides using a craft knife and a ruler, or a paper trimmer.


  13. Also trim at both sides of the vertical lines as shown.

  14. Step 12

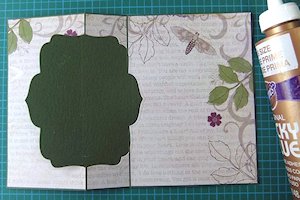
    Glue the designer paper pieces to the cardstock. Erase all pencil lines.

    TIP:
    Any sticky residue from the removable tape can also be rubbed off with the eraser.

  15. This is how the card base should look when closed.

  16. Step 13

    Adhere images and/or sentiments to both sides of the swing panel.

  17. Step 14

    Embellish as desired to complete the card.

Video!

Your Turn

You've seen the tutorial, now you try it! We've got a section of the gallery set aside for Die Cut Swing Card. Try this technique, then upload your artwork to the gallery. Show us your creations!

***Please note - Internet Explorer/Edge is not a supported browser, and will not allow you to see the videos. Please use Chrome, Firefox or Safari to view our tutorial videos.
Questions and Comments

We'd love to get your feedback or questions. Leave your comment below.

Fantastic tutorial, both video and pictorial. Thanks so much for sharing your technique, it's so much easier than trying to guess!
Andrea Robert  |  Thu Jul 17, 2014 at 3:06 PM
I have to say that the video was much easier to "use" as I am a very visual person. Thanks so very much as I love this card!
Sheryl Brown  |  Thu Jul 17, 2014 at 7:33 PM
For Karol Hall: The fonts I used on the card in the written instructions are Respective for the 'Birthday' and Yiggivoo Unicode 3D for the 'WISHES". The one on the card in the video is called Riesling. All can be downloaded for FREE from Dafont.com.
Norma Lee  |  Thu Jul 17, 2014 at 11:39 PM
Mahalo Ms Norma.. Here is my try @ your Tutorial.. lol 2nd try that is . and after I fix the 1 I made booboo on I will let you know what came of it smile but most of all Ide like to thank you for your awesome tutorial and kindness with the help you gave me smile here is the card..http://www.splitcoaststampers.com/gallery/photo/2539843?&cat=500&ppuser=408248...http://www.splitcoaststampers.com/gallery/photo/2539844?&cat=500&ppuser=408248
Hwaiian  |  Sat Jul 19, 2014 at 4:59 AM
What an awesome tutorial, great idea, excellent instructions! Very well done!
Doris Bourlon  |  Sat Jul 19, 2014 at 6:52 AM
Your video is one of the BEST I have seen. Your instructions are very clear and concise making me think I can easily make a very complicated-looking card into a very beautiful project. Thanks so much for sharing your talent!
Lilylynn  |  Sat Jul 19, 2014 at 9:27 AM
Wow! No more expensive flip card die kits for me!! This tute is a godsend and I can't thank you enough for it. LOVE your finished card too! xx
Viv  |  Mon Jul 21, 2014 at 1:58 AM
Hi Norma, absolutely brill tutorial, thank you so much. If you get a moment could you please let me know the name of the font you used in the video, it's so elegant. Many thanks
Best wishes
Ann xxxxx
Ann Levers  |  Mon Jul 21, 2014 at 3:22 AM
For Ann Levers: The font is called Riesling and you can free download it from Dafont.com.
Norma Lee  |  Mon Jul 21, 2014 at 12:50 PM
Thank you, Norma, so kind.
xxxx
Ann Levers  |  Mon Jul 21, 2014 at 2:05 PM
Norma thank you for sharing this technique. Your card is simply gorgeous.
Irene Williams  |  Thu Jul 24, 2014 at 9:38 AM
Thank you for a precise and excellently executed tutorial. Your card was also very lovely. Your coloring is exquisite!

Thanks again,

Vicki
Vicki Laster  |  Sat Aug 16, 2014 at 9:28 PM
I would love to make this card, but I do not have this particular die. Can I use the same measurements with a similar die? Thanks
Laurie Figueroa  |  Tue Aug 19, 2014 at 6:28 PM
Laurie, absolutely! Any shaped die will work.
Dina K  |  Tue Aug 19, 2014 at 9:57 PM
Hello Norma ..
Thank you so much for this great tutorial .. its such a beautiful card ...

I have tried to make the swing Card, and in my mind I can make it .. :D
After 4-5 times .. I saw my die is smaller than yours, so I can only make the first cut at 2 5/8" and the 4 1/4" line is outside of my die .. So its not very much swing in my card LOL

Hope you understand my english language and can give me a hint how to make another measure insteat of the 2 vertical lines at 2 5/8" and the 4 1/4"

Greetings from Denmark
Lone F  |  Wed Aug 27, 2014 at 3:03 PM
LOL... I did the same thing with my 1st try ...I think if the die is smaller then what is used here.. you may need to ajust your score line to catch a part of the end of your smaller die? at least that's what I did and called it magivored it lol good luck
hawaiian  |  Wed Aug 27, 2014 at 10:44 PM
Wow! Amazing.
sue mathews  |  Mon Sep 1, 2014 at 7:13 PM
The lines in the tutorial were set up to give you a 5�" square card. If you alter the measurements, you won't get the square card anymore.

If you have a small die, then you may want to make a smaller card. I've worked out these different measurement for an A2 card size (4�" x 5�").
- cardstock and designer paper should be 6�" x 5�"
- vertical lines on the cardstock at 2" and 3�"
- vertical lines on the designer paper at 2 1/8" and 3 1/8"
Norma  |  Sat Oct 25, 2014 at 3:14 AM
I love the card and have already given it a try using different dies. The first die I used didn't quite work because using your measurements didn't quite leave enough of the die cut uncut on the shorter side. I adjusted the second line measurement and it worked, but then the swing part of the die didn't swing through. I've tried several different ways to use this die, but none of them quite work. I love this die! I would really like to use it. Do you have a way to determine your pencil marks for placing and cutting the die used?
Letitia MacFarlane  |  Sun Apr 10, 2016 at 3:57 PM
Norma, you are a wonderful instructor. This was the clearest direction I have ever had the pleasure of following. I'm still dithering with my design but once I've perfected it I will upload the final project. Is there a way to "follow" you so I can learn even more?! Thanks!
Judith de Haan  |  Mon May 23, 2016 at 2:26 PM

Page 3 of 4 pages  <  1 2 3 4 >

You need to be logged in to comment

GET OUR NEWSLETTER


Splitcoaststampers's privacy policy