Die Cut Swing Card
by Norma Lee
Create a swing card using a shape or label die.
Supplies
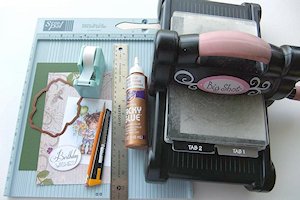
- Cardstock cut to 8 1/4" x 5 1/2"
- Designer paper cut to 8 1/4" x 5 1/2"
- A shape die template (Spellbinders Labels Five used here)
- Die cutting machine
- Scoring board
- Removable or low-tack tape (3M Scotch used here)
- Pencil, ruler and craft knife (or paper trimmer)
- Adhesive (craft glue used here)
- Other supplies as needed to finish the card
Step-by-Step
-
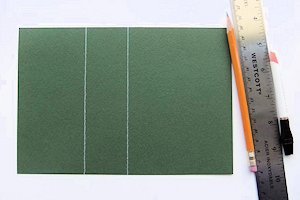
Step 1
On the 8 1/4" x 5 1/2" cardstock, lightly pencil 2 vertical lines at 2 5/8" and 4 1/4" (white pencil used here for better viewing). Set cardstock aside.
-
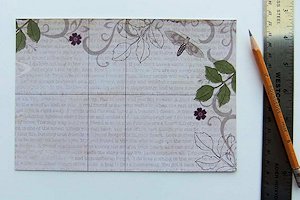
Step 2
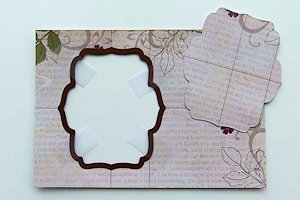
On the 8 1/4" x 5 1/2" designer paper, lightly pencil 2 vertical lines at 2 3/4" and 4 1/8" and a horizontal line midway at 2 3/4".
-
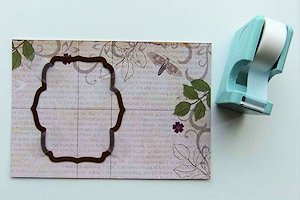
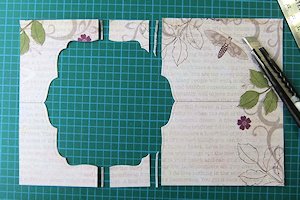
Step 3
Center the die around the cross formed by the horizontal line and the first vertical line as shown. Secure in place with 3 or 4 pieces of removable tape.
-
Step 4
Die cut the paper. DO NOT remove the tape pieces or the die itself, but remove the die cut piece from the center leaving a window on the designer paper.
-
Step 5
Place the designer paper exactly on top of the cardstock, lining up the paper edges. Secure in place with the removable tape pieces that are already there.

-
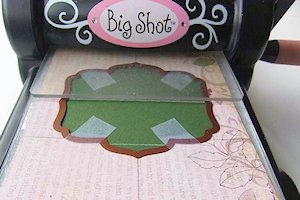
Step 6
With the die blade-side down, place the papers between the two cutting plates. Ensuring that edge of the top cutting plate is lined up along the 2 5/8" vertical line (drawn in Step 1 above) as shown, run the sandwich through the die cutting machine.
-
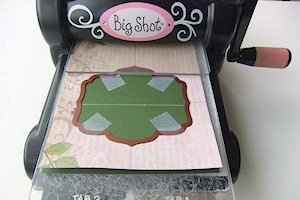
Step 7
Now turn the papers around 180 degrees and repeat Step 6, this time with the edge of the top cutting pad up lined up along the 4 1/4" vertical line.
-
Step 8
Remove the die and tape pieces from the papers.
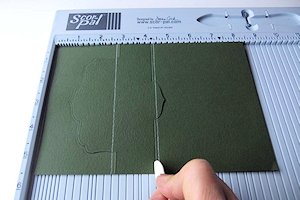
Place the cardstock upside down on the scoring board and score at 2 3/4" as shown, from the paper edges to the die-cut lines only. DO NOT score in the middle part.
-
Step 9
Turn the cardstock right-side up and score at 4 1/8", from the paper edges to the die-cut lines only. DO NOT score in the middle part.
-
Note:
If using the Scor-Pal, place the left edge of the paper at the 1/8" mark and score at 4 1/4" as shown.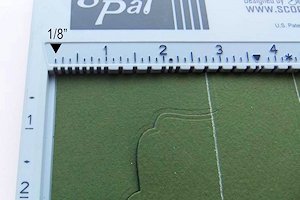
-
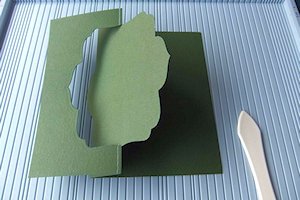
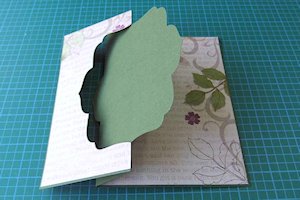
Step 10
Valley-fold and mountain-fold the cardstock as shown.
-
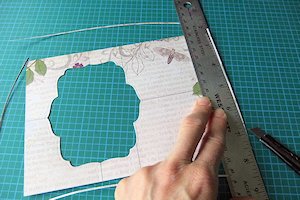
Step 11
To create a narrow border around the outside of the designer paper, trim off about 1/16" from each of the four sides using a craft knife and a ruler, or a paper trimmer.
-
Also trim at both sides of the vertical lines as shown.
-
Step 12
Glue the designer paper pieces to the cardstock. Erase all pencil lines.
TIP:
Any sticky residue from the removable tape can also be rubbed off with the eraser.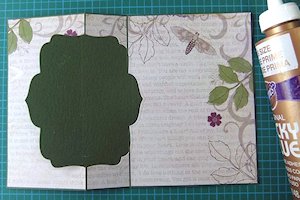
-
This is how the card base should look when closed.
-
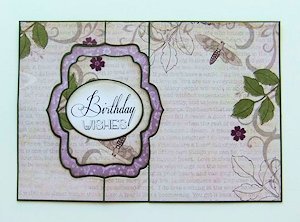
Step 13
Adhere images and/or sentiments to both sides of the swing panel.

-
-
Step 14
Embellish as desired to complete the card.

-

Video!
Your Turn
You've seen the tutorial, now you try it! We've got a section of the gallery set aside for Die Cut Swing Card. Try this technique, then upload your artwork to the gallery. Show us your creations!
***Please note - Internet Explorer/Edge is not a supported browser, and will not allow you to see the videos. Please use Chrome, Firefox or Safari to view our tutorial videos.

Questions and Comments
We'd love to get your feedback or questions. Leave your comment below.
How do you make the adjustments for a smaller card? Thanks very much.
Hope that makes sense.
thank you
Karol
Page 2 of 4 pages < 1 2 3 4 >