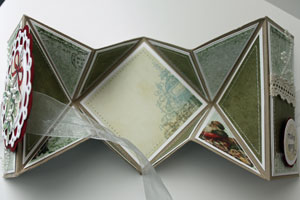
Diamond Fold card
by Beate Johns
Create a special fold card with a few score lines.
Supplies
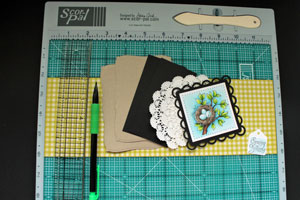
- Scor-Pal™, or other scoring tool
- One 4" x 12" strip of heavy weight patterned paper or cardstock
- Ruler
- Pencil
- Additional cardstock, embelllishments and stamps to decorate your card
Step-by-Step
-
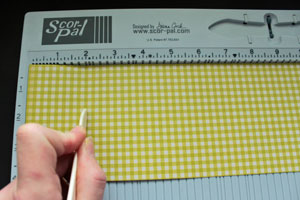
Step 1
Score 4" x 12" piece of patterned paper at 2"
-
and at 10".
-
Step 2
Prefold at the score lines and turn paper over.
-
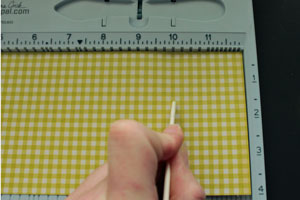
Step 3
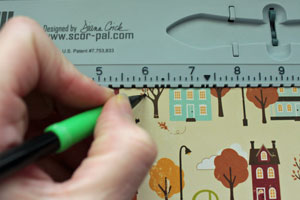
On the back, mark the 6" mark on both sides.
-
Step 4
Take one end of the paper and fold it down diagonally at the 6" mark.
-
Fold the opposite side down the same way.
-
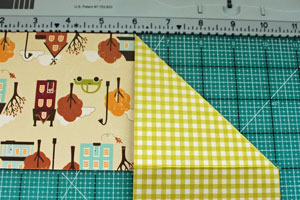
Step 5
Unfold the score lines. Turn paper 180 degrees. Repeat the folding on this side.
-
-
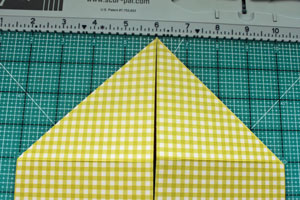
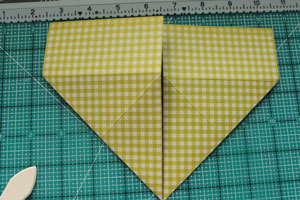
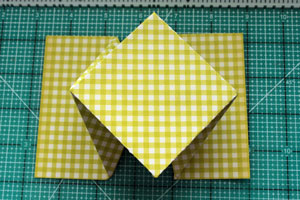
Step 6
Unfold paper again. Hold strip vertically. Where the score lines intersect press the corners in to create a point.
-
Fold the sides down.
-
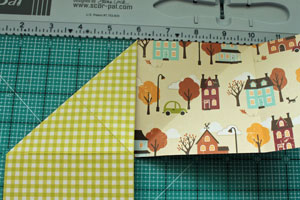
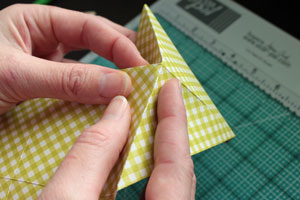
Step 7
Fold the 2" part of the strip out.

-
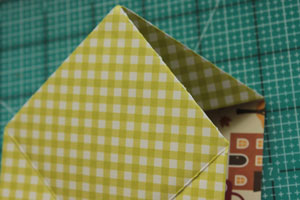
Step 8
Fold the other corner in the same way.
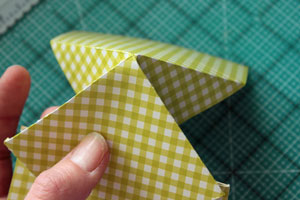
-
Fold the 2" side out. Your Diamond Fold card base is done.
-
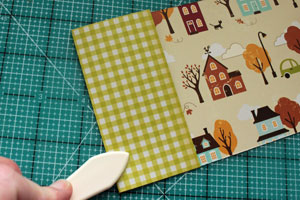
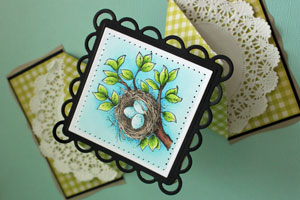
Step 9 (Optional)
Add layers underneath the 2" x 4" sides.

-
Step 10 (Optional)
Add image or sentiment to the diamond in the center.
-
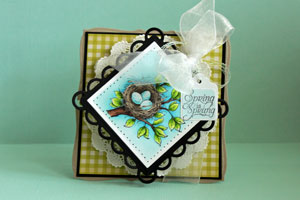
You can leave the card open, or tie it shut with ribbon that you can slide off the side before opening the card.
Video!
Variations
-
Inside out!
Try folding the card so the diamond is in the back instead of the front of the card for a different look.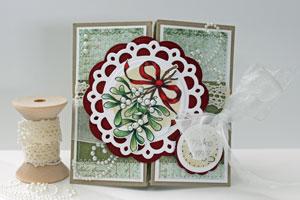
-
Your Turn
You've seen the tutorial, now you try it! We've got a section of the gallery set aside for Diamond Fold card. Try this technique, then upload your artwork to the gallery. Show us your creations!
***Please note - Internet Explorer/Edge is not a supported browser, and will not allow you to see the videos. Please use Chrome, Firefox or Safari to view our tutorial videos.
 *
*
Questions and Comments
We'd love to get your feedback or questions. Leave your comment below.
PS beautiful card!
You make this look simple...I actually believe I CAN MAKE THIS!!!
Thank you so much for the video and your patience to teach these things! I am grateful!
He IS Able,
Traci S.
Thanks!
I WILL TRY THIS CARD TECHNIQUE AND WILL HAVE THE YOUR VIDEO RIGHT BESIDE ME,TOO.
Wonderful to receive again my Weekly & to have such a fabulous tutorial. Will attempt making one today !
Jenny
You could add a white square on the opposite side of the image square on the back for your message. Or yes, you could write on the piece where I added the doily.
d
Beautiful work. Thank you for sharing.
Shirley
Page 1 of 2 pages 1 2 >