Diamond Fold card

by Beate Johns

Create a special fold card with a few score lines.

Supplies
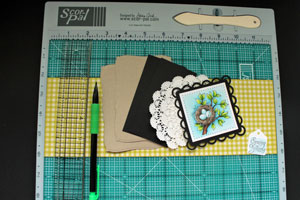
  • Scor-Pal™, or other scoring tool

  • One 4" x 12" strip of heavy weight patterned paper or cardstock

  • Ruler

  • Pencil

  • Additional cardstock, embelllishments and stamps to decorate your card

Step-by-Step

  1. Step 1

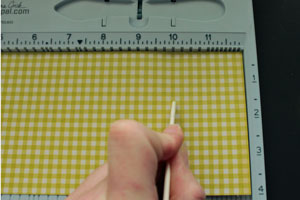
    Score 4" x 12" piece of patterned paper at 2"
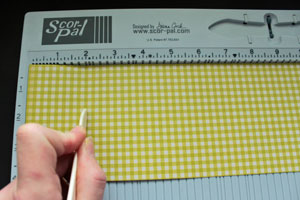
  2. and at 10".

  3. Step 2

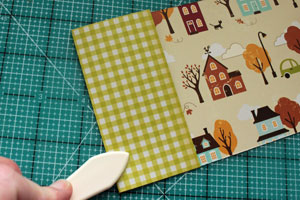
    Prefold at the score lines and turn paper over.
  4. Step 3

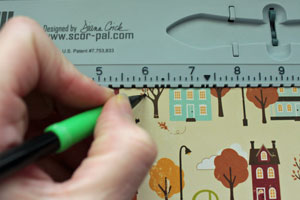
    On the back, mark the 6" mark on both sides.
  5. Step 4

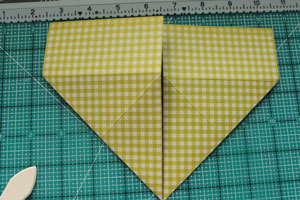
    Take one end of the paper and fold it down diagonally at the 6" mark.
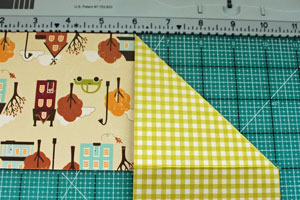
  6. Fold the opposite side down the same way.
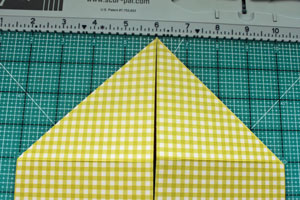
  7. Step 5

    Unfold the score lines. Turn paper 180 degrees. Repeat the folding on this side.
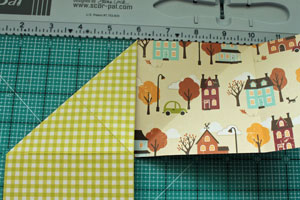
  8. Step 6

    Unfold paper again. Hold strip vertically. Where the score lines intersect press the corners in to create a point.
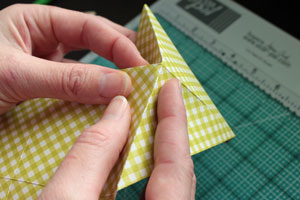
  9. Fold the sides down.

  10. Step 7

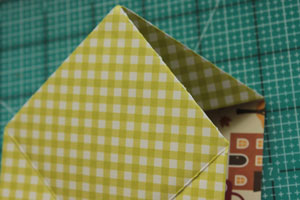
    Fold the 2" part of the strip out.
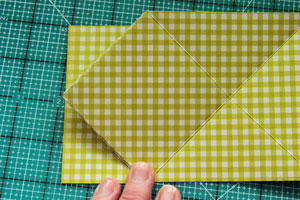
  11. Step 8

    Fold the other corner in the same way.
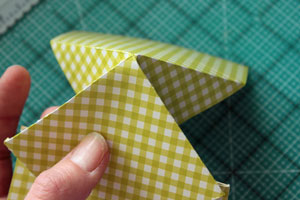
  12. Fold the 2" side out. Your Diamond Fold card base is done.
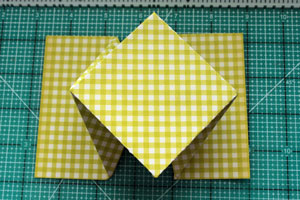
  13. Step 9 (Optional)

    Add layers underneath the 2" x 4" sides.
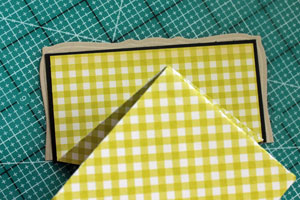
  14. Step 10 (Optional)

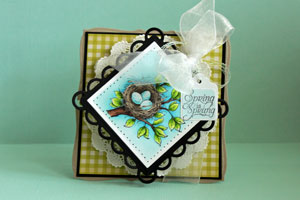
    Add image or sentiment to the diamond in the center.
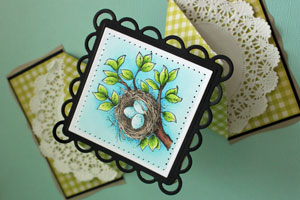
  15. You can leave the card open, or tie it shut with ribbon that you can slide off the side before opening the card.
Video!

Variations

  1. Inside out!
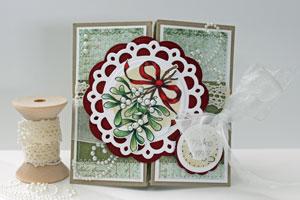
    Try folding the card so the diamond is in the back instead of the front of the card for a different look.
Your Turn

You've seen the tutorial, now you try it! We've got a section of the gallery set aside for Diamond Fold card. Try this technique, then upload your artwork to the gallery. Show us your creations!

***Please note - Internet Explorer/Edge is not a supported browser, and will not allow you to see the videos. Please use Chrome, Firefox or Safari to view our tutorial videos.

Questions and Comments

We'd love to get your feedback or questions. Leave your comment below.

Love this card idea. Can't wait to try it. Keep the ideas and videos coming.
thanks so much
susan
SusanRN  |  Fri May 27, 2011 at 9:16 PM
esta preciosa!!!!!
Natacha  |  Sun May 29, 2011 at 9:05 PM
Beate your tutorials are wonderful, thank you so much for giving your time and expertise to us novices. I noticed that you placed a "plate over the scorpal that had different markings on it. What was that? Ta Julie
Julie  |  Mon May 30, 2011 at 11:48 PM
I am a fairly new cardmaker...I watched the Video and printed out the instructions and made 3 of these Diamond shaped cards in a matter of 1 1/2 hrs. Instructions and video were very clear and precise...I love all the info I find on this site...I rate this a #10
Roberta Belleare  |  Tue May 31, 2011 at 4:52 AM
Julie,
It's called a Scor-Mat. It's a cutting mat that fits perfectly into your Scor-Pal!
Beate  |  Tue May 31, 2011 at 5:30 AM
Beautiful card Beate! Quick question, what did you use for the edge punch? I love it!
Steph  |  Fri Jun 10, 2011 at 11:46 AM
Steph, I used the Lacey Square Nestabilities die, not a border punch!
Hugs and smiles
Beate  |  Fri Jun 10, 2011 at 2:51 PM
I finally got a chance to sit down and make one of these. I'll be making this more (once I get some stamps and embellies to decorate them). Thanks for a great tutorial.
Gina  |  Fri Jun 10, 2011 at 9:08 PM
Thank you so much for a fabulous website. Keep up the good work!
Belle Botha  |  Tue Jun 14, 2011 at 1:45 AM
What a great tutorial... and fab. video... going to make this.... thanks a million for sharing this!
Warm Hug
Marion
Marion van Eijsden  |  Sat Aug 6, 2011 at 2:10 AM
Thanks for the great video and especially for the step by step pictures and written instructions. I keep missing something in the other videos that I have seen. Hopefully I can now create this card.
Debby  |  Thu Nov 10, 2011 at 8:48 PM
Beate, I have learned many new techniques using your videos! Thank-you sooo much! Whenever there is a style of card that I want to try, I come here first to see if there is a tutorial for it! :0)
Romaine  |  Tue Mar 20, 2012 at 4:33 PM
This looks like a real challenge. Ends up as a real surprise for the recipient. I can hardly wait to make one & teach my friends. Thanks for the good instructions. Suzie
Suzie  |  Fri Apr 20, 2012 at 12:21 PM
This was so easy. I used it to make both of my grandson's cards that they could put on their tables.
Thanks!!
Rosa Smith  |  Sat Apr 28, 2012 at 7:52 AM
LOVE YOUR CARDS LIKE ANYTHING. YOU INSPIRED ME BY ALL OF UR CARDS
AYESHA  |  Mon Oct 8, 2012 at 12:31 PM
Great tutorial--I just bought some of this style card called "Reverse Explosion" from The Paper Cut company--love them...but now I know how to make em myself! smile
Susanne Gleason  |  Wed Oct 2, 2013 at 5:39 AM
so much easier than the one I made last week, amazinng, will be making this one for sure, as I love the look of the diamond fold . Thank you xx
Ivodell Kelly  |  Fri Sep 7, 2018 at 5:44 AM
Hello Beate, how would I go about making this card somewhat larger. I tried a couple of times, but with no success? Because, here in the US, and the card being square, I'm paying $3.50 just to mail the card! I just love this card too. I actually made 6 of them as a Thank You and was shocked that the postage was $21!!! What to have done. Besides the card all being handmade, the time, and now unreal price to mail. Hope you can help me. TY in advance.
Claire  |  Tue Nov 13, 2018 at 11:27 AM

Page 2 of 2 pages  <  1 2

You need to be logged in to comment

GET OUR NEWSLETTER


Splitcoaststampers's privacy policy