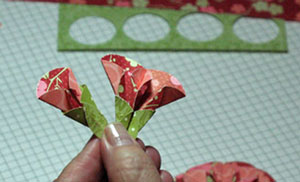
Dahlia Fold

by Donna Moore

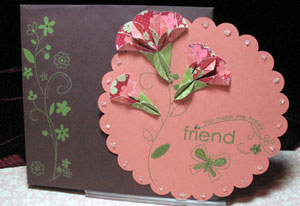
Add beautiful paper bouquets to your cards, scrapbooks, and other projects.

Supplies
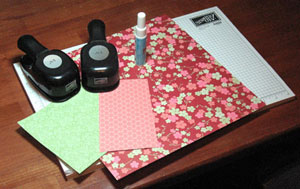
  • Circle punches

  • Double sided patterned paper

  • Cardstock

  • Adhesive


  • Note: To make folding more visible, a larger 3” circle was used for most of this demonstration.

Step-by-Step

  1. Step 1

    Punch one 1 1/4" cardstock circle and fold in fourths. Petals will be mounted on this base.

    For a full dahlia flower, punch eight circles from double-sided patterned paper for petals.
  2. Step 2

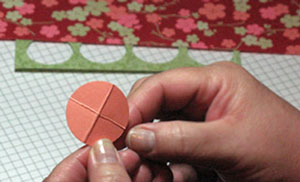
    Fold first patterned paper circle in half, trying to only crease the lower half to prevent folds in the upper part of the finished flower.

    Fold in half again and open.

    Decide which side should be the main background color (here, the red patterns is the main color). Flip over to show back side.
  3. Step 3

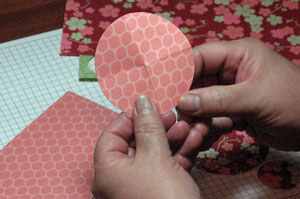
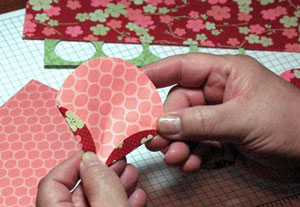
    In the lower two quadrants, fold a small petal shape upward using the fold marks as a guide.

    Turn over to the front side.
  4. Step 4

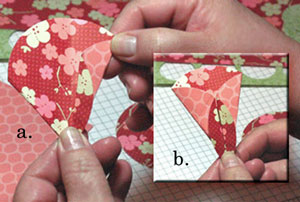
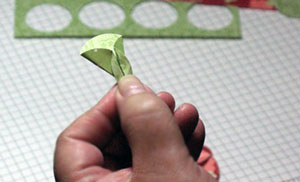
    Fold petal inward to the center like a paper airplane. (Picture A)

    Repeat for the other half. (Picture B)

    Repeat steps one through four to create seven more petals. This will make a full dahlia.
  5. Step 5

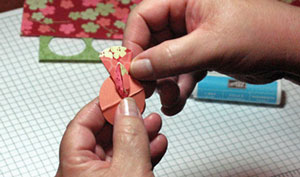
    Using the cardstock base from Step 1 as an evenly spaced mounting guide, adhere the first petal, aligning it at the center and at the fold line.
  6. Step 6

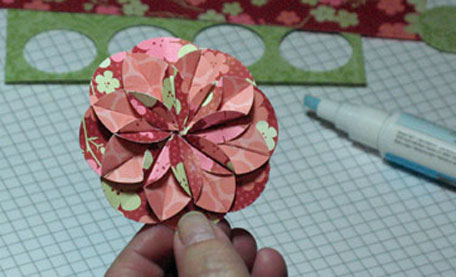
    Repeat process and adhere all 8 sections for a full dahlia.
  7. Step 7

    Finished project.

    Try creating flowers with one to eight petals.
Video!

Variations

  1. To create a flower bud, use slightly smaller single petals made from green paper for a stem base.

    For a frillier flower, use a scallop punch instead of plain circles.
Your Turn

You've seen the tutorial, now you try it! We've got a section of the gallery set aside for Dahlia Fold. Try this technique, then upload your artwork to the gallery. Show us your creations!

***Please note - Internet Explorer/Edge is not a supported browser, and will not allow you to see the videos. Please use Chrome, Firefox or Safari to view our tutorial videos.

Questions and Comments

We'd love to get your feedback or questions. Leave your comment below.

I don't have a 1 1/4 inch circle punch (as per the tutorial) so used my 1 3/8 inch circle punch. Discovered that you need 9 circles (instead of 8) when you use this size. Just a tip!

Thanks for a great tutorial. I love this technique!
Glenda  |  Sat Mar 22, 2008 at 8:28 AM
i always look forward to the tutorials, i learn something new everytime...thanks ladies for enriching my stamping experience!!!
sherrie  |  Sat Mar 22, 2008 at 4:47 PM
Terrific tutorial. I did it!~ Looks great for a novice. Used a circle cutter instead of a punch. Thanks again.
Monica B.  |  Sat Mar 22, 2008 at 7:54 PM
Wow! This is really neat. I am going to have to try this myself now.
Julia Miller  |  Sun Mar 23, 2008 at 5:20 PM
As usual, you did a superb job Donna - thanks SO much!!

Off to try some more dahlias
Jan in PB  |  Sun Mar 23, 2008 at 9:16 PM
Thank you, thank you, thank you! I've tried to figure this out on my own with little luck. This is spledid!
TexasGrammy  |  Mon Mar 24, 2008 at 12:26 AM
Wow! How beautiful! I really must try this! Thank you so much!

~ Kim
Kim  |  Tue Mar 25, 2008 at 4:29 PM
that is beautiful, thanks for sharing.
ruby  |  Fri Mar 28, 2008 at 7:13 PM
Love this idea will try it soon
Barb  |  Sat Mar 29, 2008 at 8:25 AM
This is so great. My stamp club is going to love it- if they haven't all already seen it hear. What size circle did you use for the large petal- the one with the designer paper? It looks larger than 1 1/4".
Abby  |  Sat Mar 29, 2008 at 1:34 PM
Just in time for wedding season! Many, many thanks!
Karen  |  Sat Mar 29, 2008 at 5:32 PM
Soooo pretty! I' m thinking MOTHER'S Day!!! I have printed this up for my techniques notebook. Thanks a bunch!
Kathryn  |  Sat Mar 29, 2008 at 6:21 PM
What a terrific embellishment. This has so many possibilities. Thanks a million. Off to the drawing board !
Janie Dunning  |  Sat Mar 29, 2008 at 10:06 PM
i would love to see this tutorial but i am with comcast.net and they say you have a virus in some of our pictures and they will not display on how to make the dahlia fold. could you send me the turorial to my email so i can practice making these for a class i plan in may??? thanks for doing this
[email protected]
lindaanderson  |  Sun Mar 30, 2008 at 10:09 AM
Donna,

I saw this card in some card book and tried and tried to follow their directions to duplicate it and I couldn't figure it out. Thank you for making such an easy to follow tutorial!

Michelle
Michelle Webster  |  Mon Mar 31, 2008 at 8:22 AM
Abby, there's a little note at the start that says the circle I used for the first part of the tutorial was actually a 3" circle to make it easier to understand the folds. I've used anywhere from a 3/4" circle up to the 1 3/8" circle punch.

Linda, I'll be glad to send you the instructions to your email address.
Donna  |  Tue Apr 1, 2008 at 5:24 PM
I love this! Thanks for sharing!
Terri  |  Sat Apr 5, 2008 at 7:32 PM
Your tutorial is great. Thanks for the idea.
Belle  |  Sat Apr 5, 2008 at 7:38 PM
An oval punch may be used instead of a circle. However, it takes 10 ovals to make a complete flower when ovals are folded longwise on the vertical axis. The flower comes out very pretty and has a soft appearance. an example may be found on the following page in my gallery:

http://www.splitcoaststampers.com/gallery/photo/793456?cat=500&ppuser=79346

Hope you have fun! I certainly did and will make many more Dahlia old cards in the future. Thanks for looking!!! -Chrysi McDonald- a.k.a. knoxville8625
Chrysisse  |  Sun Apr 6, 2008 at 12:55 PM
just love the tutorial...ty so much. Plan on trying it tonight. visiting my best friend in ohio and we are stampin our fingers off!!!! and of course hitting all the stamp stores we can in her area. beautiful card!!!!!!!!!! e./nevercantell
evette  |  Wed Apr 9, 2008 at 2:31 PM

Page 3 of 5 pages  <  1 2 3 4 5 >

You need to be logged in to comment

GET OUR NEWSLETTER


Splitcoaststampers's privacy policy