Clear Envelope Brag Book

by Corinne Somerville

Make your own photo brag book with clear envelopes.

Supplies
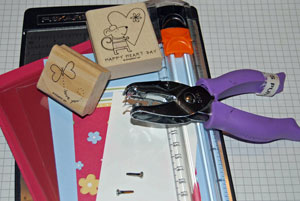
  • 4 3/4" x 9 1/4" piece of cardstock for back and spine of book

  • 4 3/4" x 6 1/4" piece of cardstock for front of book

  • Additonal cardstock and patterned paper to decorate

  • Paper cutter with scoring tool

  • 1/16" handheld circle punch

  • Clear Envelopes

  • Brads

  • Sticky Strip™

Step-by-Step

  1. Step 1

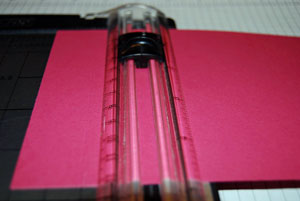
    Score your 4 3/4" x 9 1/4" piece of cardstock at 1" and 2" on the 9 1/4" side.
  2. Step 2

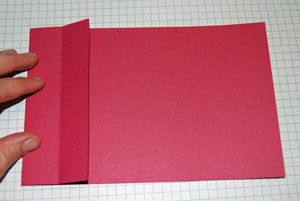
    Fold your cardstock over at the 2" score mark. This will form the spine of your book.
  3. Step 3

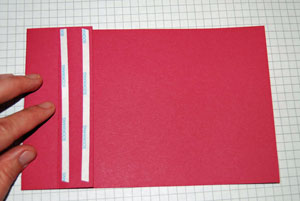
    Apply Sticky Strip™ to the end of the front panel.
  4. Step 4

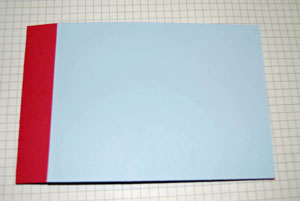
    Adhere the 6 1/4" x 4 3/4" piece of cardstock (your front cover) to the exposed Sticky Strip™.
  5. Step 5

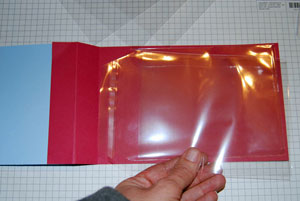
    Peel the plastic lining of your clear envelope seal, line the envelope up with the back of your book and tape down. Layer all envelopes on top of each other.

    Five envelopes were used here. The envelopes will serve as page protectors for your photos.
  6. Step 6

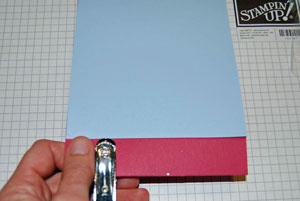
    Use your hole punch to make holes for your brads. You can use your thumb as a ruler on both ends.

    The punch will go through both all the cardstock and envelopes with no problem
  7. Step 7

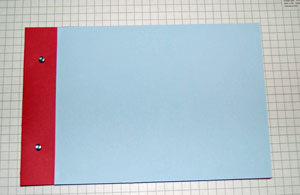
    Attach your brads.


    Variation:
    Eyelets and ribbon can be used here instead of brads.
  8. Step 8

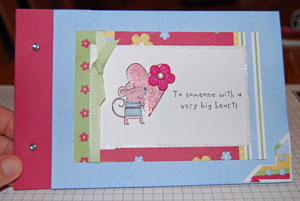
    Decorate brag book to whatever theme that will hold your photos.
Your Turn

You've seen the tutorial, now you try it! We've got a section of the gallery set aside for Clear Envelope Brag Book. Try this technique, then upload your artwork to the gallery. Show us your creations!

***Please note - Internet Explorer/Edge is not a supported browser, and will not allow you to see the videos. Please use Chrome, Firefox or Safari to view our tutorial videos.

Questions and Comments

We'd love to get your feedback or questions. Leave your comment below.

Splitcoast tutorials are the best and when any of us need a little inspiration, we come to this site and it gets the juices flowing. Thanks.
Sue Manlove  |  Wed Feb 6, 2008 at 6:41 AM
Thanks for the reminder! I forgot all about this project. Made several a few years back.
I will have to do this again.
debbiedee
Debbie  |  Wed Feb 6, 2008 at 6:46 AM
Love the newsletters - lots of super ideas! I think everyone at SCS should come and live at my house and continually inspire me! Hey! Do you have any inspiration to do housework? It seems to be sadly neglected due to your fab site!!! Maybe something to doll up my Dirt Devil? Make it more appealing? How about the ring in my tub - any embellishments to add to it so I don't have to clean it?
Stampin'Tam  |  Wed Feb 6, 2008 at 8:07 AM
Stampin' Tam - you are WAY TOO funny. Thanks for the laughs! BTW - I agree with you and your requests. LOL
Valerie  |  Wed Feb 6, 2008 at 8:10 AM
I LOVE this project. So simple and cute! Thanks so much.
SerendipityLaura  |  Wed Feb 6, 2008 at 8:15 AM
Thank you for all your kind comments about the tutorial...I really appreciate it. You guys are too sweet !!!!

Have a great day!
Corinne
Corinne (aka Roxy)  |  Wed Feb 6, 2008 at 8:21 AM
Wonderful tutorial! Thank you!!
Rose Ann  |  Wed Feb 6, 2008 at 8:54 AM
As usual, that Roxy continues to impress!! If you can imagine, she is an even more amazing person than as a stamper! She's awesome....love ya!!!!
Barb Dean  |  Wed Feb 6, 2008 at 9:00 AM
Thank you Corinne for a wonderful tutorial!
Hugs and smiles
beate  |  Wed Feb 6, 2008 at 9:02 AM
Fabulous, I love it....and had no problem being finding it...now must get some of those clear envelopes.
Irene  |  Wed Feb 6, 2008 at 9:13 AM
The item # for the clear envelopes is 102619. You get 50 in a package. They're also great for mailing your cards because everybody gets to see the card you made smile
Corinne (aka Roxy)  |  Wed Feb 6, 2008 at 9:19 AM
Love the little extras on the book! The flower on the heart, the jewel brads--what a fun, classy little book that will wow the receivers!
Paula B  |  Wed Feb 6, 2008 at 9:20 AM
I really enjoy receiving your weekly inklings and I find your ideas so inspiring. Thank you for all the effort you put into this group!
Yvonne Hellyar  |  Wed Feb 6, 2008 at 9:27 AM
I just made one like this for a christmas gift, it was fun to make and the lady loved the photos I put in it for her!

Great project.
debe  |  Wed Feb 6, 2008 at 9:36 AM
I often show this project as my "wow" presentation at my workshops. Everyone loves how simple and yet is such a personal gift.
Corinne  |  Wed Feb 6, 2008 at 9:52 AM
So you apply 5 clear envies to each other? One on top of the other, correct? And they hold pretty well?? Also, do you punch the holes through the clear envies? I'm sorry I have so many questions!
kimberlee  |  Wed Feb 6, 2008 at 12:09 PM
I usually put 5 in each brag book as that will allow 10 photos in each book which usually is enough for a themed brag book. You could probably easily put a few more envelopes in with no problem at all. The brads that you put in the book will go through the front and back cover of the book as well as through the envelopes so everything is held in nice and tight but the envelopes do stick nicely together even before you put the brads in. Hope that helps....if I've confused you or if you have any other questions please don't hesitate to ask smile
Corinne  |  Wed Feb 6, 2008 at 12:13 PM
This is a really sweet idea. Looks simple enough even for me. :}
I'll be printitng this out to try sometime soon thanks for sharing.~kim
kimk  |  Wed Feb 6, 2008 at 1:00 PM
What is the name of this stamp set ?
The mouse holding the heart is so cute.
Pam Pritchard  |  Wed Feb 6, 2008 at 1:50 PM
Happy Heart Day...it's such an adorable set !! The nice thing is that it's a set you can use other than for Valentine's Day too...it's on page 65 of the Stampin' Up Spring/Summer catalogue....

Hope that helps smile
Corinne  |  Wed Feb 6, 2008 at 1:54 PM

Page 2 of 5 pages  <  1 2 3 4 >  Last »

You need to be logged in to comment

GET OUR NEWSLETTER


Splitcoaststampers's privacy policy