Advent Calendar

by Beate Johns

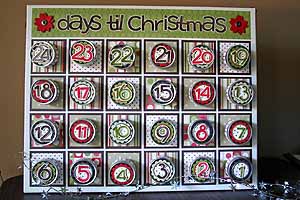
Make your own Advent calendar to help ease the anxiety of waiting for December 25.

Supplies
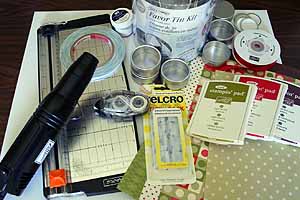
  • One 16" x 20" blank Canvas
  • 24 metal tins (2" diameter Wilton® favor tins were used here, available at Michaels in the wedding favor section)
  • Patterned Paper
  • Coordinating Cardstock
  • Number and Letter Stamps
  • Ink
  • Strong and regular adhesive (SNAIL and Terrific Tape)
  • Ribbon
  • Paper cutter
  • 24 Velcro™ dots

Step-by-Step

  1. Step 1

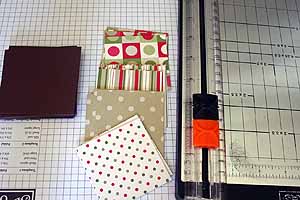
    Cut 24 2 5/8" squares of patterned paper and 24 3" squares of cardstock.
  2. Step 2

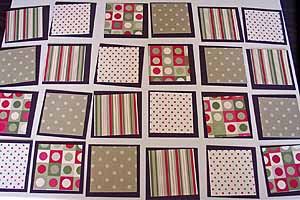
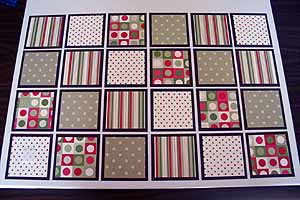
    Lay out cardstock pieces in four rows with six pieces each.

    Add patterned paper on top. If more than one patterned paper is used, lay them out in the pattern you would like to have when the calendar is finished.
  3. Step 3

    Apply adhesive to the back of the patterned paper.
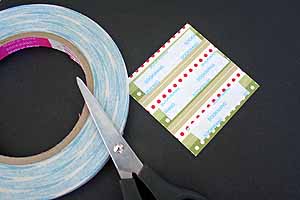
  4. Step 4

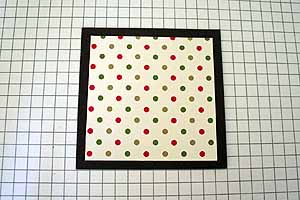
    Center and adhere over cardstock square.

    Repeat with all 24 squares.
  5. Step 5

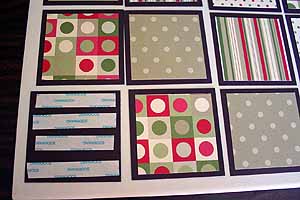
    Apply strong adhesive to the back of all cardstock squares.
  6. Step 6

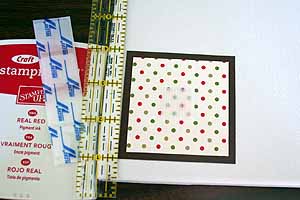
    Line bottom left square 1/2" up from the bottom and left side and adhere to canvas.
  7. Step 7

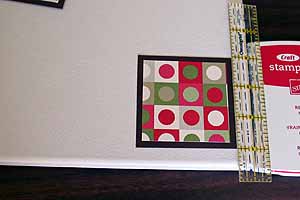
    Line bottom right square 1/2" up from the right and bottom edge and adhere to canvas.
  8. Step 8

    Adhere the remaining squares.

    Here, the spacing is 3/8" between each square and each new row.
  9. Step 9

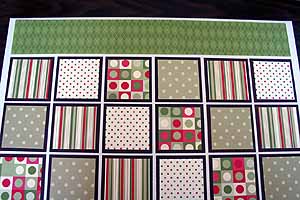
    Cut two 2 1/2" x 12" pieces of coordinating patterned paper and adhere them to a 2 1/2" x 18 7/8" long strip of cardstock.

    ( I cut a 2 1/2" x 12" and a 2 1/2" x 10" piece of cardstock and pieced them together to get my 2 1/2" x 18 7/8" long strip. The patterned paper was taped over the cardstock strip to make it sturdier.)
  10. Step 10

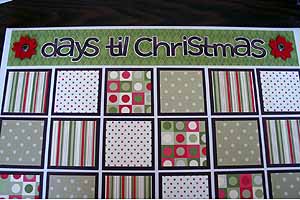
    Stamp calendar title and tape down. Add embellishments if wanted. Here, letters were stamped in pigment ink and embossed with clear embossing powder.

    Adhere patterned paper strip to the top of the canvas with strong adhesive.


  11. Step 11

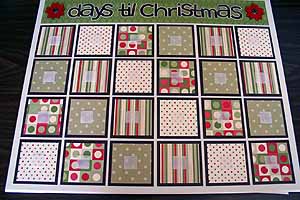
    Adhere a bottom piece of Velcro in the center of each square.
  12. Step 12

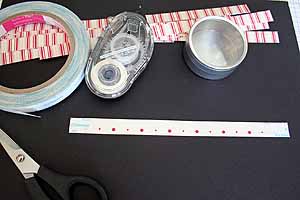
    Cut 24 1/2" x 7 1/2" strips of patterned paper.
    Add a small piece of strong adhesive on each end and regular adhesive in between.
  13. Step 13

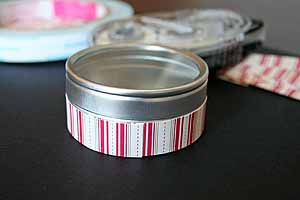
    Tape one of these strips around the bottom of each tin.
  14. Step 14

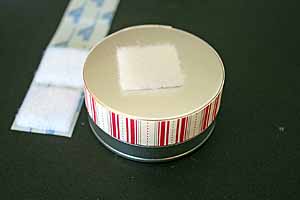
    Add one Velcro top on a bottom of each tin.
  15. Step 15

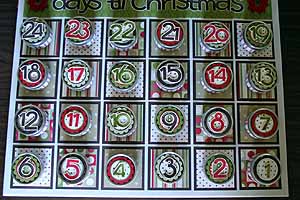
    Stamp numbers from 1 - 24 and adhere them to the front of your tins.
    I stamped mine in Chocolate Chip, Old Olive and Real Red Craft ink and embossed them with clear embossing powder.
    I added punched out layered punched out circles under each number.
  16. Step 15

    Stamp numbers from 1 - 24 and adhere them to the front of your tins.
    I stamped mine in Chocolate Chip, Old Olive and Real Red Craft ink and embossed them with clear embossing powder.
    I added punched out layered punched out circles under each number.

  17. Step 15

    Stamp numbers from 1 - 24, cut them out and adhere them to the front of each tin.

    These are stamped in Chocolate Chip, Old Olive and Real Red Craft ink and embossed with clear embossing powder. Punched out layered punched out circles were layered under each number.

  18. Step 16

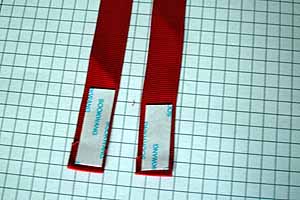
    To hang the calendar, cut two 30" pieces of ribbon.

    Add a 1 1/2" long strip of strong adhesive on one end of both ribbon pieces.
  19. Step 17

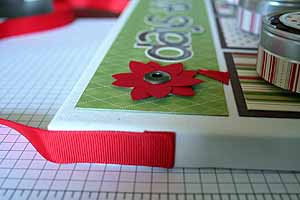
    Adhere ribbon piece on each top side of the canvas board. Reinforce with small nails or thumb tacks if needed.
  20. Step 18

    Fill the tins and let the count down begin.

  21. Step 18

    Fill the tins and let the countdown begin.
Variations

    Use a magnet board instead of canvas and magnets instead of Velcro dots.

    Line the holes of a mini muffin pan with decorated cardstock circles and add goodies inside.

    Use paper mache boxes instead of tins.

Your Turn

You've seen the tutorial, now you try it! We've got a section of the gallery set aside for Advent Calendar. Try this technique, then upload your artwork to the gallery. Show us your creations!

***Please note - Internet Explorer/Edge is not a supported browser, and will not allow you to see the videos. Please use Chrome, Firefox or Safari to view our tutorial videos.

Questions and Comments

We'd love to get your feedback or questions. Leave your comment below.

I have been looking for this pattern and today was my day! I am someone's 'Secret Santa' in our family who I think will really enjoy this - plan to make it and give it to her...shooosh..no tellin' on me! smile
Susanne  |  Tue Nov 3, 2009 at 1:20 PM
Thank you so much for this project! I've been looking for a great handmade Advent Calendar and this is perfect. I've used your picture (with full credit) on my blog (mostly) Handmade Holiday. If you need me to make any changes, let me know. This would make such a great gift!
Chris  |  Fri Nov 6, 2009 at 9:04 AM
Wow, another fabulous advent calendar. I have been on the lookout trying to decide on one to make. I really like this one!!!

Anne
Creative Craft Ideas  |  Fri Nov 6, 2009 at 9:26 AM
This is just FANTASTIC!!! my kids and I are making this for their rely's. We are putting Bible verses on the inside bottom of each tin and a little goodie for each child in the family. Great little Love you from across the miles smile Thank you for the idea!
Auntie Nell  |  Mon Nov 9, 2009 at 2:23 PM
I am so happy I found a link to this. I'd forgotten all about it but I just happen to have a 16x20 canvas laying around. I think me and baby will make this today! Thanks for all your great ideas and very clear instructions.
Shawn  |  Sat Nov 28, 2009 at 6:47 AM
Hi, I've been looking at this since it was first posted. Finally had courage to try it! Directions were great and my God Daughter Loved it.
Thanks for Sharing,
Judy
Judy Connerty  |  Sun Dec 6, 2009 at 10:58 AM
Lovely project. I'll try it for 2010 December. Better to begin soon if I want it for next Christmas!
Lyne Carrier  |  Thu Jan 7, 2010 at 7:12 PM
I like make everything and this idea
is very good .
I like it very much.
My English is not very good.
sorry.
penny  |  Sat May 29, 2010 at 7:00 AM
Since my little girl cannot eat chocolat (because of milk and soy) this could be a really fun project to do for her and much more cute than whatever we can buy!
msn nickleri  |  Fri Jul 2, 2010 at 7:56 AM
I love this project! Thanks for the tip! I'm going to recommend it in my blog!
Marta  |  Tue Nov 16, 2010 at 9:11 AM
I love this idea! I'm going to run out and get the stuff after work! For those who have a dollar store in their town, I have seen the tins there too!
Cricket  |  Wed Dec 1, 2010 at 1:55 PM
LOVED this! I did it and it turned out fabulously! Thank you for sharing your idea.
Shanna  |  Wed Dec 1, 2010 at 11:10 PM
Beate: I wanted to stop in and say Thank You for sharing this tutorial. Your instructions were easy to follow. I have now made 10 of these calendars and more orders to follow.
Thank you so very much.
Marg Roswell  |  Sat Jan 8, 2011 at 5:44 AM
I would love for you to link this up to my blog this week. It is Advent Calendar challenge and you could win the top prize or the great giveaway. We have a different challenge every week so come on by.

Dee Brady
www.thecsiproject.com
Dee  |  Sun Nov 20, 2011 at 12:20 AM
Is it possible to get a PDF file of this?? The font you used is absolutely darling!
Carolyn  |  Tue May 1, 2012 at 4:30 PM
Carolyn, I don't have a PDF file for the font. The letters were stamped with a Stampin' Up! stamp set.
Hugs and smiles
beate  |  Tue May 1, 2012 at 6:46 PM
This is absolutely adorable! Do you share the "days til Christmas," numbers and other artwork??
Carolyn  |  Tue Nov 6, 2012 at 10:22 AM
Carolyn,
I used alphabet letters and number stamps to create the title and numbers for the calendar.
beate  |  Tue Nov 6, 2012 at 12:04 PM
i have a question if you did not have most of the stuff to make it then how much did it cost you? it cost me $70.00 to get most of it and i think my mom is going to return it because it was so much! :(
Rachel  |  Sat Nov 24, 2012 at 2:49 PM
I realize this thread is a few years old but I was wondering if someone could still help me. I have done this exactly as the directions say but I can't get the 3" squares to fit. They hang off the edge. I even had one of my co-workers make me a "spacer" that is 3/8" wide and used it between the rows. They STILL hang over the side edges. What am I doing wrong or what is the secret? I want to make at least 2 of these for donations to silent auctions in the fall. Glad I started early!!! Any help would be GREATLY appreciated!
Marsha
Marsha  |  Mon Jun 27, 2016 at 7:59 AM

Page 4 of 4 pages « First  <  2 3 4

You need to be logged in to comment

GET OUR NEWSLETTER


Splitcoaststampers's privacy policy