Advent Calendar

by Beate Johns

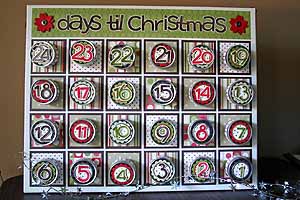
Make your own Advent calendar to help ease the anxiety of waiting for December 25.

Supplies
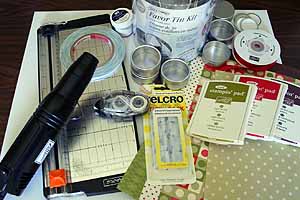
  • One 16" x 20" blank Canvas
  • 24 metal tins (2" diameter Wilton® favor tins were used here, available at Michaels in the wedding favor section)
  • Patterned Paper
  • Coordinating Cardstock
  • Number and Letter Stamps
  • Ink
  • Strong and regular adhesive (SNAIL and Terrific Tape)
  • Ribbon
  • Paper cutter
  • 24 Velcro™ dots

Step-by-Step

  1. Step 1

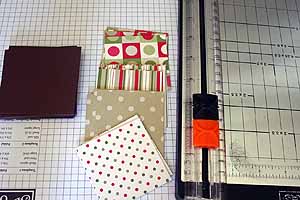
    Cut 24 2 5/8" squares of patterned paper and 24 3" squares of cardstock.
  2. Step 2

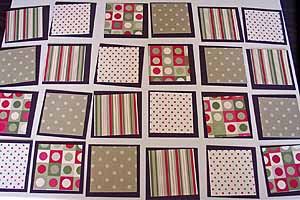
    Lay out cardstock pieces in four rows with six pieces each.

    Add patterned paper on top. If more than one patterned paper is used, lay them out in the pattern you would like to have when the calendar is finished.
  3. Step 3

    Apply adhesive to the back of the patterned paper.
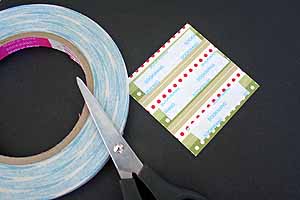
  4. Step 4

    Center and adhere over cardstock square.

    Repeat with all 24 squares.
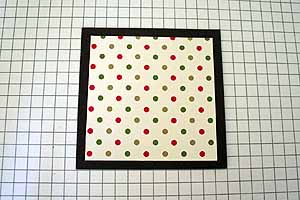
  5. Step 5

    Apply strong adhesive to the back of all cardstock squares.
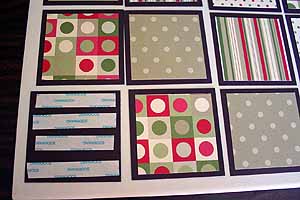
  6. Step 6

    Line bottom left square 1/2" up from the bottom and left side and adhere to canvas.
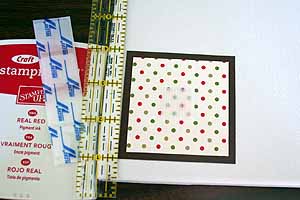
  7. Step 7

    Line bottom right square 1/2" up from the right and bottom edge and adhere to canvas.
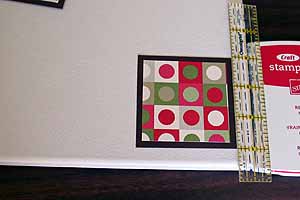
  8. Step 8

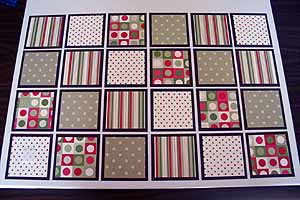
    Adhere the remaining squares.

    Here, the spacing is 3/8" between each square and each new row.
  9. Step 9

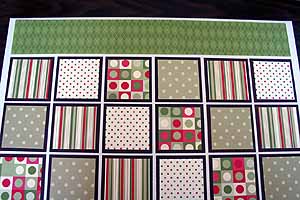
    Cut two 2 1/2" x 12" pieces of coordinating patterned paper and adhere them to a 2 1/2" x 18 7/8" long strip of cardstock.

    ( I cut a 2 1/2" x 12" and a 2 1/2" x 10" piece of cardstock and pieced them together to get my 2 1/2" x 18 7/8" long strip. The patterned paper was taped over the cardstock strip to make it sturdier.)
  10. Step 10

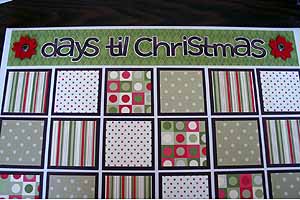
    Stamp calendar title and tape down. Add embellishments if wanted. Here, letters were stamped in pigment ink and embossed with clear embossing powder.

    Adhere patterned paper strip to the top of the canvas with strong adhesive.


  11. Step 11

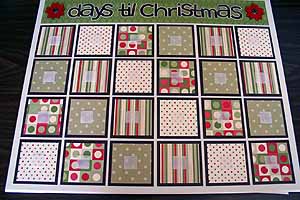
    Adhere a bottom piece of Velcro in the center of each square.
  12. Step 12

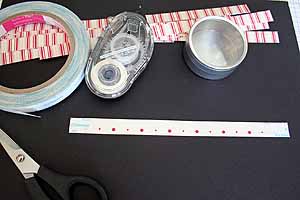
    Cut 24 1/2" x 7 1/2" strips of patterned paper.
    Add a small piece of strong adhesive on each end and regular adhesive in between.
  13. Step 13

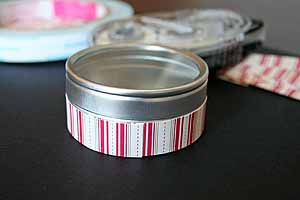
    Tape one of these strips around the bottom of each tin.
  14. Step 14

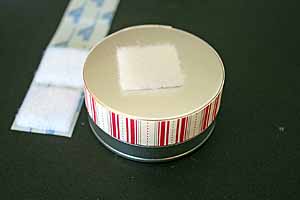
    Add one Velcro top on a bottom of each tin.
  15. Step 15

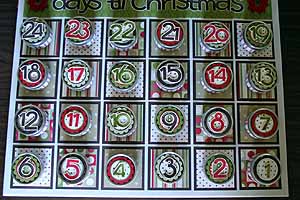
    Stamp numbers from 1 - 24 and adhere them to the front of your tins.
    I stamped mine in Chocolate Chip, Old Olive and Real Red Craft ink and embossed them with clear embossing powder.
    I added punched out layered punched out circles under each number.
  16. Step 15

    Stamp numbers from 1 - 24 and adhere them to the front of your tins.
    I stamped mine in Chocolate Chip, Old Olive and Real Red Craft ink and embossed them with clear embossing powder.
    I added punched out layered punched out circles under each number.

  17. Step 15

    Stamp numbers from 1 - 24, cut them out and adhere them to the front of each tin.

    These are stamped in Chocolate Chip, Old Olive and Real Red Craft ink and embossed with clear embossing powder. Punched out layered punched out circles were layered under each number.

  18. Step 16

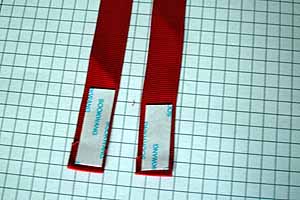
    To hang the calendar, cut two 30" pieces of ribbon.

    Add a 1 1/2" long strip of strong adhesive on one end of both ribbon pieces.
  19. Step 17

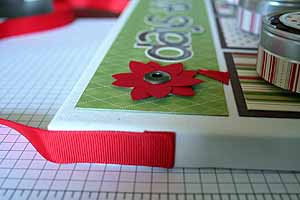
    Adhere ribbon piece on each top side of the canvas board. Reinforce with small nails or thumb tacks if needed.
  20. Step 18

    Fill the tins and let the count down begin.

  21. Step 18

    Fill the tins and let the countdown begin.
Variations

    Use a magnet board instead of canvas and magnets instead of Velcro dots.

    Line the holes of a mini muffin pan with decorated cardstock circles and add goodies inside.

    Use paper mache boxes instead of tins.

Your Turn

You've seen the tutorial, now you try it! We've got a section of the gallery set aside for Advent Calendar. Try this technique, then upload your artwork to the gallery. Show us your creations!

***Please note - Internet Explorer/Edge is not a supported browser, and will not allow you to see the videos. Please use Chrome, Firefox or Safari to view our tutorial videos.

Questions and Comments

We'd love to get your feedback or questions. Leave your comment below.

this is so very cute. My kids (13 and 7) get such a kick out of opening the calendars each day. We now have 4 plus my stepdad gets the choc throw away kind each year too. What's one more I say. I went to Michael's at lunch and have my supplies in the trunk. I'm ready to go, now I just need the time.
Thanks for the great idea and tutorial.
Kim  |  Thu Nov 15, 2007 at 2:44 PM
This is so cute! Just wondering how the paper holds up under the velcro after a few tugs on the tin?

Thank you!
Norma  |  Sat Nov 17, 2007 at 12:00 PM
For those of you who don't have access to a Michaels, I found this website with the tins and they're pretty reasonable (except for shipping if it's just you ordering them). I would recommend getting some friends together to do these with you so that shipping can be cheaper per person, or even FREE! Here's the site: http://www.weddingaccessories.net/favboxes.htm?source=overture
Marie - mariemc  |  Sat Nov 17, 2007 at 3:37 PM
I love the idea of the scavenger hunt...if I put the treats in tins my boys would probably eat them all when I wasn't looking! Really love your project and I am going to make one myself. Thanks!
Danielle  |  Mon Nov 19, 2007 at 7:12 AM
Too stinkin' cute!!! Okay, now I have to try it!
Amy Celona  |  Mon Nov 19, 2007 at 7:58 AM
Thank you, thank you, thank you for such a darling idea. I had to spend my weekend making one and it was really fun. You're a creative wonder!!
Gingerstamp  |  Mon Nov 19, 2007 at 4:29 PM
Beate, Thanks so much, my grandkids and I are making one and having great fun.
Wanda
granywonder  |  Fri Nov 23, 2007 at 9:02 AM
I found the tins at Michael's....then I went to AC Moore and they had them too grin Good Luck!
penny  |  Sat Nov 24, 2007 at 5:17 PM
Love It! Love It!
I'm working on one right now.
How about using our Stampin' Store containers? I have enough empties saved "for the right use" that I can make one calendar without purchasing containers, but for future classes I plan to order SU! containers. They're actually less expensive the the Wilton ones, and it adds to our sales!
Kim H.  |  Wed Nov 28, 2007 at 8:01 AM
That is fabulous! I am going to have to make one, and was thinking if you can't find the tins you can always make boxes from mat board too! Thank you so much for the idea!
gibbypie  |  Mon Dec 3, 2007 at 3:08 PM
HOW THE HECK DID I MISS THIS!!!???!!! OMG!!! Did you put anything in the tins?
Otter  |  Wed Feb 27, 2008 at 1:13 PM
This is WONDERFUL! I wanted to make an advent calendar, and my sister suggested tins, but i didn't have a clear idea. This is perfect!
MilesOfSmiles  |  Sun Apr 20, 2008 at 10:23 PM
Thanks for sharing this great tutorial with us. I just bookmarked it. Great idea,never think how easy this can be.
photo to canvas  |  Thu May 22, 2008 at 3:49 AM
This is a fantastic project. I have a Christmas Card Club that starts in the summer time to have enough cards made to send out by the beginning of December. I think that this project would be a perfect addition to this years class. Thank you so much for sharing! I cannot wait to make this and show all my clients!

Inky Hugs,
Cristena
Cristena Bagne  |  Thu Jun 12, 2008 at 11:51 AM
This is a really awsome project and mine turned out beautiful. However, I had my husband help me out with the measurements because my squares were not spaced evenly. My husband figured out the problem and said the measurements were off. If your using the 16" x 20" You should start at 3/8" from the edges instead of 1/2" and 1/4" between each square instead of 3/4". Thank you much for sharing this wonderful project.
Tiffaney Sugai  |  Tue Jul 15, 2008 at 8:34 PM
My husband and I made one, and I love it!! I can't wait to use it!
Shannon  |  Thu Nov 6, 2008 at 10:47 AM
That is stunning! I'm totally snatching that idea and making it for my sister. Great tutorial as well!
Perfektly Mary  |  Tue Dec 2, 2008 at 1:57 PM
I made one and mod podges over it with several coats after I finished to keep the paper from peeling off after multiple uses. Have it out again this year and it looks great! I altered it a little to say "Days of Christmas" and started with 1 so I could keep track of what day we were on a little easier. I even put little rhymes that refer to an activity planned on that day in some of the containers instead of treats. It adds to the suspense each day!
Jennifer  |  Sat Dec 6, 2008 at 5:17 PM
This is fabulous!! What a wonferful keepsake
canvas  |  Mon Dec 15, 2008 at 2:56 AM
This is beautiful! When I first saw it, I thought there was no way I could make something like that. Your directions are fantastic - thank you!
Becky  |  Mon Oct 5, 2009 at 11:57 AM

Page 3 of 4 pages  <  1 2 3 4 >

You need to be logged in to comment

GET OUR NEWSLETTER


Splitcoaststampers's privacy policy