Joy Fold Card

by Beate Johns

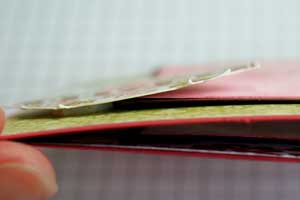
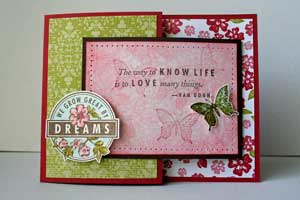
Create this unique opening card with two pieces of cardstock.

Supplies
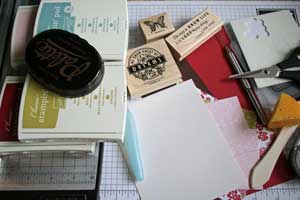
  • One 4 1/4" x 8 1/2" piece of cardstock
  • One 3" x 8" piece of cardstock
  • Two 2 3/4" x 4" pieces of cardstock or designer paper (optional)
  • One 4" x 5 1/4" piece of of cardstock or designer paper (optional)
  • One 2 3/4" x 4" piece of cardstock or designer paper (optional)
  • Additional cardstock
  • Scoring tool
  • Adhesive
  • Stamps
  • Ink

Step-by-Step

  1. Step 1

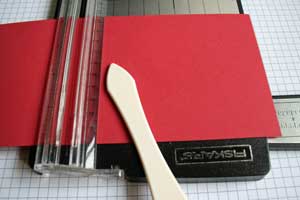
    Score your 4 1/4" x 8 1/2" piece of cardstock at 5 1/2".
  2. Step 2

    Score your 3" x 8" piece of cardstock at 4".
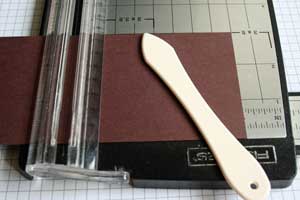
  3. Step 3

    Adhere your 4" x 5 1/4" piece of designer paper on the inside of the card.
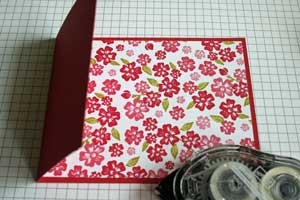
  4. Step 4

    Adhere your 2 3/4" x 4" piece of designer paper to the card front.
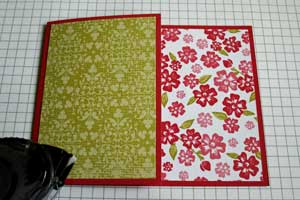
  5. Step 5

    Stamp your 2 3/4" x 3 3/4" pieces of designer paper if needed and adhere them to the inside and outside of your smaller folded cardstock piece.
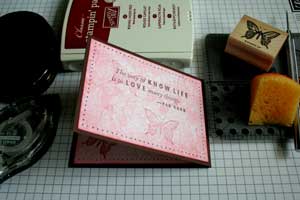
  6. Step 6

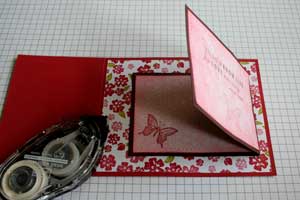
    Add adhesive to the back of your smaller flap and tape it to the inside of the card. Make sure the fold of the smaller flap is pointing to the right.
  7. Step 7 (Optional)

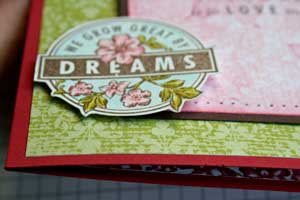
    If you want to secure the flap from opening, stamp a complimentary image and adhere it with dimensionals to slightly over the edge of the smaller flap to keep it closed.
  8. Step 8

    Finish your card.

Video!

Variations

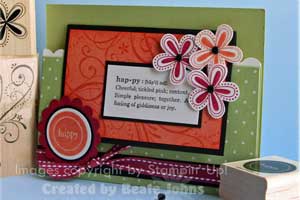
  1. Try a flap on top instead.
    Make the card base a 5 1/2" x 7 1/4" piece of cardstock scored at 4 1/4".

    Create a flap from a 4 1/4" x 5 1/2" piece of cardstock scored at 2 3/4".
  2. Make it a square.
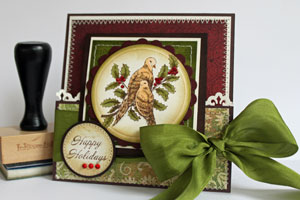
    Create your square card base by scoring a 4 1/4" x 6 1/4" piece of cardstock at 4 1/4". Score a 3" x 6" piece of cardstock at 3" to create your insert.


    Make a mini-slimline card.
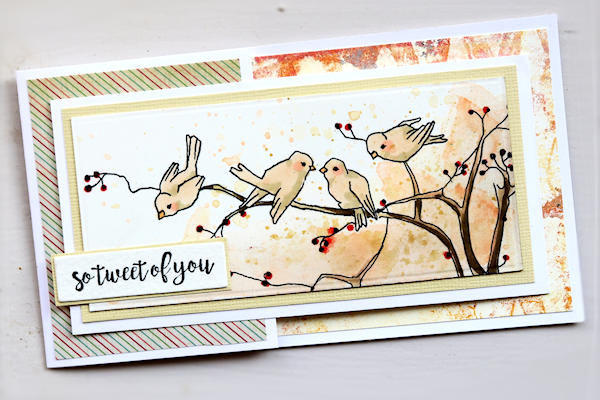
    Make the card base 3 1/2" x 9" and score at 2 3/4". Cut a second piece at 2 3/4" x 11" for the insert, scoring at 5 1/2". The finished card is 3 1/2" x 6 1/4" and will fit in a #6-3/4 envelope (small business size).

    Inside layering panel: 3 1/4" x 6"
    Left layering panel: 2 1/2" x 3 1/4"
    Insert layering panel: 2 1/2" x 5 1/4", focal panel 2 1/4" x 5"

Your Turn

You've seen the tutorial, now you try it! We've got a section of the gallery set aside for Joy Fold Card. Try this technique, then upload your artwork to the gallery. Show us your creations!

***Please note - Internet Explorer/Edge is not a supported browser, and will not allow you to see the videos. Please use Chrome, Firefox or Safari to view our tutorial videos.
Questions and Comments

We'd love to get your feedback or questions. Leave your comment below.

I just tried to view your "Joy Fold Card Gallery" and received a message saying "It appears you do not have permission to view this category". What's with that?????????
Joan Carlson  |  Thu Nov 12, 2009 at 10:29 AM
thank you! Great video Beate! I am almost done with my "scrap lift"! Thank you for the idea!
ellen  |  Thu Nov 12, 2009 at 9:06 PM
Beate: Thanks so much for sharing the Joy Fold card tutorial and the written instructions. It is such a neat, simple card. Have a great day and GO Airforce...I'm assuming your hubby is serving-give him a BIG Thank You from my husband and I. Barb
Barb Schreib  |  Thu Apr 22, 2010 at 10:46 AM
Hi, I only just discovered this site today. This card is just such a great idea. Thank you for sharing it with us.

I was wondering where a body could purchase a corner rounder punch. It seems like a very handy punch to have on hand. Thanks. Christina
Christina  |  Sat Apr 24, 2010 at 4:52 AM
love it!I use wallpaper for my back ground paper. It works great!
Sarah H  |  Mon May 31, 2010 at 7:59 PM
Wonderful cards! I can't wait to give it a try.
Linda Lapotka  |  Tue Jun 1, 2010 at 6:43 PM
Love this folded card


Cookie Sheldon
www.longaberger.com/cookiesheldon
Beautiful things for your home
Beautiful moments for your life!
Made in America Matters to Me
cookie sheldon  |  Wed Aug 18, 2010 at 6:46 AM
WOW U sure love getting your ideas and your cards are easy and beautiful. THANKS
Ruth Daynes  |  Thu Aug 19, 2010 at 9:27 AM
These cards are just so pretty and have a different twist than most these days. Beautiful images too. My favorite is the one with the Birds and Holly in your video. Just stunning. I will have a go at replicating it using my own stamps. Beate makes it lokk so easy she is wonderful. Thank you for the inspiration Beate.
Margaret Mountstephens  |  Sun Jan 9, 2011 at 1:33 PM
Hi Beate
Thankyou for the fabulous tutorial came across this while i was browsing splitcoaster's
Hugs Dianne xx
Dianne  |  Sun Jun 12, 2011 at 9:32 AM
Love this style and will try it for sure. Maybe even for my Christmas card this year. Ty for the written and video tutorials...makes it easy peesy to follow. ek ciampo
Evette K. Ciampo  |  Sat Jul 16, 2011 at 7:48 AM
Superbe carte ! J'aime beaucoup ce nouveau pliage tr�s original. Bravo. Merci pour le tuto. Amicalement.
Micha  |  Thu Sep 1, 2011 at 3:51 AM
Thanks for a really easy to follow tutorial Beate showing a great and different fold, which I've just replicated quite quickly! This is a fantastic card base and I can see 'll be doing this over and over. Hugs Helen :o)
Crafty Mamma Mia  |  Sun Nov 27, 2011 at 4:14 AM
hi love ur cards
aash  |  Wed Oct 10, 2012 at 7:08 AM
How cool is this!
Nancy Williams  |  Mon Jan 9, 2017 at 7:40 AM
I think the 2 3/4 x 4 inch pieces of patterned paper should measure 2 3/4 x 3 3/4 inches instead. Otherwise, there is no border on the long end. I had to adjust the measurement when I made one of these this afternoon. I never made note of it back when this was originally shared. Great card to make, though! It's a lot of fun and fits in a standard A2 envelope.
Scrapjanny  |  Sat Sep 26, 2020 at 2:43 PM
What a joy to hear Beate again! Great tutorial, and thank you, thank you, Dina for the deets for all the other sizes, including the mini slimline, which is my current favorite!
joniworx  |  Wed Jul 28, 2021 at 8:12 PM

Page 4 of 4 pages « First  <  2 3 4

You need to be logged in to comment

GET OUR NEWSLETTER


Splitcoaststampers's privacy policy