I got the inspiration for this card design from this card by Patsy at Stamps to Die For. She made an A2-sized card, but because of the imagery I wanted to use on the focal panel, I had to make mine wider.
I cut a piece of cardstock to 11x5-1/2". (I actually had to do this 5 times--3 with cardstock & 2 with scratch paper--before I figured out the right width! :P) I don't have the scallop tag punch Patsy used, so I used the largest of the "Crescent Tag Toppers" dies instead. The die is about 1-1/4" tall, so I marked a line just a hair over that measurement, parallel to each end of my cardstock. I also marked the center between the top & bottom of the panel at each end. I lined up my die at one end, using my marks as guides, & ran it through my die cutting machine. I repeated that for the other end. I used my paper trimmer to cut off the top & bottom of each end, up to the cuts the die made. I scored the bottom of the tag part at the one end, and scored the card base about 4-1/4" from the other end. That gave me roughly a 3" wide panel for my image.
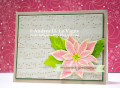
I cut a piece of watercolor paper to 2-3/4x5-1/4". I stamped the teacup from "Tea-rrific" on that, masked the cup portion, and stamped the bunch of roses from "Buds and Vases." I kind of hemmed & hawed about how to decorate the cup, and finally decided on the single rose blossom from "Buds and Vases." I stamped that, and dried the ink with my heat tool, to keep it from smearing.
I used my watercolors to paint the image. I had picked out a patterned paper to go at the right inside of the card, and used that as a color guide. To keep things from being too matchy-matchy, I painted the rose on the teacup yellow. I added a shadow to the side of the cup, as well as under the saucer, with a few very pale washes of Payne's Grey watercolor, and dried the panel with my heat tool.
I stamped the greeting above my image in Versamark, and heat embossed with Liquid Platinum powder. I used liquid glue to adhere that panel to my card base.
I die cut 2 flower-shaped hole reinforcements from pink cardstock, and glued them to the centers of the ends of my tag sections. After the glue dried, I used a 1/8" hole punch to make the center holes through the background cardstock. I threaded a length of ribbon through the holes, and tied it in a bow. I trimmed the ribbon ends at an angle, and squished a bit of liquid glue on the very ends to keep the ribbon from fraying. (The card is opened by untying the ribbon.) This card was a lot of mental work, since I had to resize the base, but I think it came out great in the end!
Date: Thursday, July 16, 2020 GMT Views: 129
Favorited:2