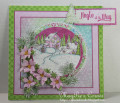
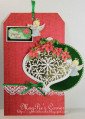
Make the card base. Score and fold a piece of cardstock and slide the window die over the scored fold and cut out. This will create a hinge so your card will open and close. Cut another window and glue it over the folded piece and this gives the card all the decorative edges. I cut out the vertical strips on the front of the window and inserted one of the card front images so that you are looking out over a magical snow scene. I added glitter and set aside to dry. Dimensional tape was used to adhere to the front of the card.
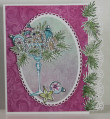
Using VersaMark ink stamp the poinsettia and then emboss with the white powder. I then used a dauber and Lilac Posies ink to color the petals and cut out using the coordinating dies. I stamped all leaves and pine boughs with Stazon Olive Green ink and cut out using the coordinating dies. The holly leaves were colored with Bamboo Leaves Ink and a dauber. Run the leaves and flower petals through your die cutting machine using the 3D Poinsettia Shaping Mold. Glue the flower together and add the prills to the center and set aside to dry. Glitter the pine boughs and set aside to dry.
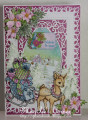
Find a ticket on the paper collection and cut out using the Luggage and Tags Dies. Use dimensional tape to adhere to the front of the card and then arrange the flowers and pine boughs around the ticket.
Date: Wednesday, August 15, 2018 GMT Views: 464
Favorited:2