Registered: August 14, 2003 Location: Belle Plaine, Kansas Posts: 875
Mon, Aug 08, 2005 @ 5:16 PM
Here are the class instructions
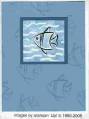
Venetian Blind Card
Supplies:
4� x 11 sheet white heavy cardstock
40� grosgrain ribbon
5� x 4� piece of cardboard (doesn�t need to be thick)
Strong adhesive like red tape
Ruler
Scoring Tool
Rectangle Hole Punch
Crafters Needle or sewing needle for ribbon
Stamp Sets, Ink Pads & Coloring Utensils of your choice
Use thick 4�� x 11� cs (all cs will work but may not be durable enough for
many openings)
Fold the cs in half so the card is now 4 �� x 5 ��
With the open part down stamp your design on the front of the card & greeting
inside or however you like. Keep in mind you�ll need �� or so on each side
where the ribbon will run through so stamp your design in the center.
On the front half only, score card every ��, starting at the bottom of the
card which should fold up, then the next �� should fold down, then repeat
working your way up the card. You should end up with 10 score lines & 11
sections.
Starting at the bottom front, accordion fold the card along each score line.
The first fold should be turned up, making a valley fold. Crease each fold
line well with the bone folder if you have one.
Using the rectangle hole punch, punch a hole along the right & left edge of
the front of the card in the middle of each section. Make sure you punch in
at least �� from the edge to avoid the card ripping later when you pull the
ribbons.
When the holes are punched on the front, fold the card in half & smooth out
the front to line up the front & back.
Using the bottom front holes as a guide, punch through the back of the card at
the bottom left & right corners only. What you want is one hole in the two
bottom corners of the back of the card.
Thread the ribbon onto the needle.
Thread the ribbon through the card as follows:
1. Leaving 3 to 4� of ribbon hanging, go up through the bottom right hole
on the front of the card, straight through all accordion folds & out the top.
2. Take the ribbon across the top of the card, it will be showing on the
top front of the card.
3. Go down through the top left hole, straight through all accordion
folds & out the bottom left corner on the front of the card. Untwist the
ribbon as needed before proceeding.
4. Go down through the bottom left hole on the back of the card.
5. Go across the back of the card & then come up through the bottom right
hole on the back of the card. The ribbon will go across the bottom back of
the card.
6. Repeat steps 1,2, & 3 as you go around the front of the card one more
time; up through the holes on the right, across the top, & down through the
holes on the left side ending with an additional 3 to 4� if ribbon hanging on
both sides. You are basically stringing the ribbon through the card twice.
Remove the needle.
Release the folds & pull the ribbon gently as needed to remove any looseness.
Once the ribbon is where you want it, adhere the cardboard to the back of your
card making sure the ribbon is flat & tight against the backside. It�s ok to
glue over the ribbon. You need the cardboard for the card to work correctly.
Trim the ribbon ends so they are the same length & about 2 to 3� below the
card when the card is closed.
You could add beads, sequins or buttons to the ends of the ribbons if you wish
or you can knot the ends.
AFTER the glue has dried, gently pull both ends of the ribbon outward to make
the blind go up.