Splitcoaststampers.com - the world's #1 papercrafting community
You're currently viewing Splitcoaststampers as a GUEST. We pride ourselves on being great hosts, but guests have limited access to some of our incredible artwork, our lively forums and other super cool features of the site! You can join our incredible papercrafting community at NO COST. So what are you waiting for?
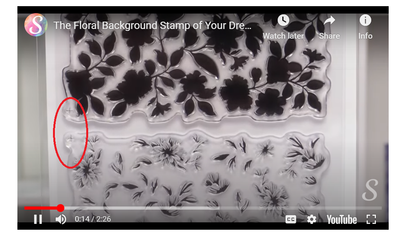
I just got a new layering stamp set with two layers. in the corner of each image is a tiny plus sign, to help with lettering. the packaging says to use the plus signs to align the stamps but not to actually ink them. how is that possible? thanks!
If you watch the video it shows how to use this set
First you would need a stamping platform.
Put paper in platform.
Put first stamp down, close lid so stamp clings to lid.
Ink stamp
Close lid and run you hand all around the top of lid so ink on stamp makes image on paper
Open lid and remove stamp from platform lid
Put next stamp down on stamped image lining up the x mark and rest of the stamp.
Close lid so stamp clings to lid.
Open lid
Ink stamp
Close lid and run your hand over top of lid so image stamps on top of first image.
I have a feeling that you don't have a stamping platform. It may be difficult to use this stamp set with acrylic blocks. If that is what you have when you line up second stamp on top of first stamped image when you use acrylic block to pick up the second stamp you will have to be very careful.
Personal I have not had any luck with 2 step stamping with an acrylic block or a stamping platform. I have come to the conclusion this is not for me.
I really suggest that you watch the video of the picture you posted.
Good Luck!!
I'm sure my explanation is as clear as much. �
__________________ The quickest way for a parent to get a child's attention is to sit down and look comfortable. Practice safe eating always use condiments
Thanks! I watched the video & i'm lucky to have a stamp platform. Im not wondering about the stamping in general. Im specifically wondering abut how to avoid stamping those little alignment pluses. In the video you can see that they get stamped. They don't show up on the cards she makes so presumably she trimmed them off. I would love to use the images as is, without the pluses & without trimming.
Thanks! I watched the video & i'm lucky to have a stamp platform. Im not wondering about the stamping in general. Im specifically wondering abut how to avoid stamping those little alignment pluses. In the video you can see that they get stamped. They don't show up on the cards she makes so presumably she trimmed them off. I would love to use the images as is, without the pluses & without trimming.
The only thing I can think of to cover up the alignment marks is to cover image with ribbon, twin, a sentiment or a butter fly punch out . Oh how about sequins or gems or some liquid drops. I for get the name right now. It's late and I'm heading to bed
__________________ The quickest way for a parent to get a child's attention is to sit down and look comfortable. Practice safe eating always use condiments
I don't have any of these stamps but isn't the purpose of the pluses to line up all the different layers of the stamps? If you are trying to mask off the pluses on the stamps themselves it defeats the purpose of them. Personally I would put my paper in the stamp platform, then I would lay the first stamp on the paper where I want it. Then I would take a tiny piece of post it note and carefully lifting up the corner of the stamp where the plus is, place the post it note under the plus, adhesive side down so the post it note is sticking to the paper. Make sure the post it note is tiny enough not to interfere with the image itself. Close the lid and adhere the stamp to the platform.Now stamp like usual, this will leave the plus mark stamped onto the post it note. Remove the first stamp and proceed with the second by matching up the plus. When all stamps are done, remove the post it note from the paper.
Last edited by August29; 07-05-2020 at 06:43 AM..
Reason: Added info
Looking at the video, I think it’s just trimmed off - it’s outside the area that is used.
Alternatively, you can mask off the plus sign by sticking a small piece of PostIt tape, PostIt, etc. over the plus sign when ready to ink.
OMG the post it note cover up! Why didn't I think of that, well maybe because it was really really late when I posted, should stay of the computer late at night!
__________________ The quickest way for a parent to get a child's attention is to sit down and look comfortable. Practice safe eating always use condiments
In the video the plus signs are stamped and visible. so trimming afterwards would be easiest for me. My blended/stenciled/watercolored backgrounds are trimmed to exactly cover a card base, or more often, trimmed smaller so there’s a border. And that’s often seen in videos.
(Actually, most of my backgrounds end up used for strip cutting or die cuts since they don’t make the cut as backgrounds (no pun intended), though making something useful/pretty from “failures” is a different topic)! :shock:
I don't have any of these stamps but isn't the purpose of the pluses to line up all the different layers of the stamps? If you are trying to mask off the pluses on the stamps themselves it defeats the purpose of them. Personally I would put my paper in the stamp platform, then I would lay the first stamp on the paper where I want it. Then I would take a tiny piece of post it note and carefully lifting up the corner of the stamp where the plus is, place the post it note under the plus, adhesive side down so the post it note is sticking to the paper. Make sure the post it note is tiny enough not to interfere with the image itself. Close the lid and adhere the stamp to the platform.Now stamp like usual, this will leave the plus mark stamped onto the post it note. Remove the first stamp and proceed with the second by matching up the plus. When all stamps are done, remove the post it note from the paper.
This is the best idea! I have always tried to mask the stamp, or wipe it off. This is 100x better!
Are the marks far enough from the rest of the image that you can easily wipe the ink off them before you stamp?
the marks are really close to the image so they really could interfere with it. I guess masking is the way to go but it just seems like a lot of fidgeting and remembering. it would also be hard to align if i want to reink the stamps without washing them first. i guess this stamp set will work better with trimming than as a one layer card. good thing it's a gorgeous & easy stamp set!
I don't have any of these stamps but isn't the purpose of the pluses to line up all the different layers of the stamps? If you are trying to mask off the pluses on the stamps themselves it defeats the purpose of them. Personally I would put my paper in the stamp platform, then I would lay the first stamp on the paper where I want it. Then I would take a tiny piece of post it note and carefully lifting up the corner of the stamp where the plus is, place the post it note under the plus, adhesive side down so the post it note is sticking to the paper. Make sure the post it note is tiny enough not to interfere with the image itself. Close the lid and adhere the stamp to the platform.Now stamp like usual, this will leave the plus mark stamped onto the post it note. Remove the first stamp and proceed with the second by matching up the plus. When all stamps are done, remove the post it note from the paper.