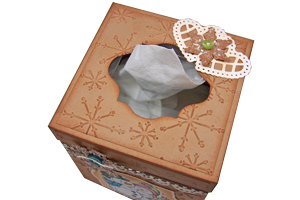
Tissue Box Cover
by Diane Zechman
Create a crafty custom cover for square tissue boxes.
Supplies
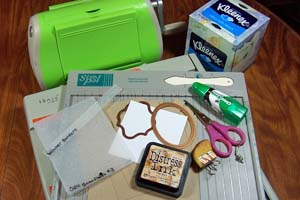
- Box of tissues (Kleenex brand used here)
- Two 5 1/8” x 9 1/2” pieces of cardstock (base)
- One 6 9/16” square piece of cardstock (lid)
- Four 4 ¼” x 4” pieces of cardstock (base layers)
- Four 4 ¼” x ¾” pieces of cardstock (lid side layers)
- One 4 ¼” square piece of cardstock (top layer)
- Scoring tool
- Glue
- Scissors
- Cutting dies or shape templates
- Die cutting machine
- Embossing folder
- Sponge
- Ink
- Additional cardstock, stamps, diecuts, punches and other embellishments as desired
Step-by-Step
-
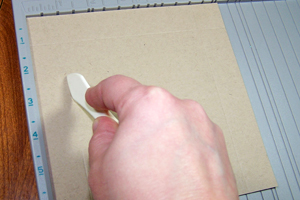
Step 1
Score the long sides of each of your two 5 1/8” x 9 1/2” pieces of cardstock at 1/2" and 5".
Note:
I used a Kleenex brand tissue box. If you use a different brand, measure your box
and adjust all measurements as needed.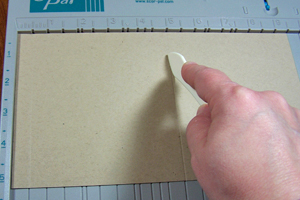
-
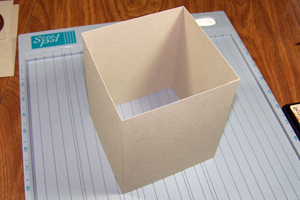
Step 2
Glue side “A” on the first piece to side “B” on the second piece. Refer to drawing.
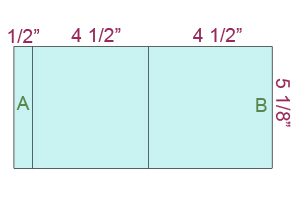
-
Repeat with your second piece of cardstock to form base.
-
Step 3
Score the 6 9/16" square piece of cardstock at 1" along all 4 sides.
-
Step 4
Trace an oval shape and cut it out with scissors. I used the largest die in the Small Classic Ovals Nestabilities™ set.
Hint:
If you choose to not add a top layer, make sure your oval is smaller than the opening on the tissue box.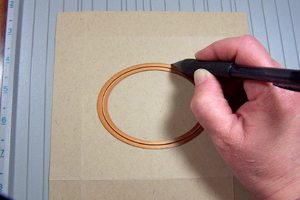
-
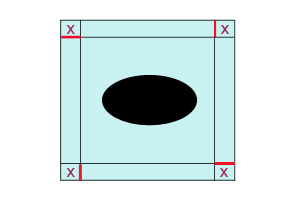
Step 5
Cut each corner on the red lines (up to the scored line) as shown in the drawing.
-
Step 6
Fold and adhere all four tabs (marked “X” in the drawing) to form the box lid.
-
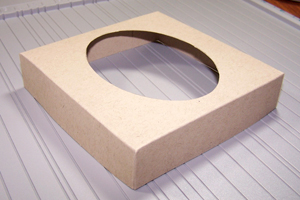
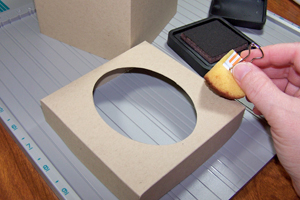
Step 7
Sponge all edges and corners of the base and lid if desired.
-
Step 8
Slip the box lid over the base and glue into place.

-
Step 9
Die cut an opening in the 4 1/4" square piece of cardstock or trace and cut desired shape with scissors.
I used the 4th die in the Labels 13 Nestabilities set, counting out from the smallest die.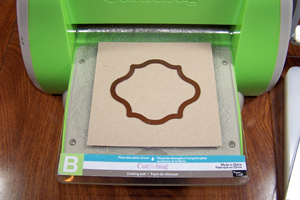
-
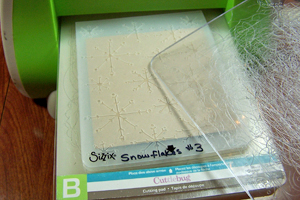
Step 10
Emboss all base and lid layers with embossing folder of choice.
-
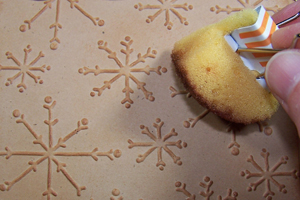
Step 11
Sponge embossed layers with ink if desired.
-
Step 12
Glue all layers into place and embellish box cover as desired. Slip finished cover over a tissue box.

-
Video!
Variations
Try using heavy-weight patterned paper instead of plain cardstock and embossing folders. Make covers for any occasion or holiday.
Your Turn
You've seen the tutorial, now you try it! We've got a section of the gallery set aside for Tissue Box Cover. Try this technique, then upload your artwork to the gallery. Show us your creations!
***Please note - Internet Explorer/Edge is not a supported browser, and will not allow you to see the videos. Please use Chrome, Firefox or Safari to view our tutorial videos.

 *
*
Questions and Comments
We'd love to get your feedback or questions. Leave your comment below.
Diane listed all her supplies in her gallery upload. She states ithe stamp is: Penny Johnson�s Snowy Cuddles by Stampavie.
Hugs and smiles
Beate
Eveline.
Lana
Lori Jane, maybe you could trace some cookie cutters or make your own template from some clip art on the computer? Or a plastic stencil template might work well.
Page 1 of 4 pages 1 2 3 > Last »