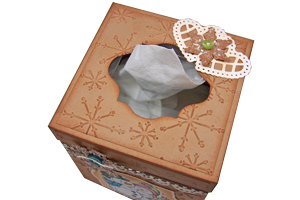
Tissue Box Cover
by Diane Zechman
Create a crafty custom cover for square tissue boxes.
Supplies
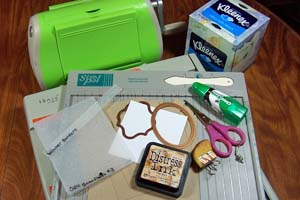
- Box of tissues (Kleenex brand used here)
- Two 5 1/8” x 9 1/2” pieces of cardstock (base)
- One 6 9/16” square piece of cardstock (lid)
- Four 4 ¼” x 4” pieces of cardstock (base layers)
- Four 4 ¼” x ¾” pieces of cardstock (lid side layers)
- One 4 ¼” square piece of cardstock (top layer)
- Scoring tool
- Glue
- Scissors
- Cutting dies or shape templates
- Die cutting machine
- Embossing folder
- Sponge
- Ink
- Additional cardstock, stamps, diecuts, punches and other embellishments as desired
Step-by-Step
-
Step 1
Score the long sides of each of your two 5 1/8” x 9 1/2” pieces of cardstock at 1/2" and 5".
Note:
I used a Kleenex brand tissue box. If you use a different brand, measure your box
and adjust all measurements as needed.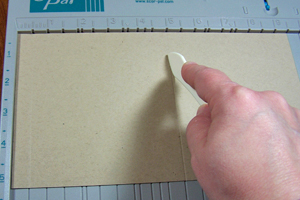
-
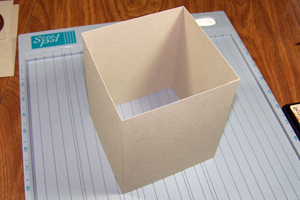
Step 2
Glue side “A” on the first piece to side “B” on the second piece. Refer to drawing.
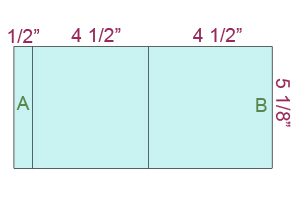
-
Repeat with your second piece of cardstock to form base.
-
Step 3
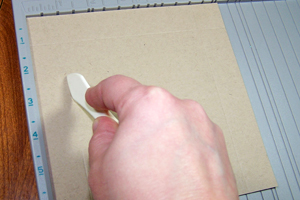
Score the 6 9/16" square piece of cardstock at 1" along all 4 sides.
-
Step 4
Trace an oval shape and cut it out with scissors. I used the largest die in the Small Classic Ovals Nestabilities™ set.
Hint:
If you choose to not add a top layer, make sure your oval is smaller than the opening on the tissue box.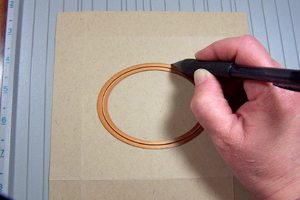
-
Step 5
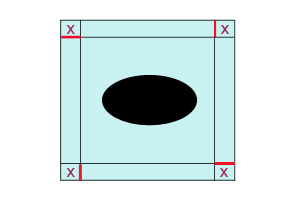
Cut each corner on the red lines (up to the scored line) as shown in the drawing.
-
Step 6
Fold and adhere all four tabs (marked “X” in the drawing) to form the box lid.
-
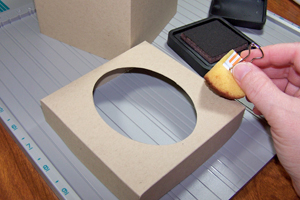
Step 7
Sponge all edges and corners of the base and lid if desired.
-
Step 8
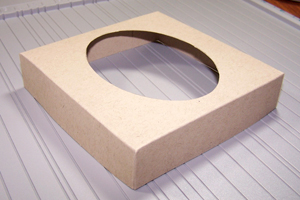
Slip the box lid over the base and glue into place.

-
Step 9
Die cut an opening in the 4 1/4" square piece of cardstock or trace and cut desired shape with scissors.
I used the 4th die in the Labels 13 Nestabilities set, counting out from the smallest die.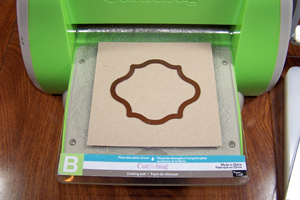
-
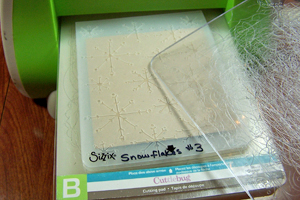
Step 10
Emboss all base and lid layers with embossing folder of choice.
-
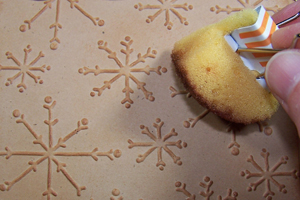
Step 11
Sponge embossed layers with ink if desired.
-
Step 12
Glue all layers into place and embellish box cover as desired. Slip finished cover over a tissue box.

-
Video!
Variations
Try using heavy-weight patterned paper instead of plain cardstock and embossing folders. Make covers for any occasion or holiday.
Your Turn
You've seen the tutorial, now you try it! We've got a section of the gallery set aside for Tissue Box Cover. Try this technique, then upload your artwork to the gallery. Show us your creations!
***Please note - Internet Explorer/Edge is not a supported browser, and will not allow you to see the videos. Please use Chrome, Firefox or Safari to view our tutorial videos.

 *
*
Questions and Comments
We'd love to get your feedback or questions. Leave your comment below.
Dotti, I use the little green bottle of liquid glue...it's either called Tombo Mono Multi or DAP One Stick. Same exact stuff, just 2 different brands that are packaged the same. ♥ ♥ ♥ that stuff! You never have to worry about your cards falling apart. It gives just a few seconds of "wiggle room" and then it's stuck!
my engl...is a litle bit bad but i see your very nice card
thank you
I just love your tissue box tutorial. I did one yesterday. I did add a bottom to the tissue box by
cutting a 6 1/2 inch square and scored it at
1 inch folded an glued it just like the top. I put
the bottom inside and slid it down to the bottom. I gently squeezed the sides of the base to allow me
to glue the bottom to the base. Thanks again.
Page 3 of 4 pages < 1 2 3 4 >