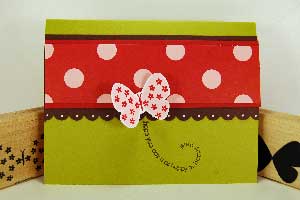
Spiral Pop-Up Card

by Corinne Somerville

Create this fun pop up card in a few easy steps.

Supplies
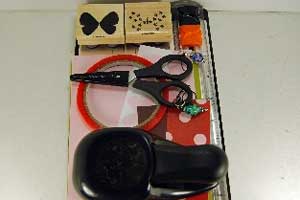
  • One 5 ½” x 8 ½” piece of cardstock for the card base

  • One 5 ¼” x 8 ¼” piece if cardstock for the card liner

  • 1 ¾” Circle Punch

  • Scissors

  • Glue Dots

  • Sticky Strip™

  • Stamps

  • Ink

Step-by-Step

  1. Step 1

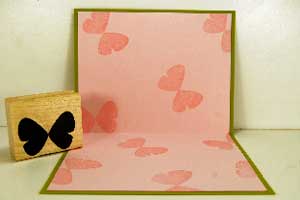
    Attach the 5 ¼” x 8 ¼” liner cardstock onto the 5 ½” x 8 ½” card front.

    The liner is required to give the card extra weight to handle the spring action.
  2. Step 2

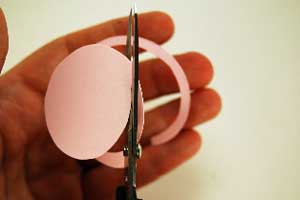
    Punch a 1 ¾” circle out of cardstock.

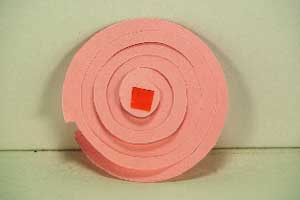
    Starting from the outside, create a spiral by cutting in a continuous circle approximately 1/8” around until there is about a ¼” left uncut in the center.
  3. Step 3

    Place a small piece of Sticky Strip in the center of the spiral.
  4. Step 4

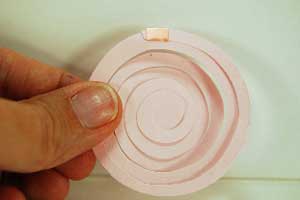
    On the opposite side that you placed the Sticky Strip in the center, place a piece of Sticky Strip on what will be the tail of the spiral.
  5. Step 5

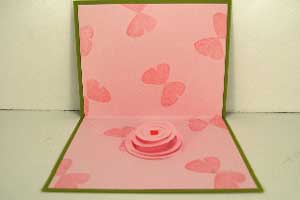
    Attach the spiral to the center of the card's inside on the bottom half of the liner.
  6. Step 6

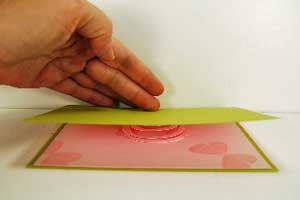
    To attach the top part of the spiral to the card, simply close the card and press firmly to make sure the Sticky Strip is well attached to the top and bottom of the card.
  7. Step 7

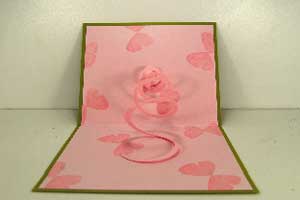
    This is what the attached spiral will look like.
  8. Step 8

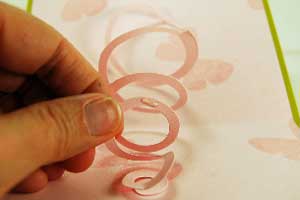
    Roll up glue dots and attach to the spiral where pop ups will be attached to the card.
  9. Step 9

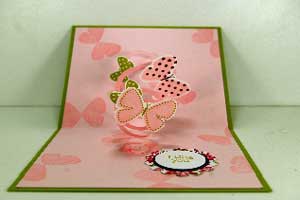
    Adhere pop ups to the glue dots.
  10. Step 10

    Decorate your card front.

Video!

Your Turn

You've seen the tutorial, now you try it! We've got a section of the gallery set aside for Spiral Pop-Up Card. Try this technique, then upload your artwork to the gallery. Show us your creations!

***Please note - Internet Explorer/Edge is not a supported browser, and will not allow you to see the videos. Please use Chrome, Firefox or Safari to view our tutorial videos.

Questions and Comments

We'd love to get your feedback or questions. Leave your comment below.

This is so adorable, I havent done any challenges yet, but I am going to do this one. smile Thanks so much for sharing.
Rebekka  |  Wed Sep 24, 2008 at 7:57 AM
This is great! All kinds of potential for embellishments - birthdays, holidays, etc. and those tiny stamps that I've only used on envelopes. I really want to try this!
Thanks very much ~
ribbongrass  |  Wed Sep 24, 2008 at 10:24 AM
That is too cute for words...I can't wait to try this technique! Well done!
Liz Anton  |  Wed Sep 24, 2008 at 10:28 AM
This is just great. Remember making these as snakes with the children when they were small. Would never have thought to use them in a card.
Great pictures and lovely simple tutorial (needs to be for me) will certainly give this one a go.
Thanks for all your hard work.
veecee  |  Wed Sep 24, 2008 at 11:42 AM
Thank you for your kind words...we were incredibly blessed to learn this at this years Stampin' Up! convention and it was so nice to be able to share how to make these with everyone.

Happy to help smile
Corinne (aka Roxy)  |  Wed Sep 24, 2008 at 11:50 AM
I have been wondering how these were done!! thanks for the tutorial, will be playing later in the day. grin
Maxine  |  Wed Sep 24, 2008 at 1:44 PM
Way cute! Thanks for putting this tutorial together for us!
Laura  |  Wed Sep 24, 2008 at 2:10 PM
Oh this was a fabulous tutorial Corinne! I made one last night using it. Just loaded it to the gallery...super cool!
Dawn Easton  |  Wed Sep 24, 2008 at 2:23 PM
Thank you for this great idea. I can't wait to make this for my friend's birthday.
Diana  |  Wed Sep 24, 2008 at 3:06 PM
Awesome tutorial Corinne, can't wait to try these cards
Jen  |  Wed Sep 24, 2008 at 5:09 PM
Awesome tutorial! Great job..cannot wait to try this!
Carolyn King  |  Wed Sep 24, 2008 at 6:37 PM
Hi Corinne,
Thanks for the quick and easy to follow tutorial. First time looking around this site. Have just become a SU demo here in New Zealand so looking forward to seeing everyones creations.
Thanks again,
Adele
Adele Quinn  |  Thu Sep 25, 2008 at 1:03 AM
It's very nice!!!!
I want to make this card...
thanks
ji eun  |  Thu Sep 25, 2008 at 2:32 AM
Thanks Corinne, this looks like a fun one!
sleepyinseattle  |  Thu Sep 25, 2008 at 7:21 AM
Love it! Love it! I will definately use this for kids' cards! Thanks for sharing
stamps4funGin  |  Thu Sep 25, 2008 at 7:39 AM
This is so clever! Hope I have a chance to do this one.. I had just gotten a new circle punch a couple of weeks ago. Thanks..bless you
ines(4 cats lady)  |  Fri Sep 26, 2008 at 3:01 AM
I'm so glad you found the tutorial helpful ! Enjoy smile
Corinne (aka Roxy)  |  Fri Sep 26, 2008 at 3:03 AM
Sometimes pop up cards can be very time consuming and difficult to make. This, however looks possible and the step by step directions are great. I have a belated bday card to make and now I have my inspiration. Thanks.... ON to the stamping room.
Clarkie SKC
Clarkieskc  |  Fri Sep 26, 2008 at 7:58 AM
This is awesome! Thanks for sharing. Will be trying this out over the weekend.
CQ
CQ  |  Sat Sep 27, 2008 at 12:19 AM
Es una idea genial, enhorabuena, preciosa
Monika  |  Sat Sep 27, 2008 at 8:02 AM

Page 1 of 3 pages  1 2 3 >

You need to be logged in to comment

GET OUR NEWSLETTER


Splitcoaststampers's privacy policy