Spiral Pop-Up Card
by Corinne Somerville
Create this fun pop up card in a few easy steps.
Supplies
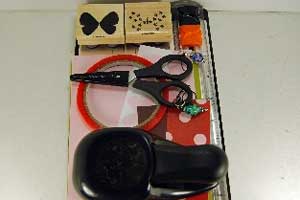
- One 5 ½” x 8 ½” piece of cardstock for the card base
- One 5 ¼” x 8 ¼” piece if cardstock for the card liner
- 1 ¾” Circle Punch
- Scissors
- Glue Dots
- Sticky Strip™
- Stamps
- Ink
Step-by-Step
-
Step 1
Attach the 5 ¼” x 8 ¼” liner cardstock onto the 5 ½” x 8 ½” card front.
The liner is required to give the card extra weight to handle the spring action.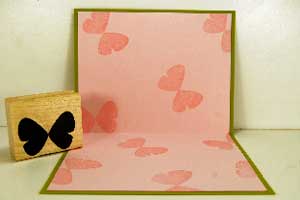
-
Step 2
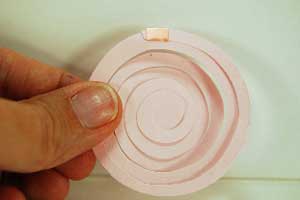
Punch a 1 ¾” circle out of cardstock.
Starting from the outside, create a spiral by cutting in a continuous circle approximately 1/8” around until there is about a ¼” left uncut in the center.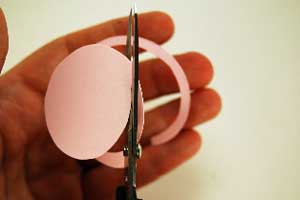
-
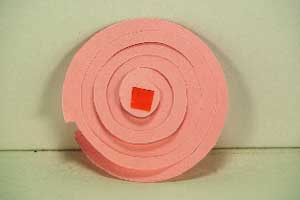
Step 3
Place a small piece of Sticky Strip in the center of the spiral.
-
Step 4
On the opposite side that you placed the Sticky Strip in the center, place a piece of Sticky Strip on what will be the tail of the spiral.
-
Step 5
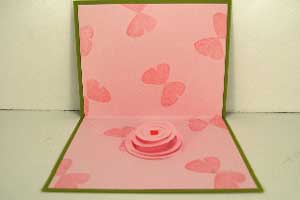
Attach the spiral to the center of the card's inside on the bottom half of the liner.
-
Step 6
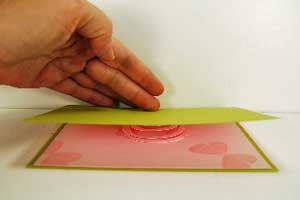
To attach the top part of the spiral to the card, simply close the card and press firmly to make sure the Sticky Strip is well attached to the top and bottom of the card.
-
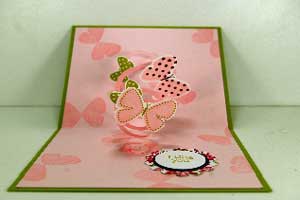
Step 7
This is what the attached spiral will look like.
-
Step 8
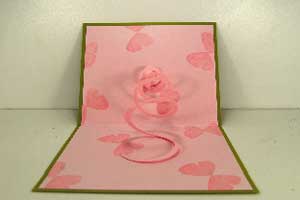
Roll up glue dots and attach to the spiral where pop ups will be attached to the card.

-
Step 9
Adhere pop ups to the glue dots.
-
Step 10
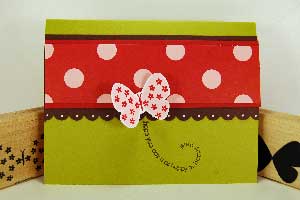
Decorate your card front.
Video!
Your Turn
You've seen the tutorial, now you try it! We've got a section of the gallery set aside for Spiral Pop-Up Card. Try this technique, then upload your artwork to the gallery. Show us your creations!
***Please note - Internet Explorer/Edge is not a supported browser, and will not allow you to see the videos. Please use Chrome, Firefox or Safari to view our tutorial videos.
Questions and Comments
We'd love to get your feedback or questions. Leave your comment below.
i permission to shared this in my multiply....
thank u for shared..
Page 3 of 3 pages < 1 2 3