Ruffled Ribbon

by Joanne Basile

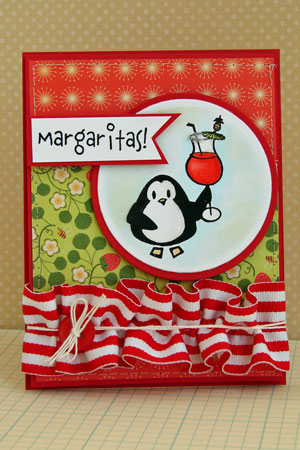
Gather ribbon for a fun, ruffly embellishment.

Supplies
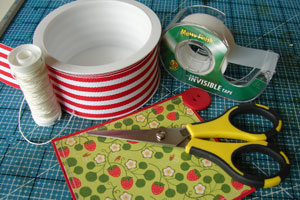
  • Ribbon

  • Sewing machine

  • Scissors

  • Tape

Step-by-Step

  1. Step 1

    Set your stitch length to the longest setting (a baste stitch) on your sewing machine. Stitch the full length of your ribbon.

    Hint:
    For this sample, the ribbon was stitched down the center for a center gather. You can also stitch just along one edge.
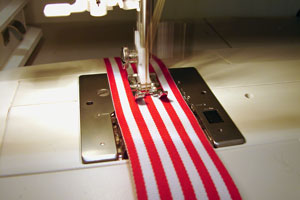
  2. On your stitching there will be one thread on the front, and a second that comes off the back.
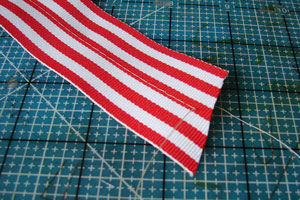
  3. Step 2

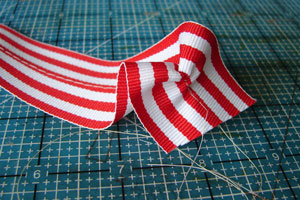
    Pull on just one of the thread ends to gather the ribbon. Then push that bunch into the center. Continue to pull the thread, and then push that little bunch towards the center.

    Hint:
    If you pull on both of them simultaneously, you won’t be able to gather the ribbon.
  4. Step 3

    Turn your ribbon and continue to turn and bunch from the other direction. Continue pushing the bunches towards the center of the ribbon.
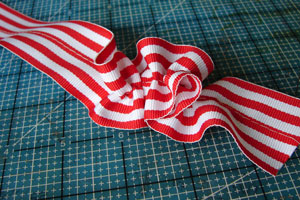
  5. Now you’ll have a messy, tightly bunched, little bundle of ribbon.
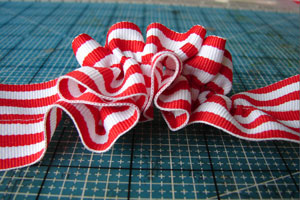
  6. Step 4

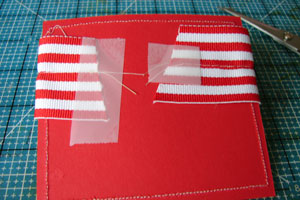
    Spread the ribbon across the width of the cardstock.
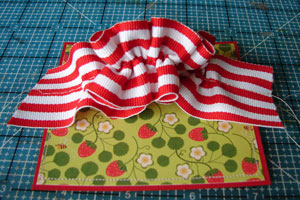
  7. Tape the ends to the back.

  8. Step 5

    Spread out the gathers in the ribbon to make for an even (and less tightly bunched) ruffle.
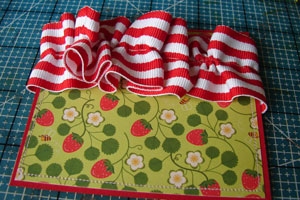
  9. Step 6 (Optional)

    For an added touch, wrap a length of button twine around the piece, and secure through a button.
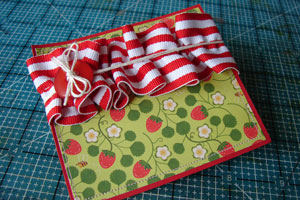
  10. Step 7

    Finish your project.

Video!

Variations

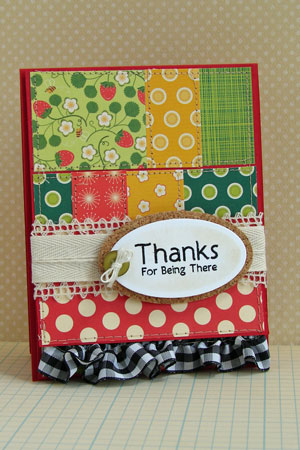
  1. One sided Ruffle
    Stitch down one side of the ribbon instead of the center. This will give a gathering all along one side leaving only one ruffly edge.
Questions and Comments

We'd love to get your feedback or questions. Leave your comment below.

Unfortunately, no sewimg machine here... and it looks quite bulky to post... Otherwise nice cards...
Nessie  |  Wed Aug 25, 2010 at 5:14 AM
Approximately what length of ribbon do you start with? It looks like maybe 2x the width of card? Beautiful! I've seen this trend but have never attempted it. TFS.
Becky B.  |  Wed Aug 25, 2010 at 5:22 AM
Gorgeous JoAnne and such a great tutorial! Thanks for sharing and NOW to get to my funky sewing machine!
Bonnie Sharp  |  Wed Aug 25, 2010 at 5:45 AM
Once again it says it's a private you tube, I'm unable to watch it unfortunately...
Could you please change the settings ?

TIA.
renate  |  Wed Aug 25, 2010 at 6:02 AM
What a neat idea I love it.
Norma  |  Wed Aug 25, 2010 at 6:14 AM
Why didn't I think of this?! I certainly will be trying it. Thanks for the great instructions. Both of your cards are so cute!
LeisaJane  |  Wed Aug 25, 2010 at 6:20 AM
Awesome, Joanne! Thanks for sharing!
Dawn Easton  |  Wed Aug 25, 2010 at 6:51 AM
I love it and can't wait to try out this great look. Thanks for doing the tutorial!
Amber Nelson  |  Wed Aug 25, 2010 at 7:43 AM
It is much easier and smoother to pull the back thread, the bobbin thread.
Ellen Crevison  |  Wed Aug 25, 2010 at 8:07 AM
thanks for changing the settings, I'm now able to watch !
renate  |  Wed Aug 25, 2010 at 8:28 AM
SUPER idea!! Thanks so much for sharing it with us.

Beverly Polen
Beverly  |  Wed Aug 25, 2010 at 8:31 AM
Totally adorable! Great tutorial! smile
Christina Fischer  |  Wed Aug 25, 2010 at 9:09 AM
I've made cards using 1" strips of fabric (gathered down the middle) that are adorable. Fabric strips are much cheaper than buying ribbon and you can get a bigger variety of color and designs with fabric. You can also use a "gather" foot on your sewing machine that will put mini tucks in the fabric - so it lays a little flatter on your card.
Sharon  |  Wed Aug 25, 2010 at 9:10 AM
Great video, Joanne. smile
Jody Morrow  |  Wed Aug 25, 2010 at 9:15 AM
Very pretty. For those who don't have a sewing machine, you can do this technique very easily by hand. Just sew a running stitch down the center of your ribbon/fabric, and pull the thread when you're finished. It only takes a few minutes. It does look bulky, but I would give these cards in person. Thanks for the video!
Scrapjanny  |  Wed Aug 25, 2010 at 9:57 AM
You don't actually need a sewing machine to do the stitching, you can hand stitch it. The sewing maching is faster and gives a more uniform stitch.
Cathy Perren  |  Wed Aug 25, 2010 at 10:01 AM
Beautiful! I always wondered how this was done! Thank you so much!!!!!
colleen schaan  |  Wed Aug 25, 2010 at 11:10 AM
Love hearing you give the tutorial. Such great information.
alma  |  Wed Aug 25, 2010 at 12:30 PM
Love the idea. Great job. I will try this. But I think if you ran two gathering stitches down the center the ribbon would gather prettier and dot be as bulky. I will try your way and mine and see which looks best.
Sandra Sellers  |  Wed Aug 25, 2010 at 1:22 PM
Joanne, thanks for a wonderful tutorial!
Hugs and smiles
beate  |  Wed Aug 25, 2010 at 1:34 PM

Page 1 of 2 pages  1 2 >

You need to be logged in to comment

GET OUR NEWSLETTER


Splitcoaststampers's privacy policy