Pencil Indenting
by Dina Kowal
Add finely detailed highlights to pencil coloring by indenting the paper with a stylus.
Supplies
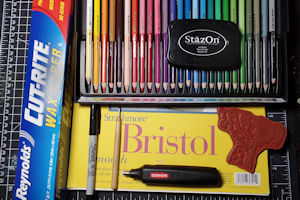
- Stamp image with fine details such as hair, fur, whiskers, fabric, wind, grass, etc. (used here: Life is Better and Every Breath sets – Unity Stamp Co.)
- Heavy pencil-friendly paper (Strathmore 100# Bristol Smooth paper used here)
- Wax paper
- Small ball stylus
- Permanent ink (Stazon Jet Black ink used here)
- Fine permanent marker (fine tip Sharpie marker used here)
- Colored pencils (Chameleon Color Tones pencils) used here)
- Pencil sharpener
- Battery eraser or small detail eraser (optional - Derwent Battery Operated Eraser used here)
- Other supplies as needed to complete the project (used here: MISTI, sentiment stamps from Inky Antics and Marcella Hawley, Sizzix tag dies)
Step-by-Step
-
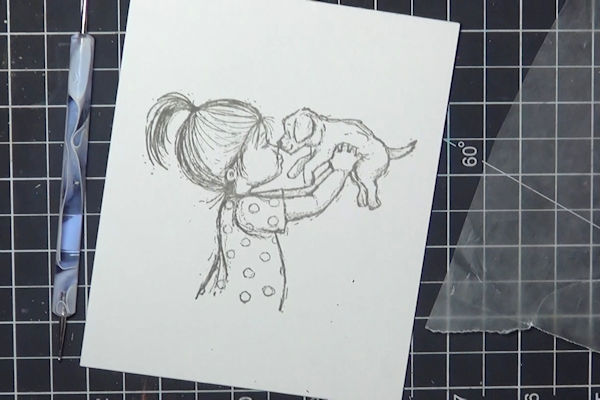
Step 1
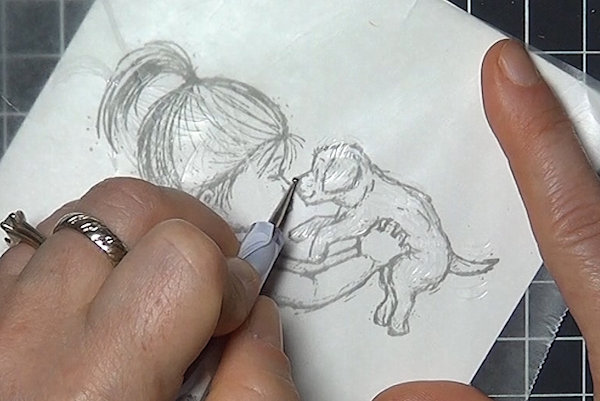
Choose a stamp image with fine details that are difficult to highlight or leave white when pencil coloring. Examples are hair, fur, whiskers, patterns, lines indicating wind or grass, etc. Stamp the image onto heavy pencil-friendly paper (Strathmore 100# Bristol Smooth paper used here).
-
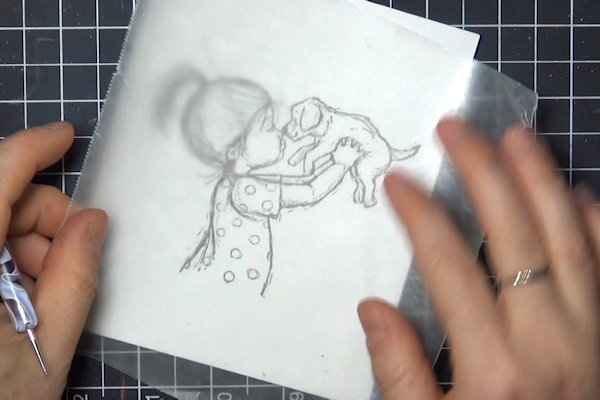
Step 2
Lay a piece of wax paper over the image. This will protect the paper and stamped image, and create a smooth surface for the stylus.
-
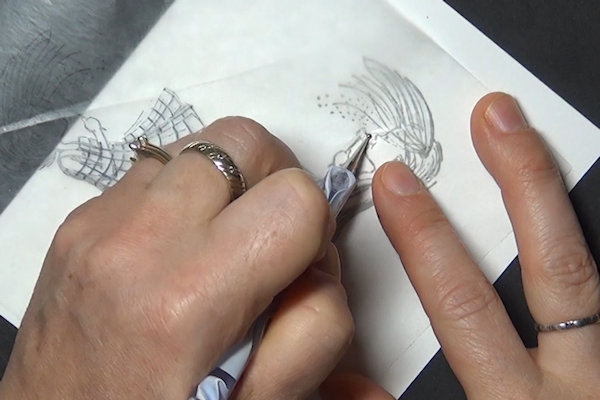
Step 3
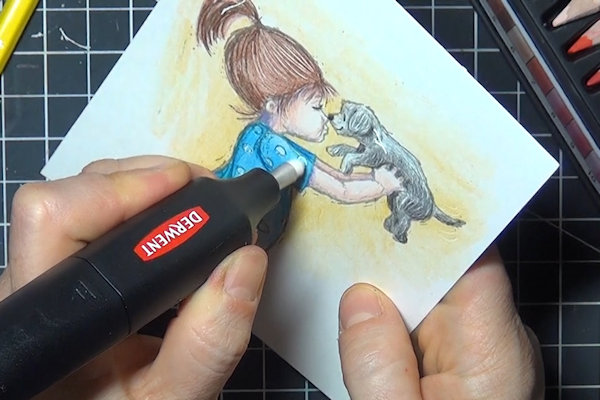
Use a small ball stylus to “draw” in lines where you want the image to remain white, creating indents in the paper. In the sample, indents were made along the upper lines of the little girl’s hair and ponytail, for the texture of the dog’s fur and the movement of his tail, and in the polka dots of the shirt.
NOTE:
It is not necessary to keep the wax paper in the same place. -
Step 4
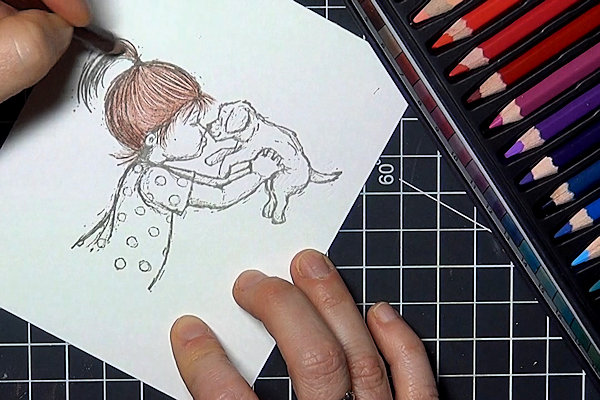
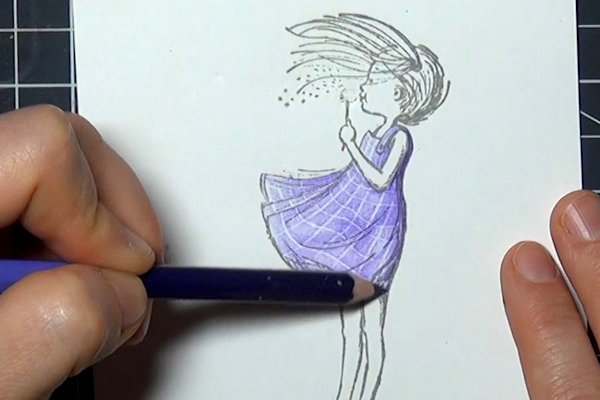
Use colored pencils to color the image. Be sure to use a light pressure to preserve the indented lines.
-
As you color, you will begin to see the indented lines.
-
Step 5
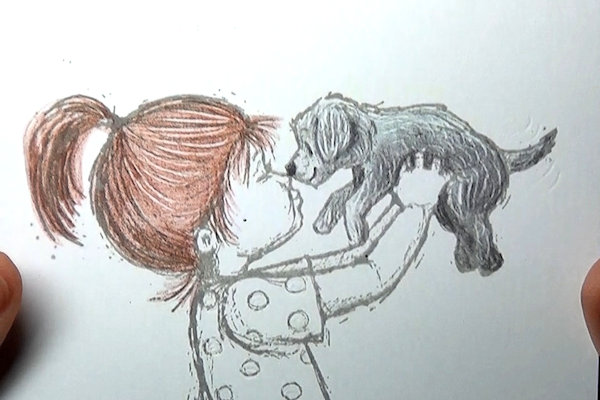
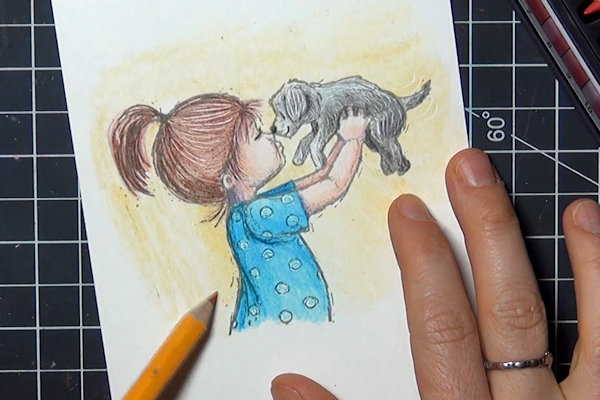
Continue adding and layering color in each area until the image is completely colored to your liking.
-
Step 6 (Optional)
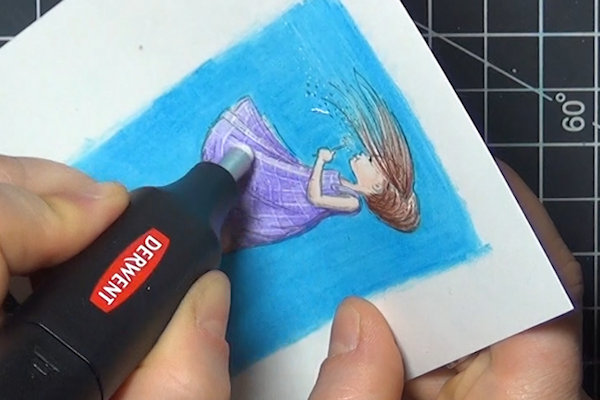
Use a battery or detail eraser to add highlights by removing color.
-
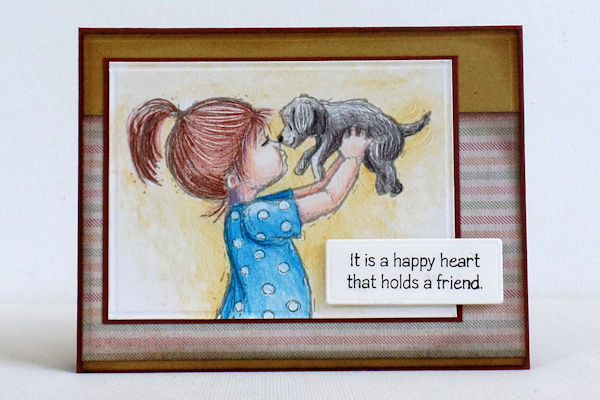
Step 7
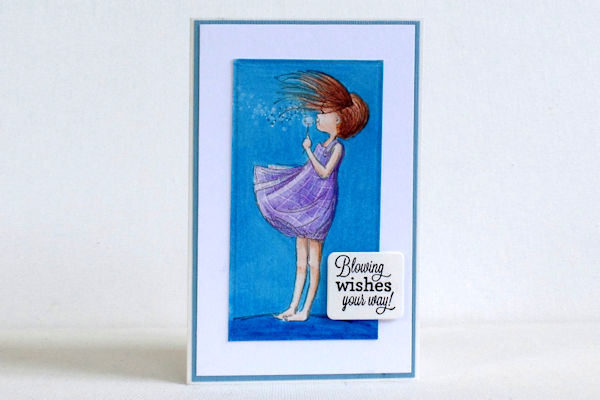
Use the panel to complete a card or other project.
-
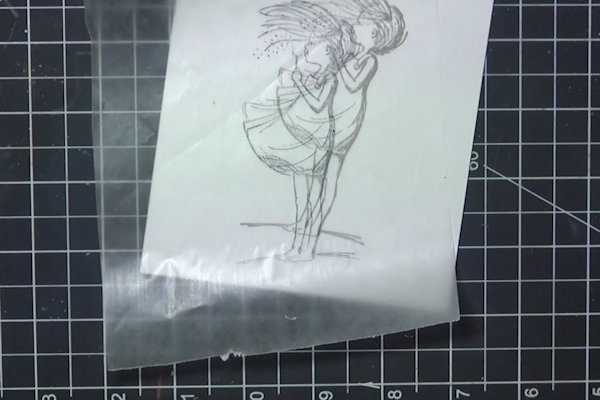
Step 8
To add a pattern to a portion of an image, stamp the image onto heavy pencil-friendly paper, and stamp a second image onto wax paper or tracing paper using a permanent ink.
-
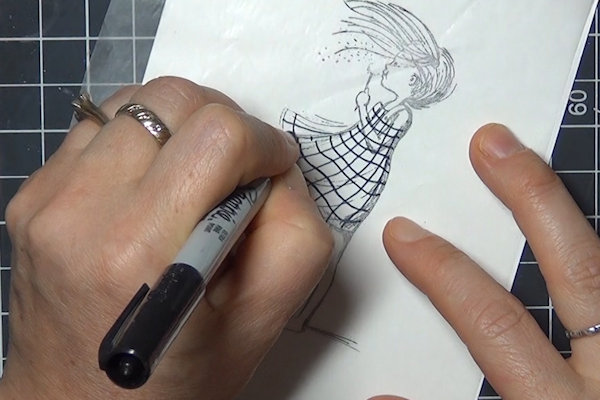
Step 9
Use a permanent marker to sketch in your pattern onto the wax paper template.
-
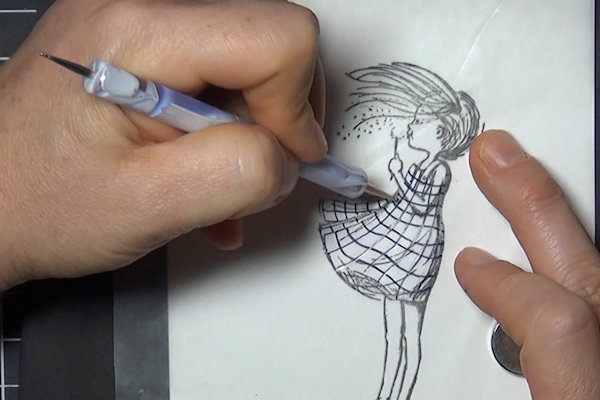
Step 10
Lay the wax paper template over the stamped image. Using the template as a guide, trace the sketched lines with a small ball stylus to indent the pattern into the paper.
TIP:
When creating the sample, I used magnets to hold the wax paper in place on the foam-padded back of my MISTI. -
Add in other indented lines as needed.
-
Step 11
Color in the image to reveal the pattern and other indented lines.
-
Use an eraser to remove areas of color and create highlights as needed.
-
Step 12
Use the panel to complete a card or other project.
Video!
Your Turn
You've seen the tutorial, now you try it! We've got a section of the gallery set aside for Pencil Indenting. Try this technique, then upload your artwork to the gallery. Show us your creations!
***Please note - Internet Explorer/Edge is not a supported browser, and will not allow you to see the videos. Please use Chrome, Firefox or Safari to view our tutorial videos.

 *
*
Questions and Comments
We'd love to get your feedback or questions. Leave your comment below.
Thanks for sharing, ~Stacy
Page 1 of 1 pages