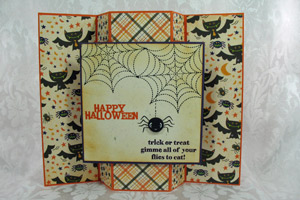
Modified Tri-Shutter Card

by Kim Score

Create a modified Tri-Shutter card with a few scores and cutting lines.

Supplies
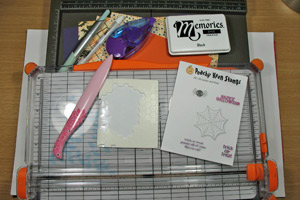
  • Card Stock
  • Patterned Papers
  • Rubber Stamps (Peachy Keen Stamps used)
  • Ink Pads
  • Embellishments of choice
  • Paper Cutter
  • Scoring Tool
  • Cutting Mat
  • Hobby Blade
  • Ruler
  • Adhesive, Dimensionals (optional)

Step-by-Step

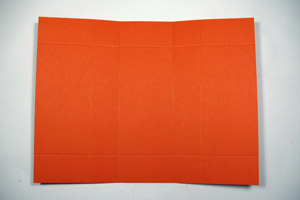
  1. Step 1

    Cut a 6" x 8" piece of cardstock for the base. On the long side, score at 2", 3", 5" and 6". On the short side, score at 1" and 5".
  2. Step 2

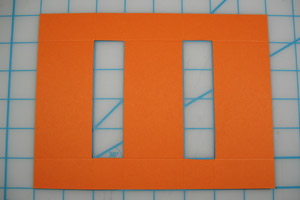
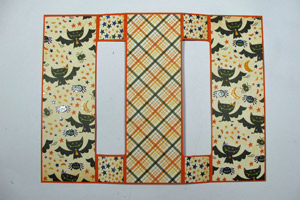
    On both sides of the center section, use a hobby blade and ruler to cut out the 1” x 4” sections.
  3. Step 3

    Decorate the panels with patterned paper. For the large side and center panels, cut 1 7/8" x 5 7/8" size pieces (this will cover those extra score lines). For the four small panel sections, cut 7/8" x 7/8" pieces.
  4. Step 4

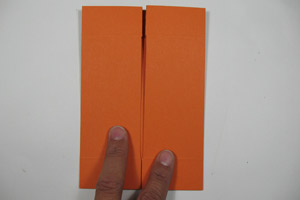
    Push the two large side panels towards the back center. Sharpen the scores in the small square panels at the top and bottom. A picture of the front
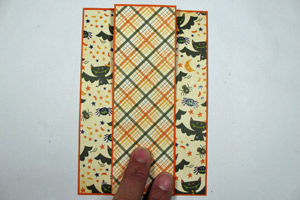
  5. and back of the folded card is included.
  6. Step 5

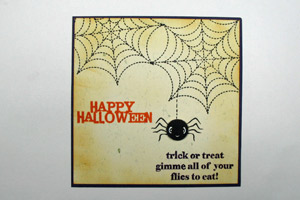
    Create a 4" x 4" decorative center for the card.
  7. Step 6

    Attach the decorative center with adhesive (or dimensionals).

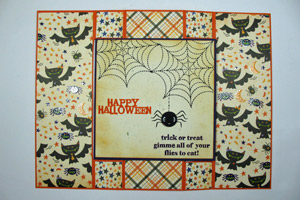
    Finished card will free stand as shown. To keep card closed, you may want to wrap ribbon around card and tie a bow.
Video!

Your Turn

You've seen the tutorial, now you try it! We've got a section of the gallery set aside for Modified Tri-Shutter Card. Try this technique, then upload your artwork to the gallery. Show us your creations!

***Please note - Internet Explorer/Edge is not a supported browser, and will not allow you to see the videos. Please use Chrome, Firefox or Safari to view our tutorial videos.

Questions and Comments

We'd love to get your feedback or questions. Leave your comment below.

Hi..this is an awesome card..Can u do it withiout cutting the 1 x 4 pieces out and just leaveing them?
Susie T  |  Wed Sep 18, 2013 at 4:06 AM
Cute card and great idea! I'm not sure why you cut out the middle panels, was it to lessen the bulk of the card?
Judi  |  Wed Sep 18, 2013 at 4:27 AM
I was reading the SCS newsletter this morning and clicked on one of the forum links and got at Google warning for malicious software. I wanted to let you know.

Thanks,
Judi
Judi  |  Wed Sep 18, 2013 at 4:35 AM
I love it, so different..Very Christmacy, thanks for a great tutorial.
Millicent Owen  |  Wed Sep 18, 2013 at 4:37 AM
I will be making this folding card but don't understand why the holes are cut out. I don't see the purpose of doing that from this tutorial. Maybe it would lesson the bulk of folding. Anyway, great idea and thanks for sharing it with us.
Dottie  |  Wed Sep 18, 2013 at 4:50 AM
As usual, a great tutorial. Thanks so much.
BeverlyBL  |  Wed Sep 18, 2013 at 6:48 AM
Super neato! Thanks for the tutorial, Kim! I know they are intense to make, so thanks for your time and skills!
Bev Rousch  |  Wed Sep 18, 2013 at 6:49 AM
I too was wondering why the holes are cut out?
Ruth
Ruth Cooling  |  Wed Sep 18, 2013 at 6:49 AM
I also want to know about the cut outs. I also received a malicious software warning when I clicked on the CAS link.
Karen  |  Wed Sep 18, 2013 at 7:38 AM
Just out of interest I have just made two 'demo' cards, one with the cut outs and one without. The one with the cut outs has a bit more interest but if you are sort of time you could omit the cut outs. Either way is more interesting than the standard one-fold card.

Thanks for the tutorial!
Ruth Cooling  |  Wed Sep 18, 2013 at 9:35 AM
I love this and it so versatile. Thanks for a great tutorial.
Gail Davenport  |  Wed Sep 18, 2013 at 9:42 AM
Love this card---love this tutorial. Thank you so much
prissequito  |  Wed Sep 18, 2013 at 9:44 AM
I will not be uploading to the gallery, because the site has some malware riding in on it right now. But you can see my card on my blog.
http://prissprojects.blogspot.com/2013/09/modified-tri-shutter-card.html
prissequito  |  Wed Sep 18, 2013 at 10:00 AM
Thanks for such an interesting card style. I'll be trying it very soon because I've needed something different and this is it!
Kathy Reindl  |  Wed Sep 18, 2013 at 10:46 AM
I've tried to notify you (in case you were not aware, but I hope you are) that when trying to get on your system, I am warned by Google Chrome (my browser) that your site is a distributor of malware. I hope you are in the process of fixing this. . .I've missed not starting my day looking at the galleries! Best, Curt
Curt  |  Wed Sep 18, 2013 at 11:55 AM
Cute card. I might like to make the front panel an actual top fold card attached to the background stand. You would have to use light enough cardstock so it would not weigh it down.
Nancy Proudfit  |  Wed Sep 18, 2013 at 12:39 PM
Kim,
I was raised in Baraboo, Wisconsin. Still lovin' the card.
Gail Davenport  |  Wed Sep 18, 2013 at 1:43 PM
What a wonderful tutorial, Kim! You sure took the complexity out of it, and I love the cut-out section to give it an openness...definitely need to try this one! Thanks!!
CherylQuilts  |  Wed Sep 18, 2013 at 1:54 PM
Love this! Thanks so much for the tutorial. I am going to try this for my Halloween cards.
momnj  |  Wed Sep 18, 2013 at 3:43 PM
I have never seen this one before. I get so excited when I come across a new idea. I just love it! Thank you so much.
Cathy DiBlasi  |  Wed Sep 18, 2013 at 6:10 PM

Page 1 of 2 pages  1 2 >

You need to be logged in to comment

GET OUR NEWSLETTER


Splitcoaststampers's privacy policy