Modified Tri-Shutter Card
by Kim Score
Create a modified Tri-Shutter card with a few scores and cutting lines.
Supplies
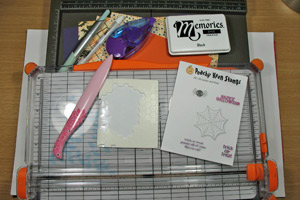
- Card Stock
- Patterned Papers
- Rubber Stamps (Peachy Keen Stamps used)
- Ink Pads
- Embellishments of choice
- Paper Cutter
- Scoring Tool
- Cutting Mat
- Hobby Blade
- Ruler
- Adhesive, Dimensionals (optional)
Step-by-Step
-
Step 1
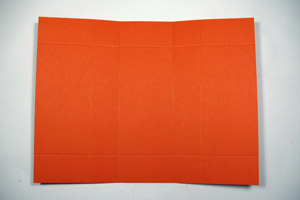
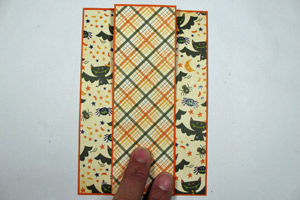
Cut a 6" x 8" piece of cardstock for the base. On the long side, score at 2", 3", 5" and 6". On the short side, score at 1" and 5".
-
Step 2
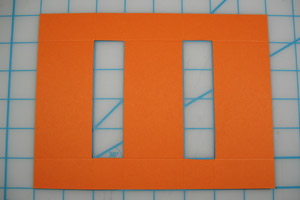
On both sides of the center section, use a hobby blade and ruler to cut out the 1” x 4” sections.
-
Step 3
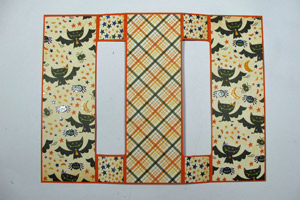
Decorate the panels with patterned paper. For the large side and center panels, cut 1 7/8" x 5 7/8" size pieces (this will cover those extra score lines). For the four small panel sections, cut 7/8" x 7/8" pieces.
-
Step 4
Push the two large side panels towards the back center. Sharpen the scores in the small square panels at the top and bottom. A picture of the front
-
and back of the folded card is included.

-
Step 5
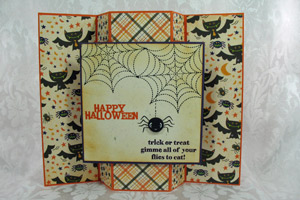
Create a 4" x 4" decorative center for the card.

-
Step 6
Attach the decorative center with adhesive (or dimensionals).
Finished card will free stand as shown. To keep card closed, you may want to wrap ribbon around card and tie a bow.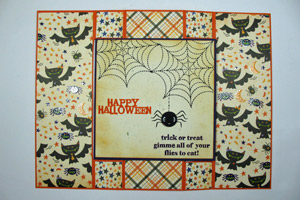
-
Video!
Your Turn
You've seen the tutorial, now you try it! We've got a section of the gallery set aside for Modified Tri-Shutter Card. Try this technique, then upload your artwork to the gallery. Show us your creations!
***Please note - Internet Explorer/Edge is not a supported browser, and will not allow you to see the videos. Please use Chrome, Firefox or Safari to view our tutorial videos.

Questions and Comments
We'd love to get your feedback or questions. Leave your comment below.
Thanks
You can always try it w/o but I think you'll prefer it with those 2 sections cut out.
Thanks Kim for a great tutorial, I'll definitely be trying this one out!
http://itsallaboutme-jocelynann.blogspot.com/2014/01/modified-tri-fold-shutter-card.html
Page 2 of 2 pages < 1 2