Ghirardelli® Box

by Beate Johns

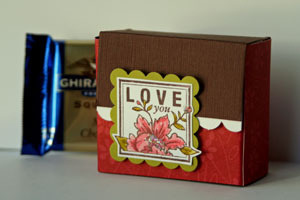
Make a box to hold four Ghirardelli® chocolates.

Supplies
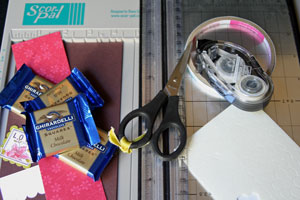
  • One 4 1/4" x 8" piece of cardstock
  • One 2" x 8 1/4" piece of patterned paper, optional
  • Paper Cutter
  • Scoring Tool, Scor-Pal™ used here
  • Scor-Tape™ or other strong adhesive
  • Scissors
  • Foam Tape or pop dots
  • Stamps
  • Ink
  • Additional Cardstock

Step-by-Step

  1. Step 1

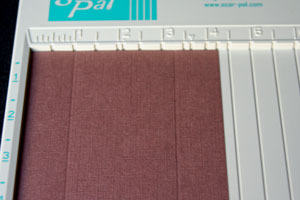
    Score the short side of your cardstock strip at 1" and 3 1/4".

    Hint:
    When using the Scor-Pal™ score at 1", then turn paper 180 degrees and score the other side at 1" again.
  2. Step 2

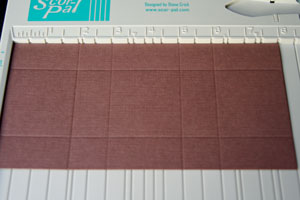
    Score your long side at 2", 3", 5" and 6".
  3. Step 3

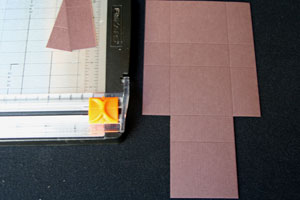
    Cut off the outer strips 3" up on one end. This will create your box flap.
  4. Step 4

    Use a bone folder to crease score lines.
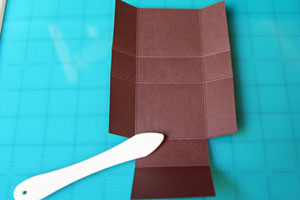
  5. Step 5

    Cut the 1" score lines on both sides.
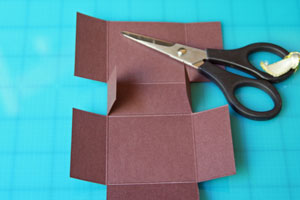
  6. Step 6

    Add Scor-Tape™ both 1" x 2" strips next to the box flap.
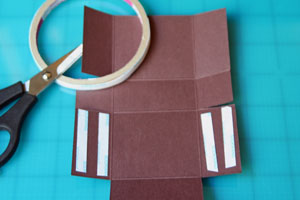
  7. Step 7

    Flip your cardstock over and add tape to the 1" tabs.
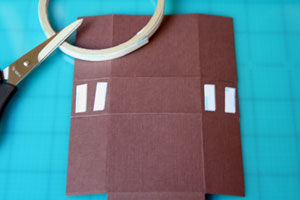
  8. Step 8

    Remove the tape liner from the 1" tabs and fold inward.
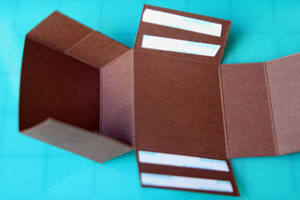
  9. Remove the liner from the 2" strips and bring sides together to form box.
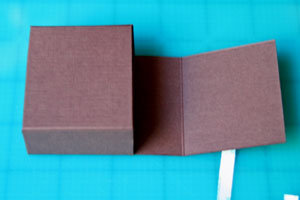
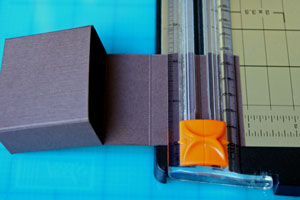
  10. Step 9

    Trim box flap. Here, it was cut down 7/8".
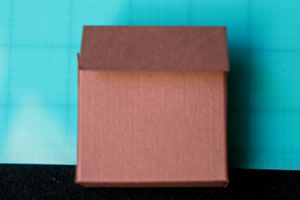
  11. Your box is done. It's time to decorate it.
  12. Step 10

    Apply adhesive to the back of the patterned paper.
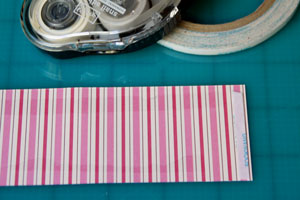
  13. Step 11

    Adhere patterned paper around your box.

    Note:
    The ends of the paper will overlap a bit.
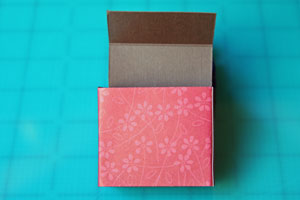
  14. Step 12

    Create a closure for the box by stamping or punching a small image.

    Add foam tape on the lower part of the back of that image.
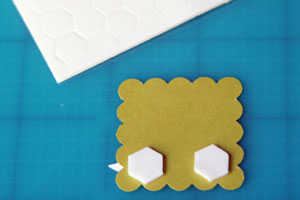
  15. Step 13

    Remove liner and adhere the punched piece to the lower part of your box so that the lid can slipped underneath.

    Fill with chocolate.
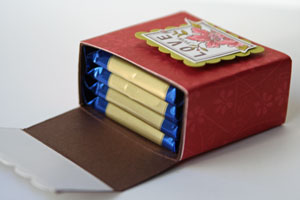
  16. Your box is finished. You can find it here in the gallery (with a listing of all supplies).
Video!

Your Turn

You've seen the tutorial, now you try it! We've got a section of the gallery set aside for Ghirardelli® Box. Try this technique, then upload your artwork to the gallery. Show us your creations!

***Please note - Internet Explorer/Edge is not a supported browser, and will not allow you to see the videos. Please use Chrome, Firefox or Safari to view our tutorial videos.

Questions and Comments

We'd love to get your feedback or questions. Leave your comment below.

Love this, Beate! Wonderful tutorial.
Susan (rainy)  |  Wed Jan 28, 2009 at 11:58 AM
Great job, Beate! (Like you could do anything but, lol!)
MSBetsyZ  |  Wed Jan 28, 2009 at 11:59 AM
I love this, Beate!! So pretty and sweet!! Thank you for another great tutorial!!
Rose Ann  |  Wed Jan 28, 2009 at 12:21 PM
Love this! Thanks for the fantastic tutorial!
Jeannette Swain  |  Wed Jan 28, 2009 at 12:34 PM
Cute, cute box!! Just wondering on the stamp you used. It's so cute. What company is it from?
Thanks much
Michelle Johnson  |  Wed Jan 28, 2009 at 12:57 PM
Thank you for giving us The Perfect Excuse to Buy Ghirardelli Chocolates. Great box and a fabulous tutorial, as always. Thanks, Beate!
mdislandgirl  |  Wed Jan 28, 2009 at 12:57 PM
What a fun little project! Could someone please tell me where to gat a Scor-Pal?? I've never seen one before. Thanks
Debbie  |  Wed Jan 28, 2009 at 12:59 PM
Debbie, I added a link to the Scor-Pal in the Supply section.
beate  |  Wed Jan 28, 2009 at 1:10 PM
I am interested in the Scor-Pal that is shown in the tutorial. What are the benefits over the standard scoring blade and is this tool still available? My mother has such difficulty scoring her CS and I am wondering if this might be the answer.

Thanks,
Susan
Susan  |  Wed Jan 28, 2009 at 1:54 PM
I made 20 of these 2 weeks ago for my daughter's Valentine's treats (I know, I was way early). We put little boxes of Nerds candies in half of them and Valentine packets of SweetTarts in the others. She's in 6th grade and just asked for 20 so she could give them out to her various friends since they don't really do the whole Valentine thing anymore. They are super cute and easy to make. I did all 20 of them, including cutting, stamping and assembly, in about an hour.
Jamie  |  Wed Jan 28, 2009 at 2:23 PM
This is too slick! I have been looking for some kind of small gift idea for a few good friends for Valentine's Day and this is it. Thanks so much!
Pamela  |  Wed Jan 28, 2009 at 2:46 PM
That is just dog-gone cute! And better still, I made one! I cannot wait to do these for Valentine's day. Thank you sooooooo much for this tutorial!
Vivian  |  Wed Jan 28, 2009 at 4:32 PM
What perfect timing!! I needed something small and cute for a coworker's b-day tomorrow and this hit the nail on the head. It was so easy to make - thanks for a great tutorial! I hope to be able to upload it to SCS later on tonight. Thanks again!
Christy  |  Wed Jan 28, 2009 at 4:52 PM
Thanks for such clear & specific instructions. I have made 3 tonight, as small B'day gifts for friends. The Ghirardelli squares fit perfectly!
DianeQ  |  Wed Jan 28, 2009 at 5:33 PM
Thanks Beate for another awesome tutorial. I'll make it for Valentine's Day.
Liliana  |  Wed Jan 28, 2009 at 5:34 PM
This is just great! I just finished making my gifts for my grandchildren but I will remake them using this gift box. Thanks! Very creative.
PT  |  Wed Jan 28, 2009 at 6:00 PM
LOVE this little box. Will make great gifts for teachers, friends, etc. Can't wait to try it.
Lynn  |  Wed Jan 28, 2009 at 6:17 PM
Thank you so much! This is totally adorable smile
Drucila  |  Wed Jan 28, 2009 at 7:42 PM
You left out the tricky part - how to keep your chocolate smeared fingers from smudging the box, coz you KNOW you are going to be EATING a few of those chocolates while you are working on the box!! LOL!
Lynne Phelps  |  Wed Jan 28, 2009 at 7:43 PM
this is adorable! I will have to try it but the dangerous part is bringing that chocolate into my house! Jan
Jan (inkerzaway)  |  Wed Jan 28, 2009 at 9:09 PM

Page 2 of 5 pages  <  1 2 3 4 >  Last »

You need to be logged in to comment

GET OUR NEWSLETTER


Splitcoaststampers's privacy policy