File Folder Notebook

by Jenn Diercks

Create a beautiful notebook holder out of a file folder.

Supplies
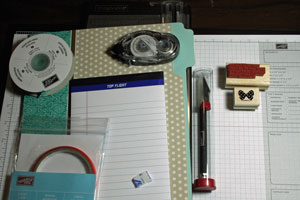
  • Scoring Tool

  • File Folder, preferably a decorated one

  • 5" x 8" Notepad

  • Velcro dot or magnet

  • Sticky Strip™, or other strong adhesive

  • Hobby Blade

  • Ribbon

  • Stamps and Card stock for decorations

Step-by-Step

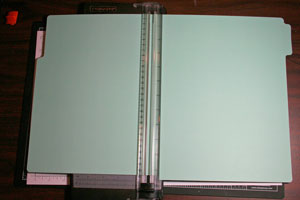
  1. Step 1

    Open file folder with tab at right side.

    Score 1/2" to the left of the center fold.
  2. Step 2

    Cut off 2 1/4" from the left hand side. This measurement includes any tabs.
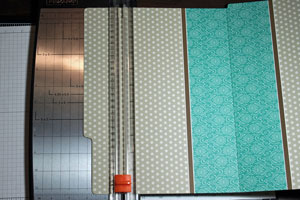
  3. Step 3

    Cut off the excess 1/4" on the bottom edge of the right hand side.

    Note: Depending on file folder being used, this may be optional. For Stampin’ Up!’s Thoroughly Modern file folders, you will need to cut off the excess.
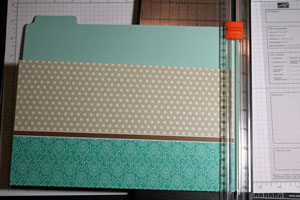
  4. Step 4

    Open the file folder and score at 12 1/2" and 13".

    The side without the tab will be at the left.
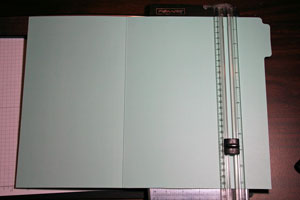
  5. Step 5

    Cut off the tab on the right hand side of the folder.
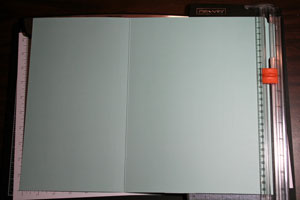
  6. Step 6

    Score at 3 1/8" along the entire bottom edge of the file folder.

    Hint:
    You may have to fold it in half, score one side and then flip it to score the other side. It will not fit horizontally in the Fiskars cutter.
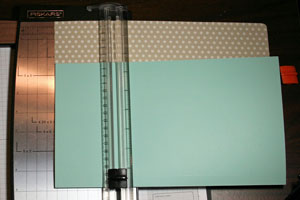
  7. Step 7

    Score on all score lines.

    Cut out bottom right hand square to the 2nd score line. It is marked with an “x” in the photo.
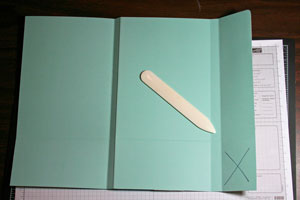
  8. Step 8

    Add Sticky Strip along right and left hand bottom edge.
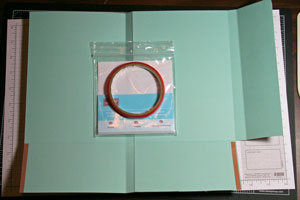
  9. Step 9

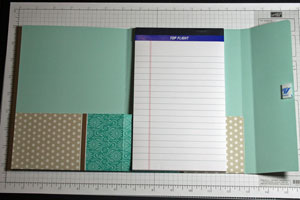
    Fold up edge to form pockets and burnish down sticky strip.

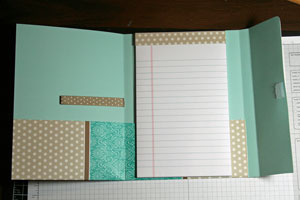
    Add the 5" x 8" notebook in the right hand pocket and add Velcro to right hand side for closure.
  10. Step 10

    Close up flap on the file folder and burnish down Velcro closure.
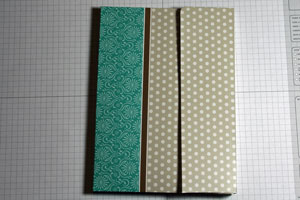
  11. Step 11

    If you wish to add your ribbon horizontally, use a hobby knife to cut slits for ribbon to slide through
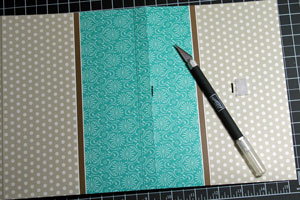
  12. Step 12

    Use a 3/4" x 5" strip of the file folder that you cut off in Step 2 to decorate the top of the notepad.

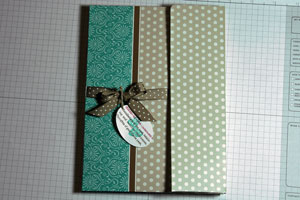
    Each notepad is slightly different so your measurement may vary. Slide ribbon through slits and tie in a bow on the front.
  13. Step 13

    Decorate the front of your file folder as desired.
Video!

Your Turn

You've seen the tutorial, now you try it! We've got a section of the gallery set aside for File Folder Notebook. Try this technique, then upload your artwork to the gallery. Show us your creations!

***Please note - Internet Explorer/Edge is not a supported browser, and will not allow you to see the videos. Please use Chrome, Firefox or Safari to view our tutorial videos.

Questions and Comments

We'd love to get your feedback or questions. Leave your comment below.

What a neat idea. Great tutorial!
Thank you.
Margaret  |  Wed Feb 3, 2010 at 2:31 PM
Great Tutorial, Jenn!! you rock !!!
corinne (aka Roxy)  |  Wed Feb 3, 2010 at 3:08 PM
What a great simple craft with lots of wow power. Thanks so much for the tutorial.
Dawn  |  Wed Feb 3, 2010 at 3:12 PM
Thank you very much for sharing this idea. I'll sure be making many of these! @}---
Stephanie  |  Wed Feb 3, 2010 at 3:12 PM
I love it, I have been looking at different tuts on this and found some cute ones from Michaels so now I have no excuse...
LISA  |  Wed Feb 3, 2010 at 3:17 PM
That was a really GREAT tutorial. I may just have to go home and make one tonight!!!
kelli  |  Wed Feb 3, 2010 at 3:31 PM
WOW! Lovely project and such easy to follow directions. Appreciate the wonderful and awesome work you do for us. Thank you so mucj.
Sonya Sheaffer  |  Wed Feb 3, 2010 at 4:55 PM
I LOVE this! Making them for my teenage girls for Valentine's Day! Thanks for the great idea!
Kendra  |  Wed Feb 3, 2010 at 5:07 PM
YEAH!! I noticed the YOUTUBE video last week and I was actually able to open it. I thought it had to be a mistake so I was waiting for this week's video. And there it is. For the longest time I haven't been able to get my video to open, just a red x. I wrote to you a couple of times and you suggested I go to YOUTUBE, which I did, but it just was a pain. Now I don't have to. I'm so happy you have done this now. Thank YOU!!!!
Linda  |  Wed Feb 3, 2010 at 5:34 PM
Super tutorial; easy to follow steps. Thanks so much for a great idea.
cdnoption  |  Wed Feb 3, 2010 at 5:43 PM
Great idea. Now where does a person find a decorative file folder?
Barbara  |  Wed Feb 3, 2010 at 5:57 PM
Great tut thank you!!

Barb- you can get super cute file folders at office supply stores, or even Target or Walmart in the office supply isles!
Wendy  |  Wed Feb 3, 2010 at 6:42 PM
love it,very pretty.makes a great gift.
teresa prate  |  Wed Feb 3, 2010 at 6:46 PM
If you have a Michaels store in your area they now have real pretty file folders in their dollar bins!
ElleK  |  Wed Feb 3, 2010 at 6:58 PM
Hi there wow yur journal is really nice ,I will try and make it in a few weeks i need to chaught up thank you for the I-TV....MaryRedford
Mary REdford  |  Wed Feb 3, 2010 at 10:13 PM
where did you get the decorated file folder? It's a great idea but I have only seen manila folders.
Cheryl Fisher  |  Thu Feb 4, 2010 at 10:22 AM
Lovely idea and ideal as a quickie present as you can personalize it.
Christine  |  Thu Feb 4, 2010 at 10:49 AM
Very nice tutorial, love it! I'm going to try it, I hope that I can do it!!!! so i can give as a Valentine gift. Thankyou.
Rosa C.  |  Thu Feb 4, 2010 at 11:12 AM
Great idea- I noticed the the white piece of paper with a grid on it that you used , where did you find it
can you share it with me? I found the decorated file folders at the Dollar Tree by my house.

Thx
corina  |  Thu Feb 4, 2010 at 1:04 PM
Excellent! Very clear instructions and a nice gift idea.
Alison  |  Thu Feb 4, 2010 at 1:32 PM

Page 1 of 2 pages  1 2 >

You need to be logged in to comment

GET OUR NEWSLETTER


Splitcoaststampers's privacy policy