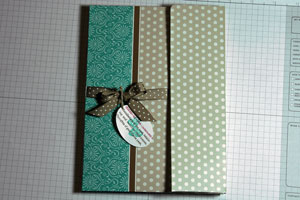
File Folder Notebook
by Jenn Diercks
Create a beautiful notebook holder out of a file folder.
Supplies
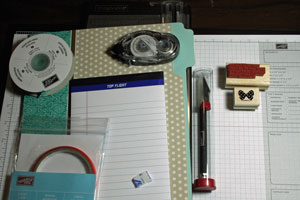
- Scoring Tool
- File Folder, preferably a decorated one
- 5" x 8" Notepad
- Velcro dot or magnet
- Sticky Strip™, or other strong adhesive
- Hobby Blade
- Ribbon
- Stamps and Card stock for decorations
Step-by-Step
-
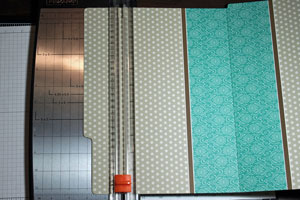
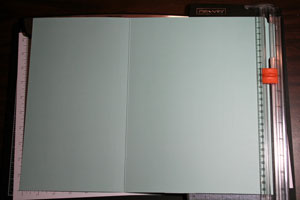
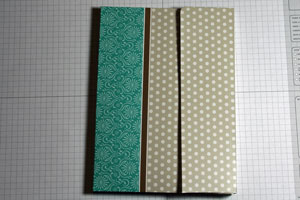
Step 1
Open file folder with tab at right side.
Score 1/2" to the left of the center fold.
-
Step 2
Cut off 2 1/4" from the left hand side. This measurement includes any tabs.
-
Step 3
Cut off the excess 1/4" on the bottom edge of the right hand side.
Note: Depending on file folder being used, this may be optional. For Stampin’ Up!’s Thoroughly Modern file folders, you will need to cut off the excess.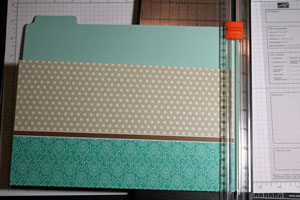
-
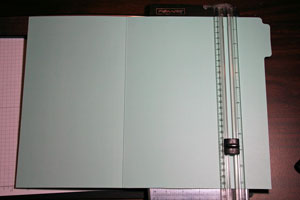
Step 4
Open the file folder and score at 12 1/2" and 13".
The side without the tab will be at the left.
-
Step 5
Cut off the tab on the right hand side of the folder.
-
Step 6
Score at 3 1/8" along the entire bottom edge of the file folder.
Hint:
You may have to fold it in half, score one side and then flip it to score the other side. It will not fit horizontally in the Fiskars cutter.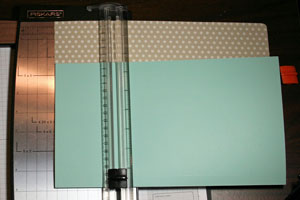
-
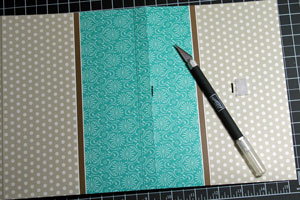
Step 7
Score on all score lines.
Cut out bottom right hand square to the 2nd score line. It is marked with an “x” in the photo.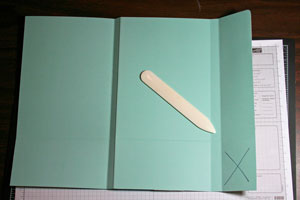
-
Step 8
Add Sticky Strip along right and left hand bottom edge.
-
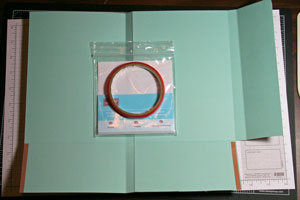
Step 9
Fold up edge to form pockets and burnish down sticky strip.
Add the 5" x 8" notebook in the right hand pocket and add Velcro to right hand side for closure.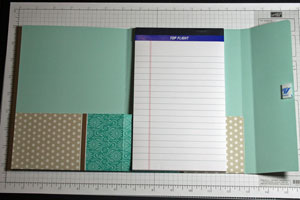
-
Step 10
Close up flap on the file folder and burnish down Velcro closure.
-
Step 11
If you wish to add your ribbon horizontally, use a hobby knife to cut slits for ribbon to slide through
-
Step 12
Use a 3/4" x 5" strip of the file folder that you cut off in Step 2 to decorate the top of the notepad.
Each notepad is slightly different so your measurement may vary. Slide ribbon through slits and tie in a bow on the front.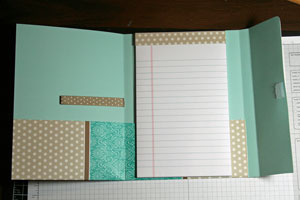
-
Step 13
Decorate the front of your file folder as desired.
Video!
Your Turn
You've seen the tutorial, now you try it! We've got a section of the gallery set aside for File Folder Notebook. Try this technique, then upload your artwork to the gallery. Show us your creations!
***Please note - Internet Explorer/Edge is not a supported browser, and will not allow you to see the videos. Please use Chrome, Firefox or Safari to view our tutorial videos.

Questions and Comments
We'd love to get your feedback or questions. Leave your comment below.
Thanks
Ramona
The paper is called Grid Paper. You can purchase it from any Stampin' Up! demonstrator.
JoAnn,
Jenn used a file folder sold by Stampin' Up! Check the earlier comments on this tutorial to find other places that sell decorated file folders.
Ramona,
Jenn used a Fiskars Paper cutter. The orange blade is to cut, the black blade to score paper.
Thanks and please email me DIRECTLY at [email protected] to give me an idea how I can see the video.
thanks much,
sherry m
Take an 12" and an 8.5" square card stock. Score both at 5.75" and 6.25".
Overlap to the folds (so the center back is a double thickness) Turn the 12" card 90� and score at 8.5" - even with the smaller square.
Continue as above.
(I used an office manilla folder).
I'm doing my first craft show next month
Thanks for posting this great tutorial!
Page 2 of 2 pages < 1 2