Envelope Gift Box
by Valita Reynolds
Create a box to give away bulky cards.
Supplies
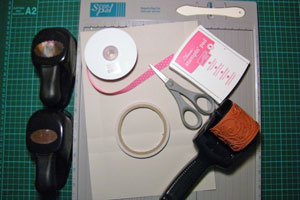
- Scor-Pal™, or other scoring tool
- One A4 Sheet of cardstock (8 1/2" x 11 5/8")
- Scor-Tape™, or other strong adhesive Scissors
- Ribbon
- Stamps
Step-by-Step
-
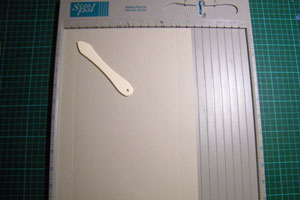
Step 1
Score the 8 1/2" side of the cardstock at 1" and 7 1/2".
-
Step 2
Turn the card on the horizontal and score at 2", 3", 7 1/2" and 8 1/2".
-
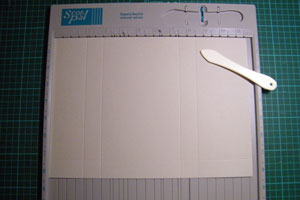
Step 3
Fold all score lines.

-
Step 4
Cut in at the 1" line on all four scores added in step 2.
-
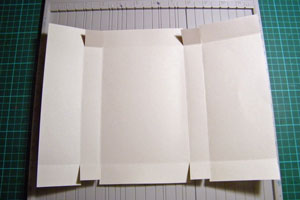
Step 5
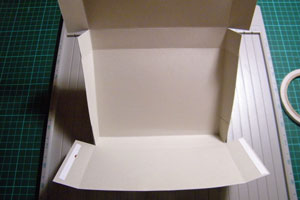
Have the wider end facing down. This will be the pocket.
Fold in the 2 small flaps and place Scor-Tape&trade on them. Place adhesive on the two larger flaps below these also.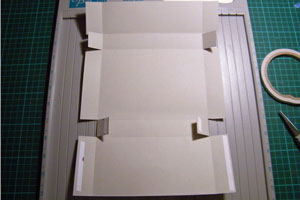
-
Step 6
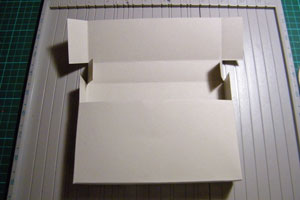
Remove tape liner and stick the smaller flaps up and attach to the inside edges of the box.
-
Step 7
Bring up the bottom and wrap around the edges of the box.
-
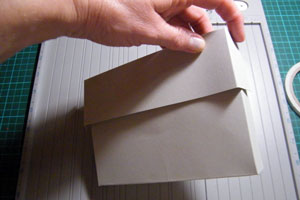
Step 8
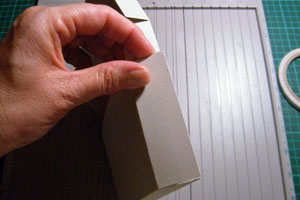
Make sure this lines up with the edge of the box.
-
Step 9
Fold in the small flaps and wrap down around the box to close it.
-
Step 10
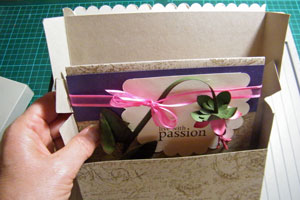
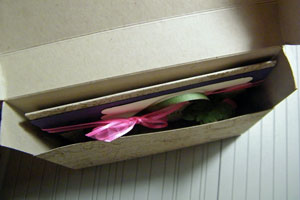
The box will hold a bulky card easily.
-
-
Step 11
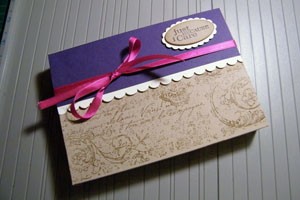
Hold closed with a ribbon and decorate to match your card.
Video!
Your Turn
You've seen the tutorial, now you try it! We've got a section of the gallery set aside for Envelope Gift Box. Try this technique, then upload your artwork to the gallery. Show us your creations!
***Please note - Internet Explorer/Edge is not a supported browser, and will not allow you to see the videos. Please use Chrome, Firefox or Safari to view our tutorial videos.

 *
*
Questions and Comments
We'd love to get your feedback or questions. Leave your comment below.
I am also interested in how to make that beautiful flower. I really like this kind of flowers, but i am allergic for them. So this is great to make them from paper. Please can you make a tutorial of these flowers?
Well done video! Thanks for sharing!
Really pretty!
Thank you.
Tina
Joni
Page 1 of 3 pages 1 2 3 >