Envelope Gift Box

by Valita Reynolds

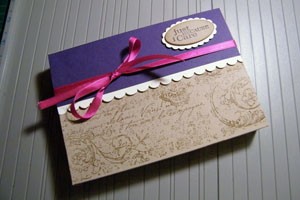
Create a box to give away bulky cards.

Supplies
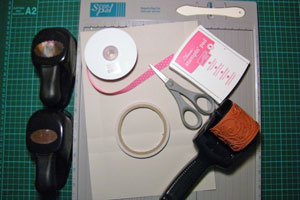
  • Scor-Pal™, or other scoring tool
  • One A4 Sheet of cardstock (8 1/2" x 11 5/8")
  • Scor-Tape™, or other strong adhesive
  • Scissors
  • Ribbon
  • Stamps

Step-by-Step

  1. Step 1

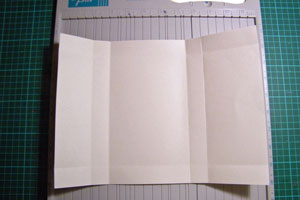
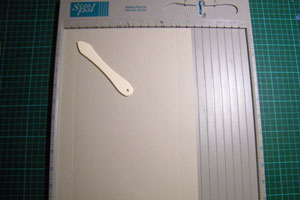
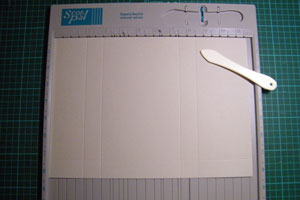
    Score the 8 1/2" side of the cardstock at 1" and 7 1/2".
  2. Step 2

    Turn the card on the horizontal and score at 2", 3", 7 1/2" and 8 1/2".
  3. Step 3

    Fold all score lines.

  4. Step 4

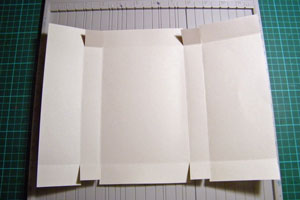
    Cut in at the 1" line on all four scores added in step 2.
  5. Step 5

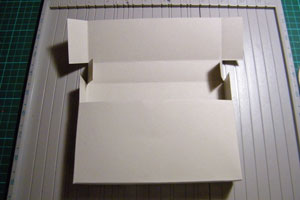
    Have the wider end facing down. This will be the pocket.

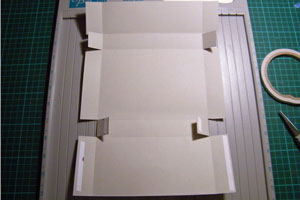
    Fold in the 2 small flaps and place Scor-Tape&trade on them. Place adhesive on the two larger flaps below these also.
  6. Step 6

    Remove tape liner and stick the smaller flaps up and attach to the inside edges of the box.
  7. Step 7

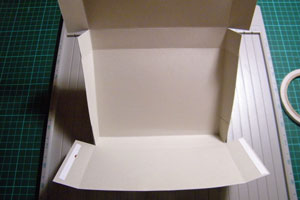
    Bring up the bottom and wrap around the edges of the box.
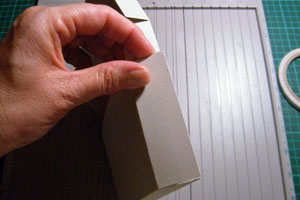
  8. Step 8

    Make sure this lines up with the edge of the box.
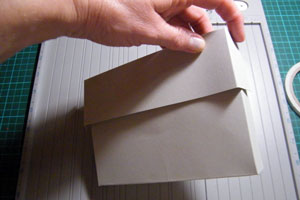
  9. Step 9

    Fold in the small flaps and wrap down around the box to close it.
  10. Step 10

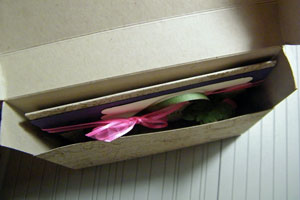
    The box will hold a bulky card easily.
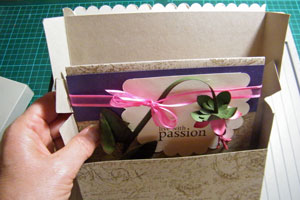
  11. Step 11

    Hold closed with a ribbon and decorate to match your card.
Video!

Your Turn

You've seen the tutorial, now you try it! We've got a section of the gallery set aside for Envelope Gift Box. Try this technique, then upload your artwork to the gallery. Show us your creations!

***Please note - Internet Explorer/Edge is not a supported browser, and will not allow you to see the videos. Please use Chrome, Firefox or Safari to view our tutorial videos.

Questions and Comments

We'd love to get your feedback or questions. Leave your comment below.

Valita, thanks for the tutorial. I checked out some of your other videos on youtube and I am hooked on them. You are so very talented.
grammatroll  |  Wed Jan 26, 2011 at 11:27 AM
I think this is a really GREAT idea. Thank you Valita.
Bobbie  |  Wed Jan 26, 2011 at 11:37 AM
I am so glad to see this technique on Split Coast - Valita is so cool and creative!!!! I love her blog and all that she does....thank you for featuring her and now she is part of the library!!! She has so many wonderful ideas!!!
Patti  |  Wed Jan 26, 2011 at 12:27 PM
Great idea Valita! I've been following her site for quite a while and she has many wonderful ideas! The fuchsia can be found here:

http://valitasfreshfolds.blogspot.com/2010/07/fuchsia-punch-art-card.html
Kim Score  |  Wed Jan 26, 2011 at 12:39 PM
Beautiful card box! A gift in itself! Thanks so much for sharing your tutorial..I can't wait to try it! Hugs!
P.S. I've admired your work for a long time..you are one talented lady!!
Vina  |  Wed Jan 26, 2011 at 1:00 PM
That is really clever! I can't wait to give it a try!
Toni Storie  |  Wed Jan 26, 2011 at 1:22 PM
Valita - thank you so much! Fantastic tutorial and your video is great - so easy to follow and well explained.

I could listen to you talk all day smile
lydia  |  Wed Jan 26, 2011 at 1:28 PM
I too would love the flower technique. So gorgeous!
Lyn  |  Wed Jan 26, 2011 at 1:41 PM
Love this idea, I am making my own boxes for gifts from now on. All my friends will be so happy and surpised to get a box home made smile

Thank you so much RMT
Rose Marie Torres  |  Wed Jan 26, 2011 at 1:41 PM
ditto on how the flower was made- is there a tutorial to share on that one??
thanx- trish K.
trish kindberg  |  Wed Jan 26, 2011 at 2:36 PM
Very nice, and the card is beautiful! Thank you for providing the website for the flower tute!
Clare Curcio  |  Wed Jan 26, 2011 at 3:29 PM
Wow this is Beautiful..Thank You soooo much for sharing..l will enjoy making this for a dear friend who is sick...
ktcraftz  |  Wed Jan 26, 2011 at 4:26 PM
Fabulous tutorial, but I must be doing something very wrong. When the top flap is folded down, it just meets the lower flap without overlapping. I have checked my measurements again and again, and watched the tutorial repeatedly. Is this the way it's supposed to be?
LadyStampaway  |  Wed Jan 26, 2011 at 5:38 PM
I am soooo glad someone else mentioned the same problem I am having- My top flap does not overlap either, and I have checked and re-checked my measurements. In the video, the top definately comes down past the bottom.(and it's not just the scalloped edge- it looks like a good one-inch overlap. Anybody have the answer? Valita- I know it's early morning in Austalia- can you help please?
LouAnne Wronski  |  Wed Jan 26, 2011 at 7:08 PM
What a great tutorial for a fun, easy, and very practical project! I was just thinking yesterday that I'd have to come up with a better idea than crunching my embellished cards into a regular envelope or giving them without any envelope at all. This tutorial came just at the right time!
Ann  |  Wed Jan 26, 2011 at 7:13 PM
you can find the flower tutorial I made for this card here
http://valitasfreshfolds.blogspot.com/2010/07/fuchsia-punch-art-card.html
Valita  |  Wed Jan 26, 2011 at 10:43 PM
I love the box.. thank you for the tutorial. I also went to see how the flower was made and that is just as awesome. The box will come in so handy for delivering cards so nicely.. Thank you for your kindness in sharing the directions...
Elizabeth  |  Thu Jan 27, 2011 at 12:07 AM
Valita - you rock. I love your work and uploads on stampinconnection and now I can love your work on SCS as well. You're amazing.
Marion Benfield  |  Thu Jan 27, 2011 at 2:45 PM
Wonderful, creative and very attractive 'envelope'. Will also use as a gift box. How is the flower made? Thanks!
lynne  |  Sat Jan 29, 2011 at 2:37 PM
PLEASE NOTE!!!! These directions are for the A4 size of paper, not the 8.5x11 as noted in the list of materials!!!!!
Lady Stampaway  |  Sun Jan 30, 2011 at 10:35 AM

Page 2 of 3 pages  <  1 2 3 >

You need to be logged in to comment

GET OUR NEWSLETTER


Splitcoaststampers's privacy policy