Embossing Folder Stamping
by Audrie Magno-Gordon
Use ink or paint on an embossing folder for a unique monoprinted background.
Supplies
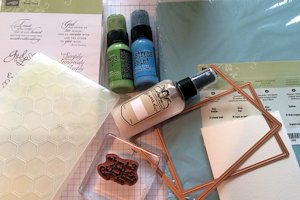
- Watercolor paper
- Water-based paints or inks (Salty Ocean & Mowed Lawn Distress Paints used here)
- Embossing folder (Stampin' Up! Honeycomb used here)
- Mister bottle, filled with water or pearlescent spray (Tattered Angels Pearl Glimmer Mist used here)
- Archival or permanent ink (Jet Black Stazon used here)
- Stamps (Stampin' Up! Trust God Stamp Set used here)
- Cardstock and other supplies to finish the card (Baja Breeze cardstock and Spellbinders Rectangle Dies used here)
Step-by-Step
-
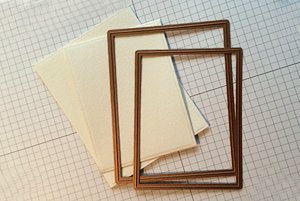
Step 1
Cut watercolor paper to fit your card front.
-
Alternative:
Instead of precutting the panel, cut after making a print.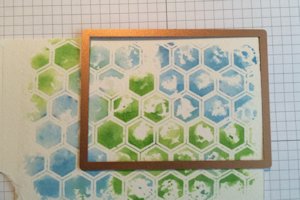
-
Step 2
Open the embossing folder. On the side with the logo, use ink or paint daubers to daub color in different areas.
Use glimmer mist or water to wet the embossing folder (plenty of water will help the pigment lift and soak into the paper).
Note:
A print can be taken from either side of the folder. The design on the logo side is the 'negative', which covers more area. The other side will print a finer outline.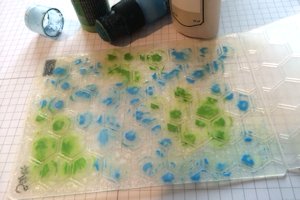
-
Step 3
Lay the watercolor paper into the wet paint. Don’t close the folder; just press with your fingers here and there (try not to press evenly).
Allow a few seconds for the paint to soak into the watercolor paper.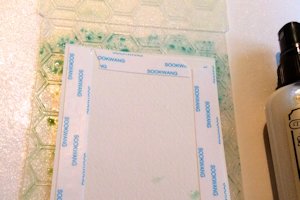
-
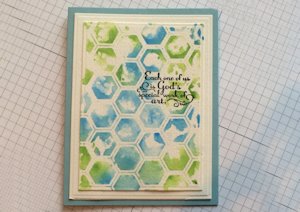
Step 4
Pick the watercolor paper straight up off of the folder (try not to drag it on the surface). Allow the panel to dry completely.

-
Step 5
Use a stamp positioner to determine good placement, then stamp a sentiment in the selected location on the printed panel.
Hint:
Use Stazon to stamp the image on the clear Stamp-a-ma-jig sheet to avoid smearing while you are working.
-
Step 6
Assemble and complete the card.
Video!
Your Turn
You've seen the tutorial, now you try it! We've got a section of the gallery set aside for Embossing Folder Stamping. Try this technique, then upload your artwork to the gallery. Show us your creations!
***Please note - Internet Explorer/Edge is not a supported browser, and will not allow you to see the videos. Please use Chrome, Firefox or Safari to view our tutorial videos.

Questions and Comments
We'd love to get your feedback or questions. Leave your comment below.
Thanks
I'm sure I'll be giving it a try. Thanks.
@Gabby I think that is a wonderful idea, please be sure to post one of your cards with such a creative border!
The second image shown could be used for a chickenwire fence and you could put a die cut or stamped & cut hen in front of it.
Page 1 of 4 pages 1 2 3 > Last »